

Rigged Objects and Rig Behaviours
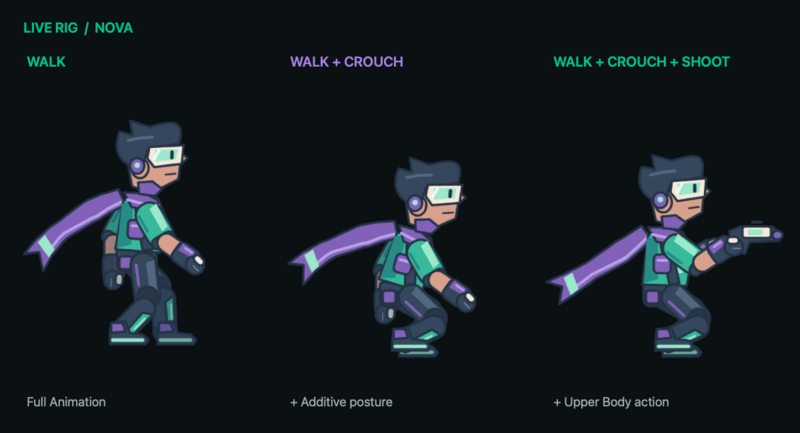
A live Rigged Object draws its bones, attached artwork, and meshes during gameplay. It remains one scene object: movement behaviours move the character, and its configured collision shape handles physics. Rig behaviours let you control the skeleton and artwork inside it.
These controls belong to the live-rig update. Use a build that includes Rigged Objects. A release date has not been assigned.
Start with an exported Rigged Object
In Art Studio, save the source project and choose File → Export Game Asset → Rigged Object…. Include the clips you need. Place the exported asset from the Asset Library, then choose its starting Animation and Skin. Enable Start on Play if the starting clip should run when the scene begins.
Use Fit Artwork in export to derive logical bounds from the artwork. Logical size defines the object's anchor/default collider; animated poses can extend beyond it without resizing the physics body on every frame. Check the collider in a scene. A rig's thumbnail is a preview, not its collision boundary.
Play existing clips
Play Animation, Joystick Controlled, Jump, Jump with Button, Shoot, Shoot with Button, Patrol, Hit by Bullet, and Tilt Controlled can select rig clips for compatible targets.
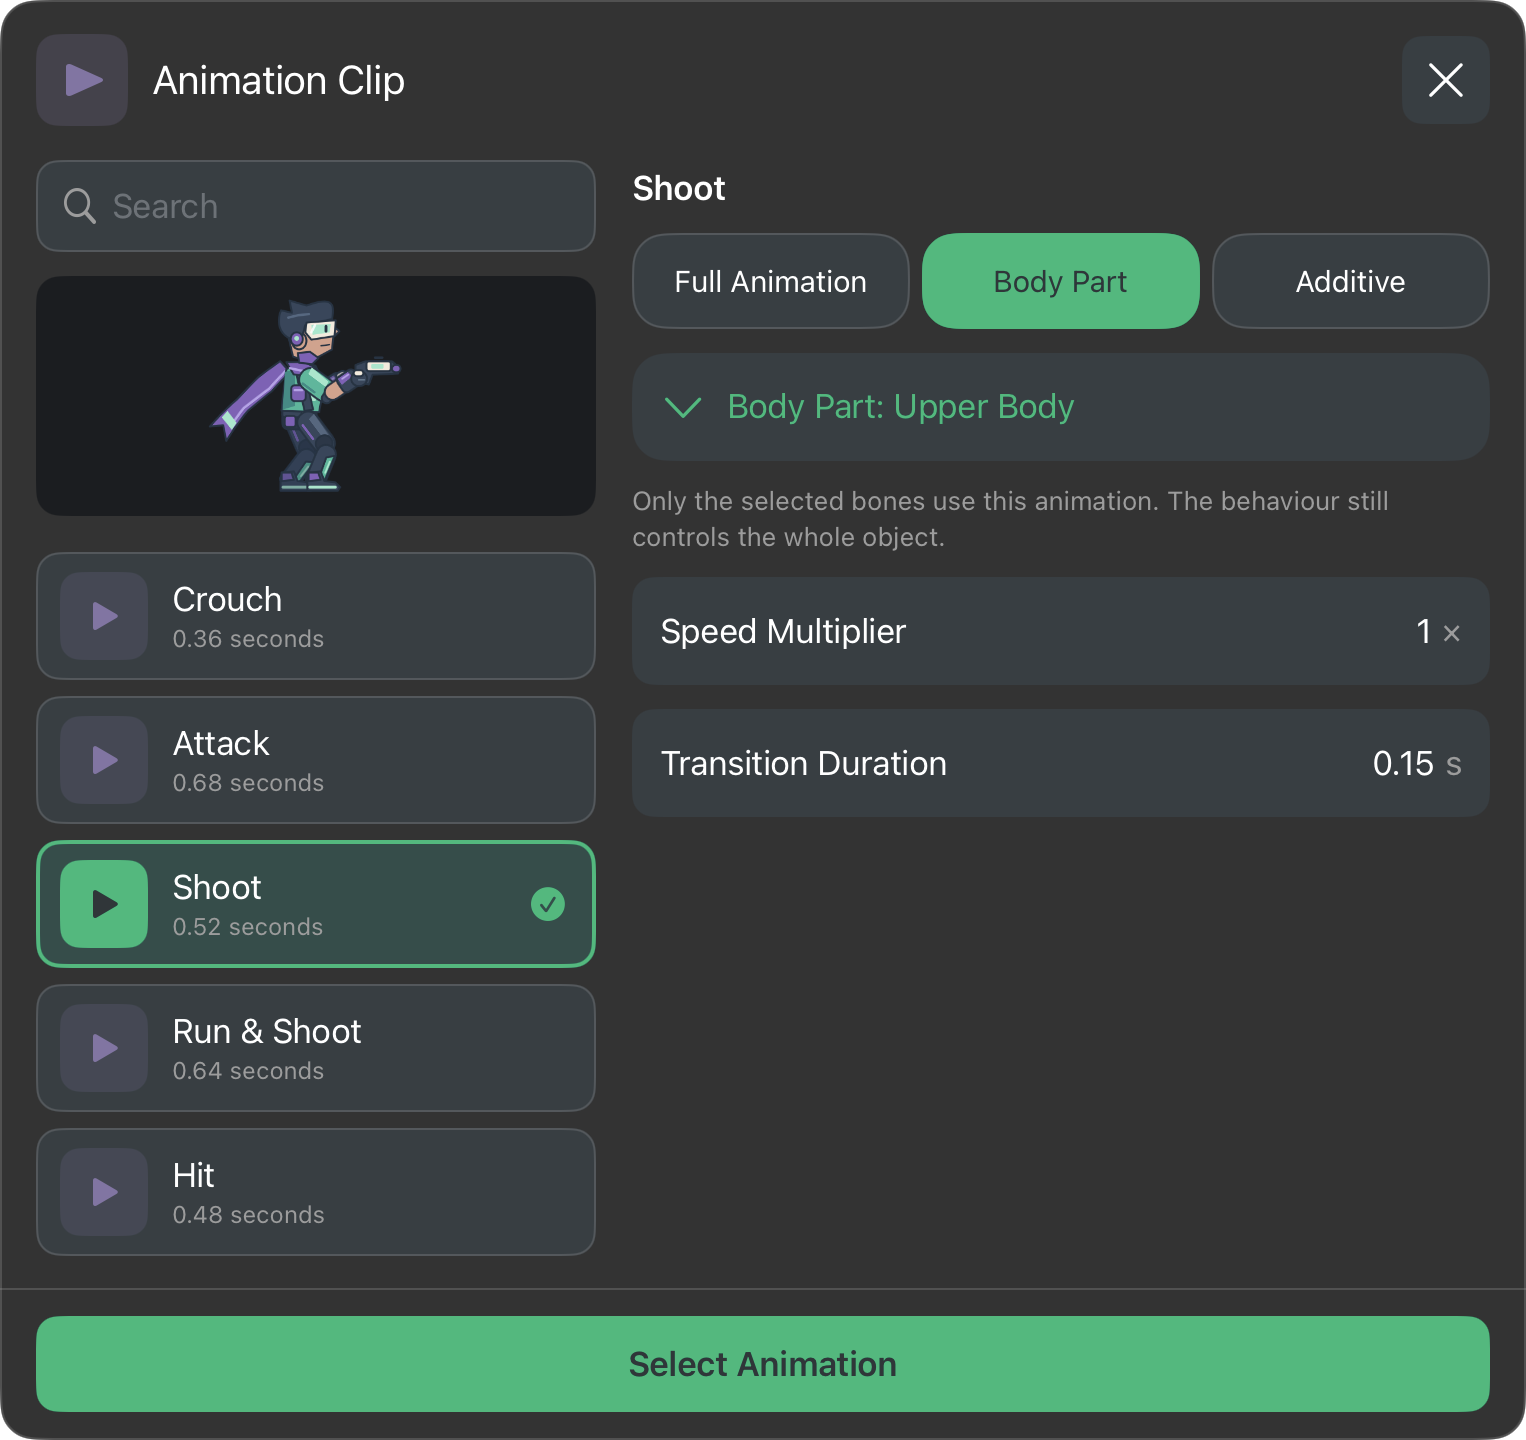
Use Full Animation for the main clip, Body Part for an independently posed group, and Additive for a relative posture change. Rig clips use Speed Multiplier, not the sprite FPS control. Body Parts and blending explains the setup, rules, and custom-rig requirements.
On a wide picker, selecting a clip automatically loops it in the preview so you can recognize the motion before confirming. In a narrow window, tap the play icon beside a cycle to reveal its preview; close the preview to see more cycles. This shows the chosen clip alone; run the scene to test blending with other actions. On a compact screen, Next opens the Playback settings.
Choose a rig behaviour
Find these controls in FX → Animation. They are advanced behaviours; enable the advanced listing if needed.
| Behaviour | Use it to… |
|---|---|
| Set Bone Transform | Pose a bone directly, replacing or offsetting selected transform channels. |
| Get Bone Transform | Read a bone or bone-local point in local, rig, or world coordinates. |
| Set IK Target | Aim an existing IK chain at a position or another scene object. |
| Set IK Influence | Fade how strongly an existing IK constraint controls its chain. |
| Attach Object to Bone | Make a separate scenery/kinematic object follow a bone. |
| Detach Object from Bone | Stop following while preserving the follower's current world transform. |
| Clear Rig Overrides | Release manual overrides so authored animation can take over again. |
| Set Rig Attachment | Swap or hide artwork in a slot on the rig. |
| Set Rig Skin | Apply an authored skin to the character. |
Coordinates and units
| Coordinate Space | Meaning | Position unit |
|---|---|---|
| Local | Relative to the selected bone's parent | Artwork points |
| Rig | Relative to the rig's origin | Artwork points |
| World | In the game scene | hyperPad metres |
Behaviour rotations use clockwise degrees. Scale is a factor: 1 = 100%, 0.5 = 50%. Get Bone Transform can read an offset point, such as a muzzle position, without creating another object. Bone-local offsets use artwork points, including when the result is requested in World space.
Animations and manual overrides
The runtime combines animation layers first, then applies procedural bone/IK controls. An override remains after a one-shot command finishes, until it is cleared, replaced, or its owning behaviour is disabled or torn down. Completing a behaviour is not the same as releasing its pose.
Use Duration/Easing where available to ease an override in. Use Clear Rig Overrides to ease it out. Its default Context scope clears overrides from the current object's behaviour context, so cloned characters can keep independent control. All is broader and can remove other behaviours' overrides on the chosen rig; use it deliberately.
IK is evaluated after bone overrides. If a manual elbow rotation seems to be ignored, check whether an IK chain is solving that arm. Reduce its influence before controlling that joint directly.
What is still one object?
Body Parts and bones are not separate scene objects. Get Object and Get Objects By Tag return scene objects. Collision behaviours test the character's configured collider; they do not identify a struck arm or leg. Animated crouching does not automatically shorten the collider.
To obtain a limb position, use Get Bone Transform. To carry a separate visual item, use Attach Object to Bone with a supported scenery/kinematic follower. Dynamic physics bodies are rejected as followers. To change a limb's own graphic, use Set Rig Attachment with artwork already included in the rig asset.
Check outputs and missing selections
Rig commands provide Valid and Error outputs in addition to their object IDs. Valid is false if the target or selected rig element is incompatible or missing. Invalid commands finish instead of leaving the behaviour chain waiting. For a group mutation, Valid is true only when all resolved targets succeeded; compatible targets may already have been updated.
Get Bone Transform and the rig side of Attach Object to Bone require one rig because their result would otherwise be ambiguous. Bone, clip, skin, slot, and group selections belong to the selected rig asset. Matching names on an unrelated asset do not make them interchangeable.
Continue with the combined movement tutorial, or open a behaviour above for its inputs, outputs, and worked example.