

Art Studio Tutorial: Make a Frame Animation
Frame animation displays a sequence of drawings. Art Studio calls the Drawing timeline mode Keyframe Animation. Here, you edit the frame artwork directly; a sequence does not automatically interpolate a drawing into the next drawing.
Start with the Glowbot project, or any drawing with facial details on a separate layer.
Three terms help when working with the timeline: a frame is one moment in the sequence; a cel is one layer's artwork at that moment; a cycle is a named sequence of frames. Several layers combine to form the frame you see on the canvas.
1. Open the timeline
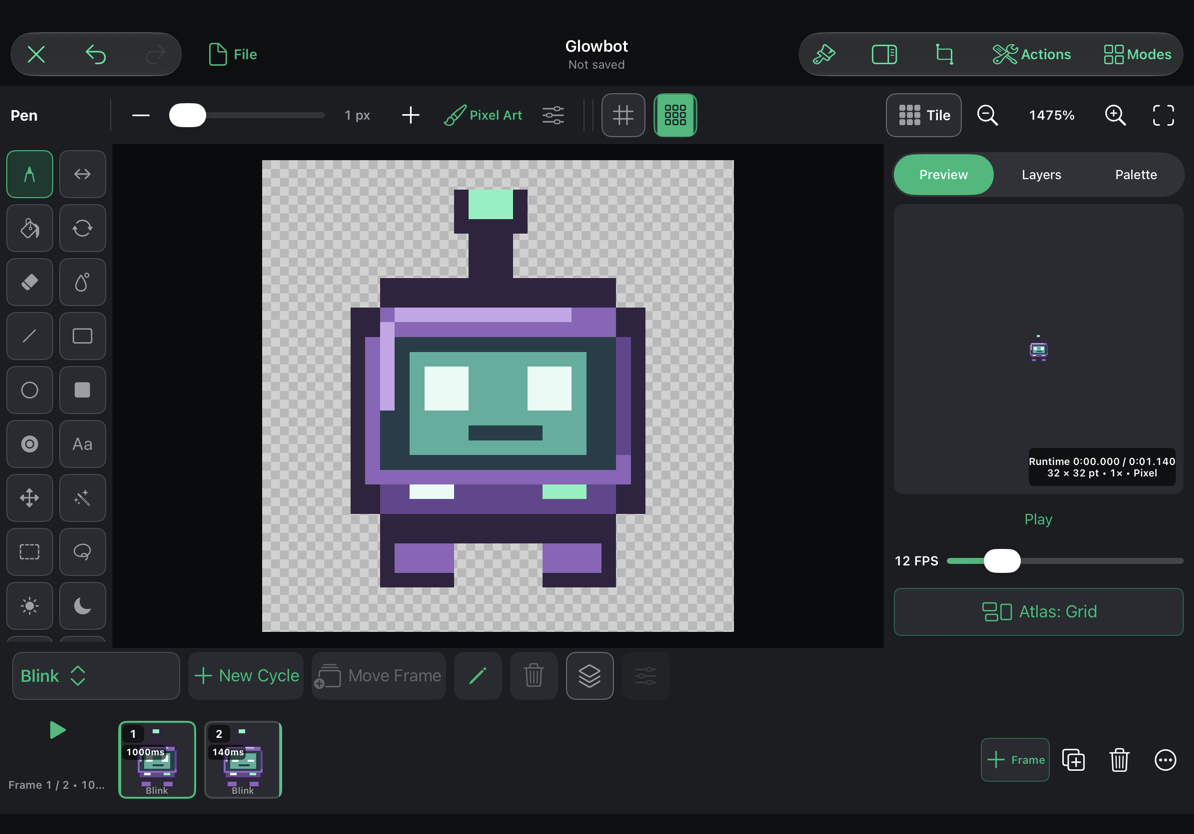
Choose Modes → Keyframe Animation. The timeline appears below the canvas. A new project can also start in this mode by choosing Keyframe Animated Object in the new-project wizard.
Use Fit (0) after opening the timeline so the whole character fits in the remaining canvas area.
Each timeline thumbnail represents a frame of the visible composite. Selecting a frame lets you edit that frame on the selected layer. The frame readout shows its position in the selected cycle and its duration in milliseconds.
Use the cycle selector to choose which animation you are editing. Rename the initial cycle Blink with the cycle rename action. Cycles such as Idle, Walk, or Attack keep separate sequences organized in one animated asset.
2. Duplicate the open-eye pose
Select the Face layer and the first frame. Choose Duplicate frame beside the timeline, or press Shift–N. Duplicating copies the current artwork across all layers into a new frame; adding a New Frame (Option–N) creates an empty frame instead.
On the new frame, paint over the two eyes with the same sea-green panel color. Then add a short pale-mint horizontal line for each closed eye. Leave the mouth, body, and highlights as they were.
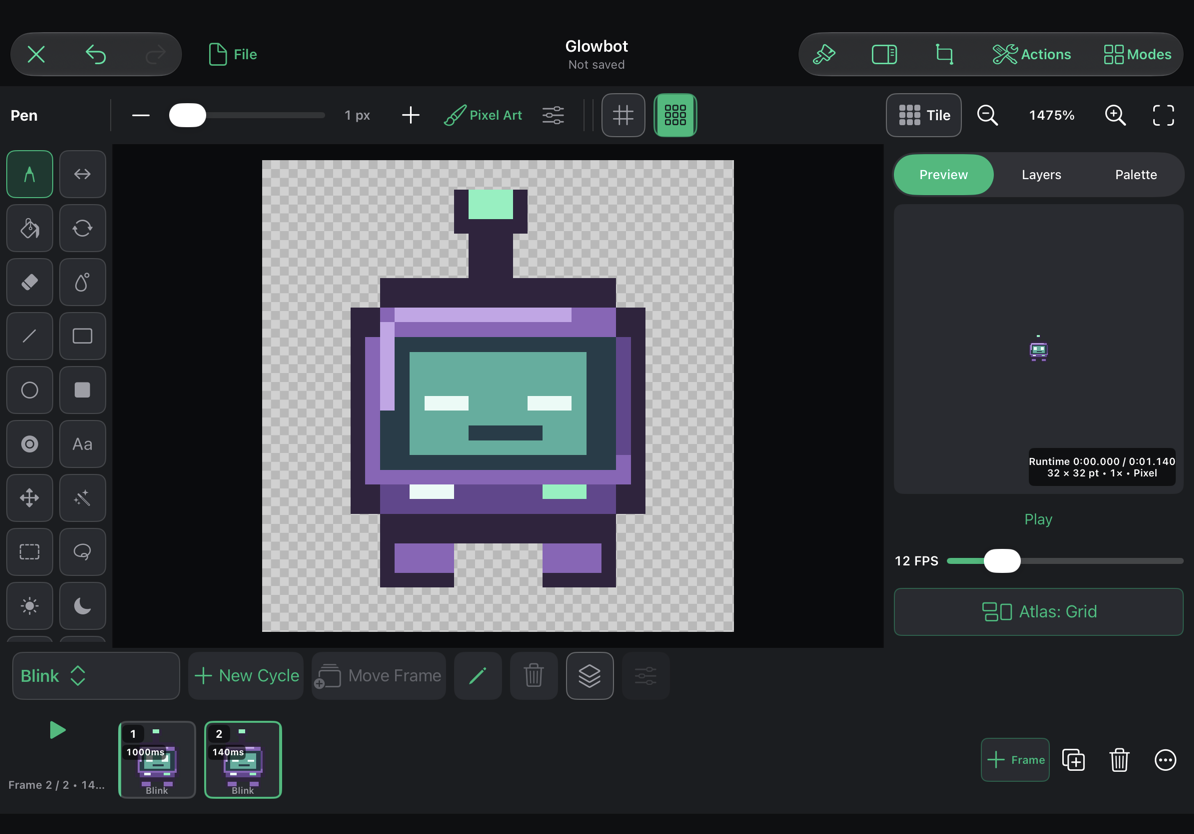
Click between the two thumbnails. The face should change while the character stays aligned. If the whole character jumps, check that you did not move or resize a layer on one frame.
3. Give the blink a useful rhythm
Open Frame Operations → Retime… for the first frame and enter 1000 ms. Set the closed-eye frame to 140 ms. This creates a long open-eye hold and a short blink.
The FPS control in Preview sets the default rate for frames that still use the default duration. It preserves individually adjusted durations. Use individual frame durations when a pose needs a deliberate hold; avoid duplicating a still pose many times just to make it last longer.
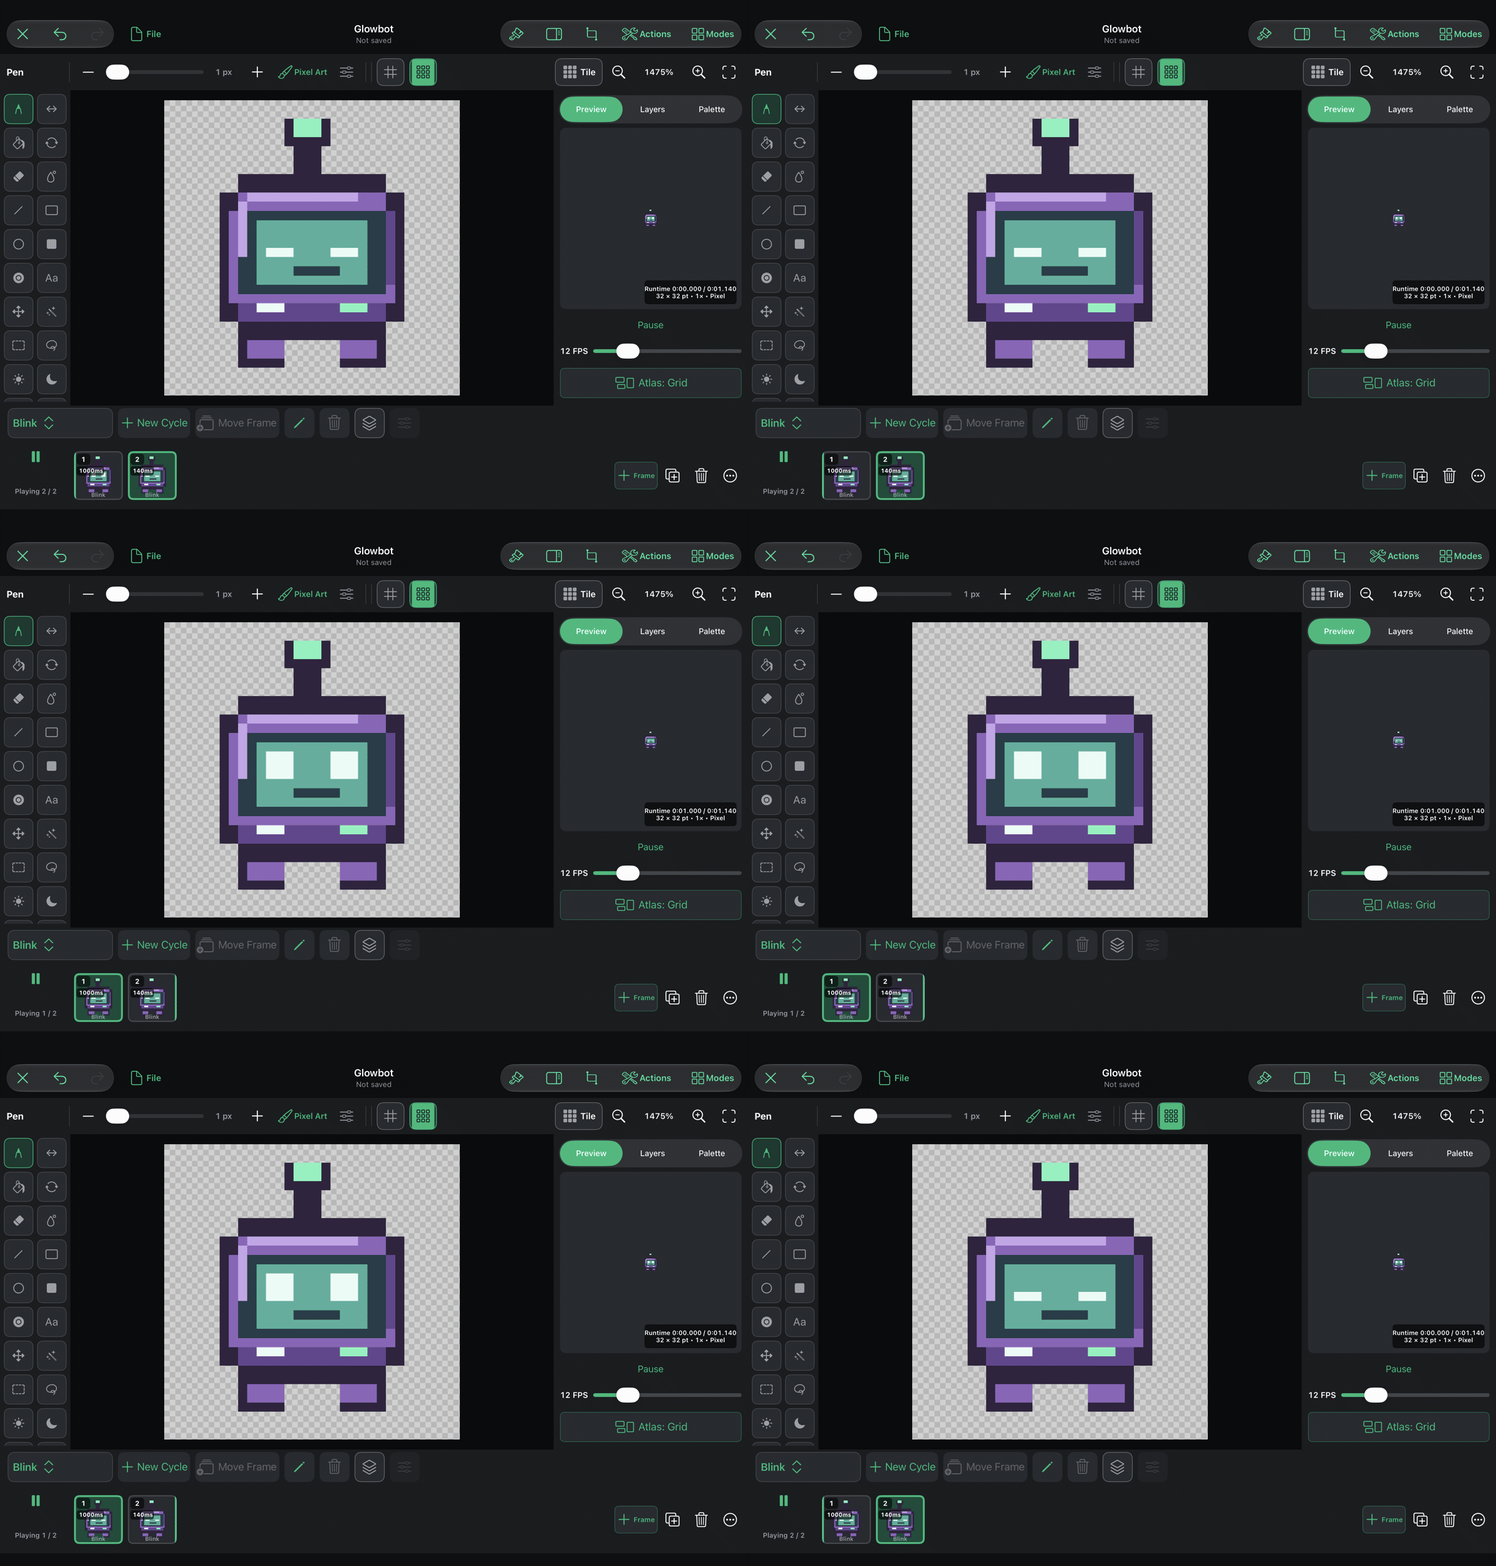
Tap the timeline Play button, or press Space, to play on the canvas. Tap again to pause. The Play button inside the Preview inspector plays only that preview, which is useful when you want to keep working in the main canvas.
4. Use onion skin to compare nearby frames
Turn on Onion Skin next to the timeline, or press ⌥O. The canvas shows nearby frames in different tints so you can judge how a shape moves between poses. Open the adjacent settings button to change the previous/next frame counts, tints, opacity, and falloff.
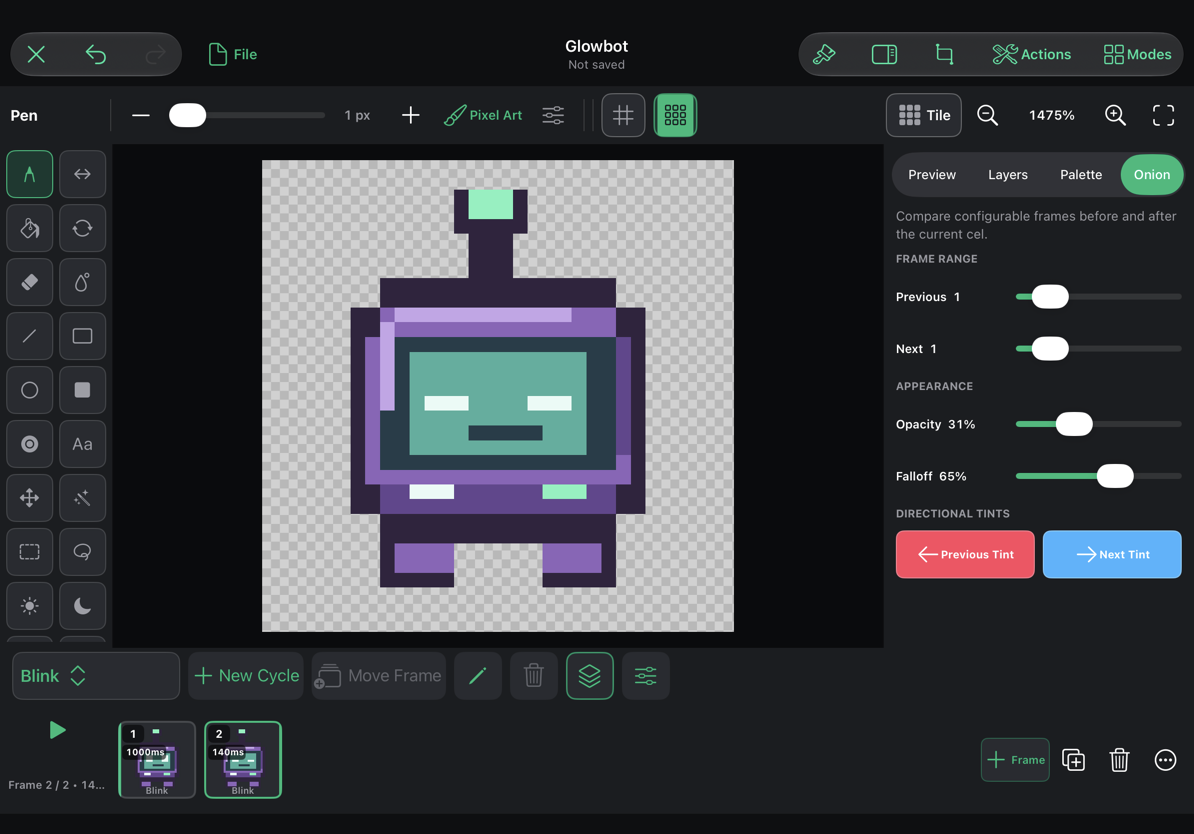
For a blink, one frame on either side is enough. For a moving hand or bouncing object, onion skin makes spacing and unwanted jumps easier to spot. Turn it off before judging the final colors: the ghost tint is an editing aid and is not exported.
5. Build a longer sequence
For a walk, bounce, or effect, add a few key poses first, then insert the drawings that connect them. Use more closely spaced poses around slow movements and larger spacing where the action is faster. Play the cycle often, rather than judging only the individual frames.
Long-press a timeline frame to begin multiple selection, then tap more frames to add or remove them. The frame readout shows how many are selected. Open the ellipsis button beside the timeline for Frame Operations:
| Operation | Use it for |
|---|---|
| Duplicate Sequence | Copy a selected group of frames. |
| Reverse | Reverse the selected sequence. |
| Make Ping-Pong | Build a forward-and-back sequence. Check the turnaround in playback. |
| Retime… | Give the selected frames a new duration. |
| Link Cels | Share the selected layer's cel artwork across frames, useful for holds or static parts. |
| Unlink Cels | Make shared cels independent before editing only one of them. |
| Transform Selected Cels | Apply a transform across the selected frames on the chosen layer. |
| Delete | Remove the selected frames. |
Linked cels are shared artwork: editing one updates the others in that linked group. Duplicate frames when you want an independent pose; use Link Cels deliberately when you want edits to stay synchronized.
Long-press or secondary-click a frame for its context actions. Move Frame moves the current frame, or the selected set, into another cycle. Check the target cycle afterwards so you know which sequence will play.
6. Keep the project and publish the animation
Save the project to preserve layers, cycles, timing, and editable text. Use the File menu's animated game asset export when you want to use the result in a game. Review the export options there; you do not need to flatten or discard the source project.
In Preview, Atlas Packing can retain full frame rectangles or trim transparent borders. Trimming is an export packing choice: it retains frame alignment and does not crop the editable canvas. Inspect the exported cycles in the Asset Library before placing the character in a scene.
Useful timeline shortcuts
| Action | Shortcut |
|---|---|
| Play/pause canvas animation | Space |
| New blank frame | ⌥N |
| Duplicate frame | ⇧N |
| Delete frame | ⇧⌥Delete |
| Previous/next frame | ⌥← / ⌥→ |
| Onion skin | ⌥O |
| New cycle | ⌥⌘N |
| Rename cycle | ⌥⌘R |
The plain arrow keys can move a selection, so use the Option-arrow shortcuts when you specifically want to change frames. ⌘/ opens the searchable keyboard reference.