

Art Studio Tutorial: Create a Walk Animation
Build a new Walk Practice animation on Nova's existing skeleton. You will create contact, passing, down, and up poses, close the loop, and compare the animation as each stage improves it. The supplied rig provides the artwork and bones; the new clip starts without pose keys.
Allow about 30–45 minutes for the first attempt. You can work with touch, Pencil, or a mouse. Numerical values later in this page let you reproduce the pictured result precisely; dragging the same poses by eye is also a useful exercise.
If the rigging workspace is new to you, read the Rig & Animate guide first. Keep that page available for definitions and controls.
What a walk needs
A complete stride contains two steps, with the front and back legs exchanging roles. The body moves through four main poses during each step:
- Contact: one foot reaches forward and the other is behind.
- Down: the body lowers as the new supporting leg takes weight.
- Passing: the free foot travels past the planted leg.
- Up: the body rises as the free leg prepares to reach forward.
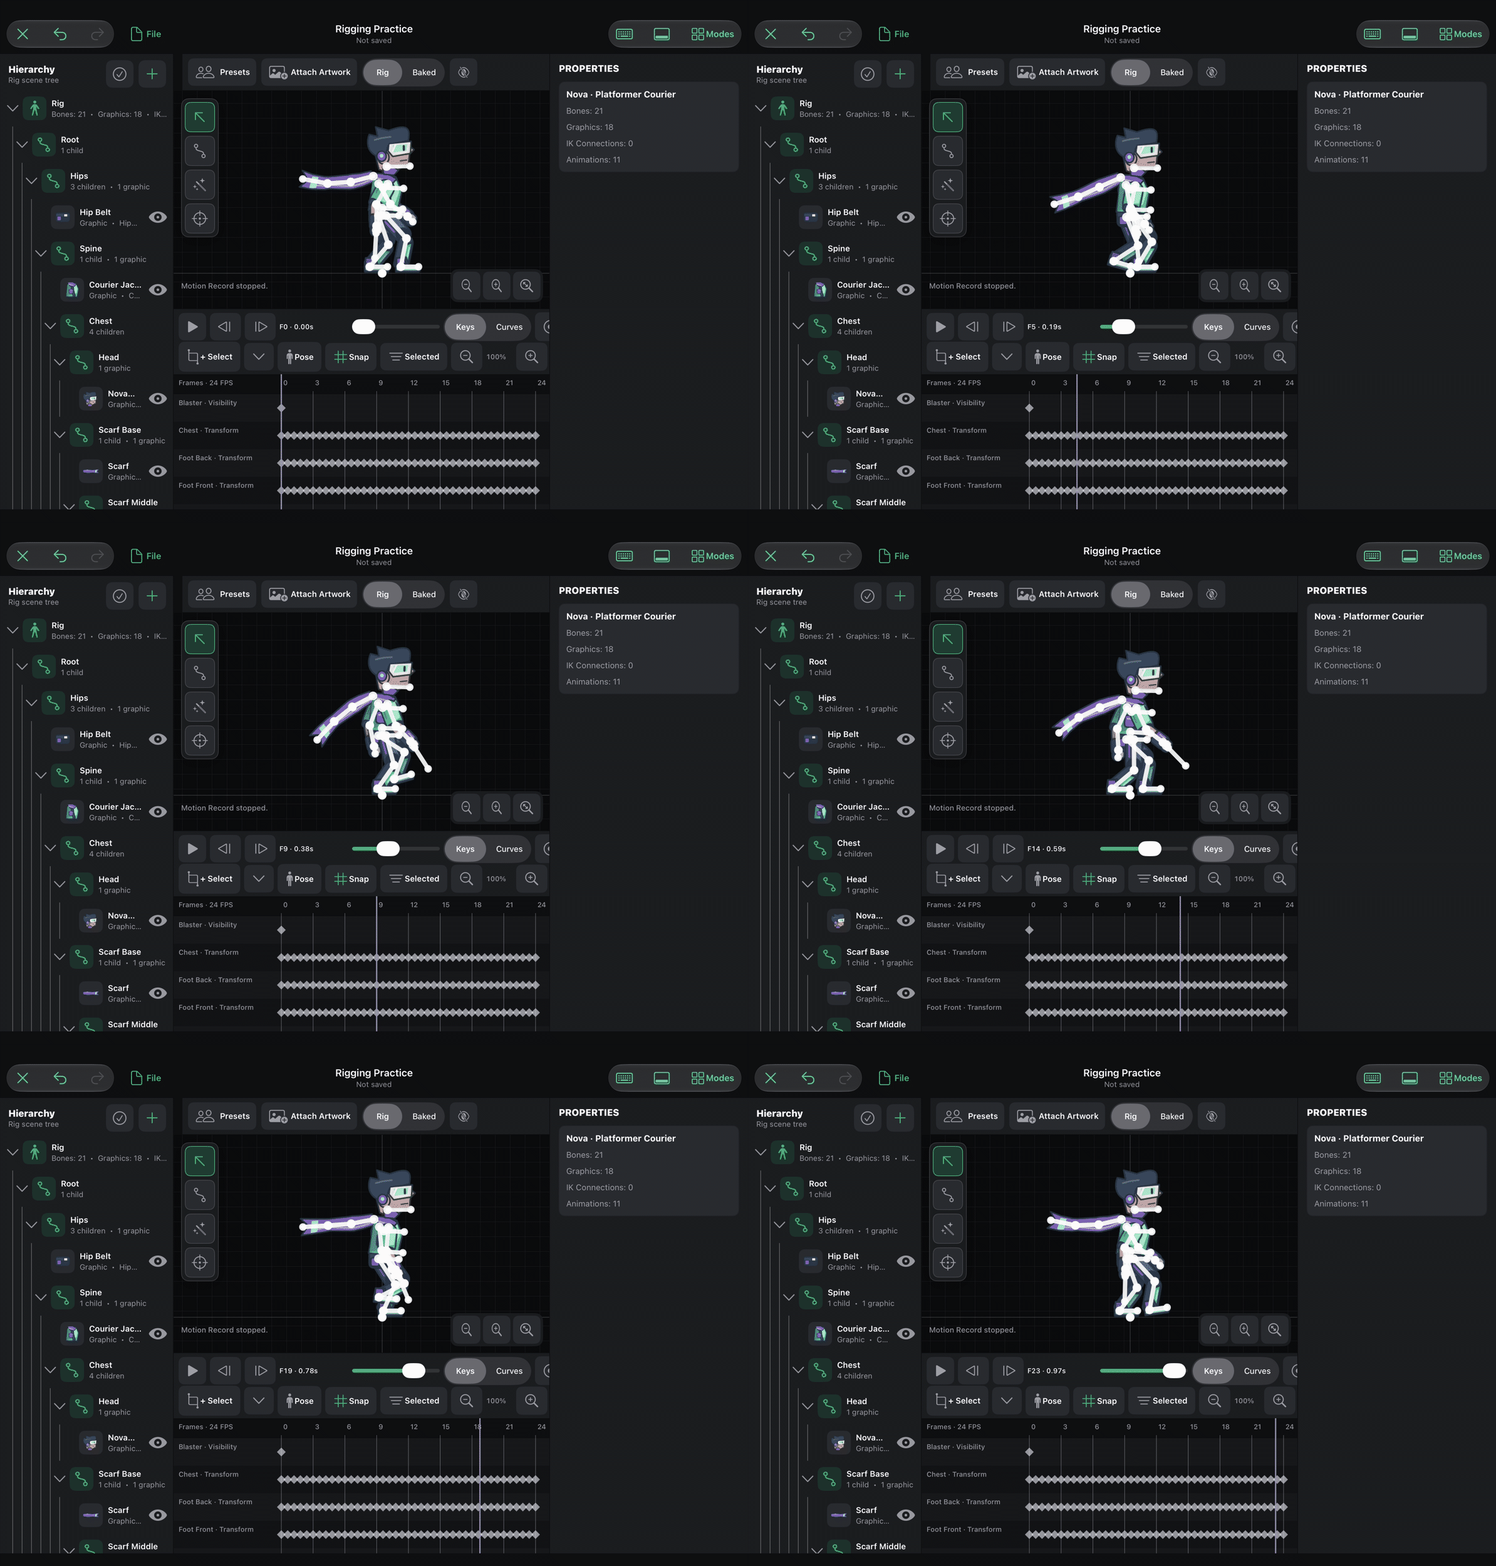
The goal is a walk in place. The feet travel backwards while supporting the body; the game supplies the character's forward travel. Moving the Root forward through the clip would give you both animation travel and game travel to coordinate.
1. Prepare a practice project
- Open Rig & Animate → Presets and load Nova · Platformer Courier.
- Pause the animation. Save an independent copy with File → Save As…, named
Rigging Practice. - Show the animation timeline with T or its toolbar button. Confirm the editor is in Animate before posing.
- In the hierarchy, use Add → Add Clip. Select the new clip, enter Walk Practice, set Duration to 1.0 s, choose Loop, and press Apply Clip.
- The freshly loaded Nova preset uses 24 FPS for timeline frame stepping. Leave that publication rate unchanged and keep Snap enabled; the times below are whole frames at that rate. The FPS button that appears when recording is armed controls motion recording separately.
- For an unarmed walk, select the Blaster and Muzzle Flash attachments in turn, hide each using its hierarchy visibility control, then choose Key → Visibility at frame 0. Their animation visibility is now explicitly off in this clip.
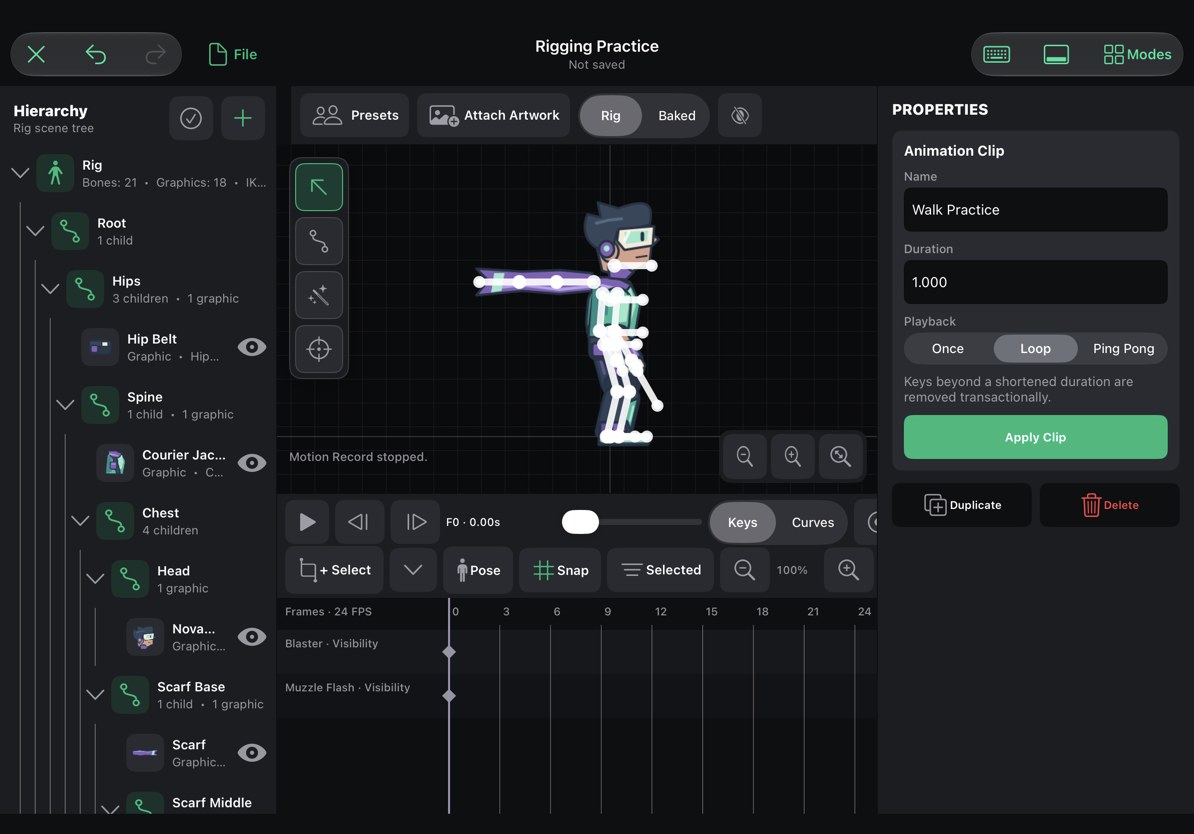
You should see a new clip with no bone-pose diamonds yet. Two visibility keys for the hidden weapon graphics are expected. The original sample clips are still available as references.
How to enter a pose
For every pose below, move the playhead to the stated frame. Scrub near the time and use the previous/next frame buttons for the final adjustment. Select a named bone in the hierarchy, enter its values in the inspector, and press Apply Animate Transform. Keep the scale and other fields unchanged unless the table explicitly gives a new value.
The tables use the inspector's local rotation in degrees, not the visual angle of the whole limb on screen. Enter negative signs carefully. Select the bone, not its graphic, when changing limb movement. Transform Graphic is for fitting a sleeve or boot to the skeleton and should stay off during this exercise.
If you pose directly on the canvas instead, choose Smart Pose (F). Drag a joint or tip to move the chain; drag a shaft for a single-bone rotation. The completed gesture writes its keys at the playhead. Use Undo whenever a drag changes the wrong chain.
2. Make the first contact pose at frame 0
Put one foot in front and the other behind. Both soles should meet the same ground line. Keep the knees slightly bent, the hips over the stance, and the arms opposed to the legs. Use the frame 0 row of the numeric guide below for the pictured pose.
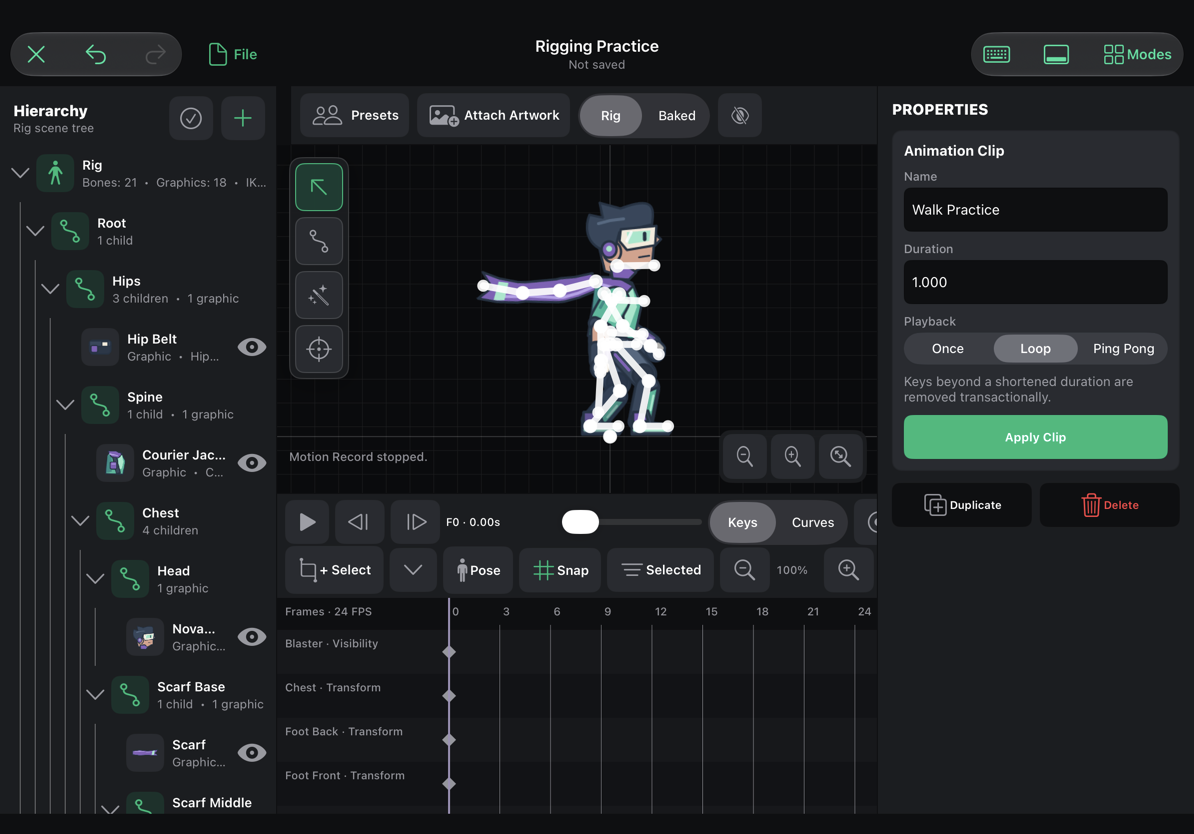
Work on the legs first: Hips, then Thigh Front / Shin Front / Foot Front, then the corresponding Back bones. Add the upper-arm swing after the silhouette reads clearly. The foot bone corrects the boot's angle after the thigh and shin rotate; leaving it unchanged can make the toe point into the floor.
Check: the character should look balanced with separated legs. If both feet are on the same side of the hips, revisit the Front/Back values. If the boots are upside down, confirm you selected the Foot bone and entered a local rotation.
3. Add the opposite contact at frame 12
Move to frame 12, halfway through the one-second clip. Exchange the leg and arm roles using the frame 12 values. The body remains at the same overall height as frame 0.
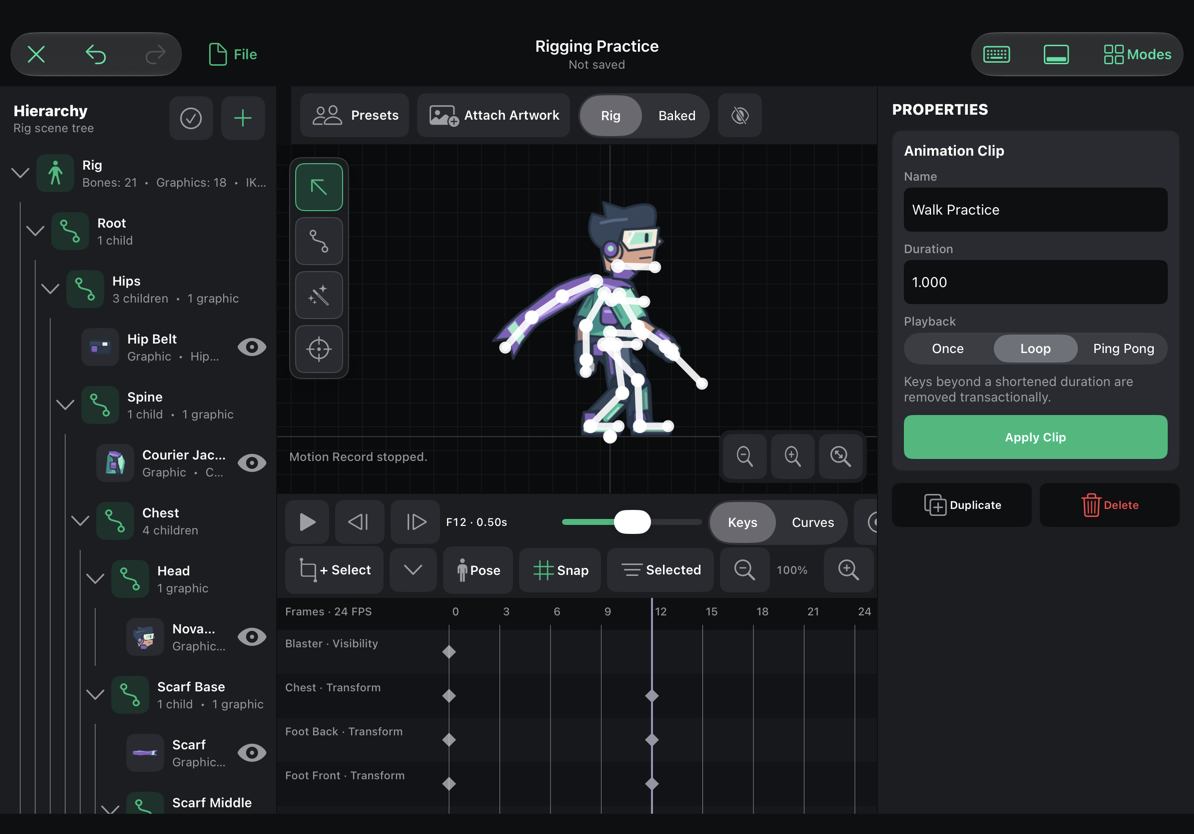
Front/Back labels describe drawing depth. They are not automatically the Left/Right naming pairs used by the mirror-pose command. Use the explicit opposite-contact values here rather than assuming Mirror Pose will exchange Nova's named limbs correctly.
4. Close the loop at frame 24
The final pose must match frame 0. You can re-enter the frame 0 values at frame 24, or copy your own first pose:
- Go to frame 0 and select Walk Practice in the hierarchy, so no individual bone remains selected.
- Open Pose → Copy Pose.
- Move to frame 24 and choose Pose → Paste Pose.
Selecting a single bone before copying limits the copied pose. Selecting the clip is a simple way to copy the whole character for this loop boundary.
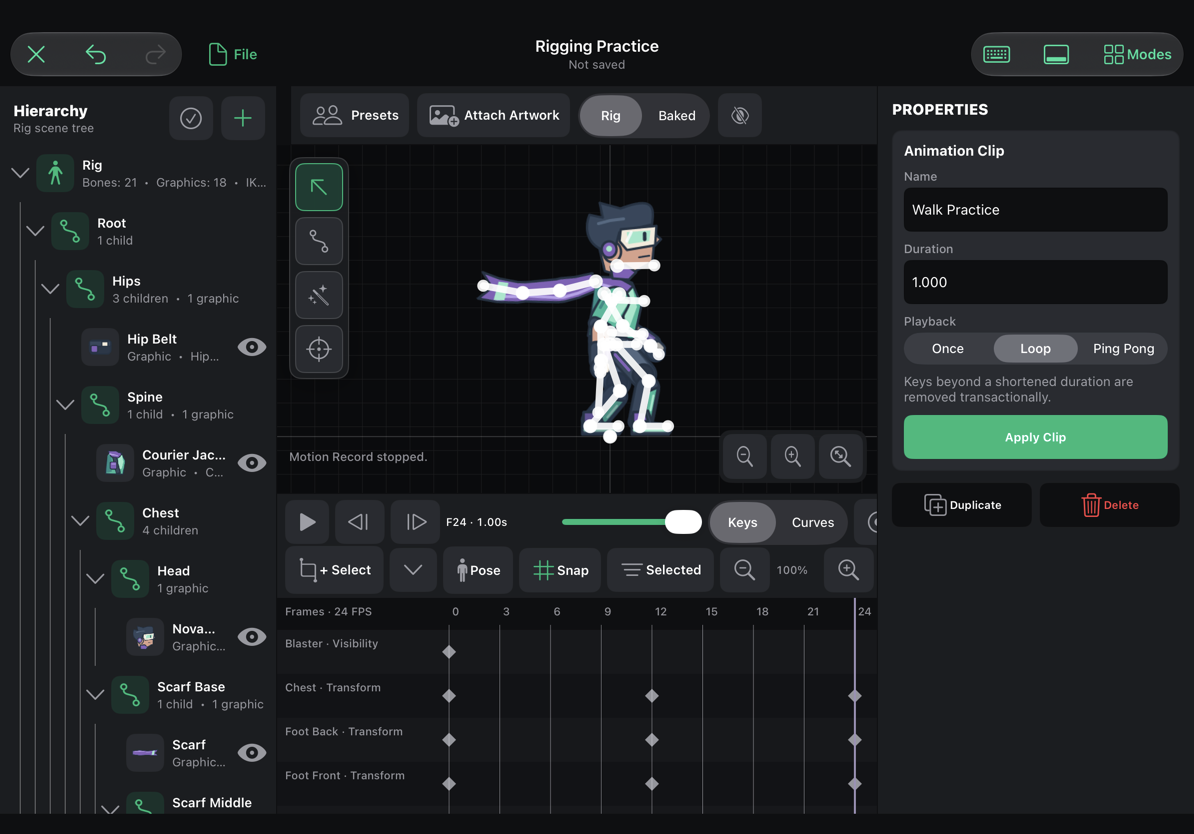
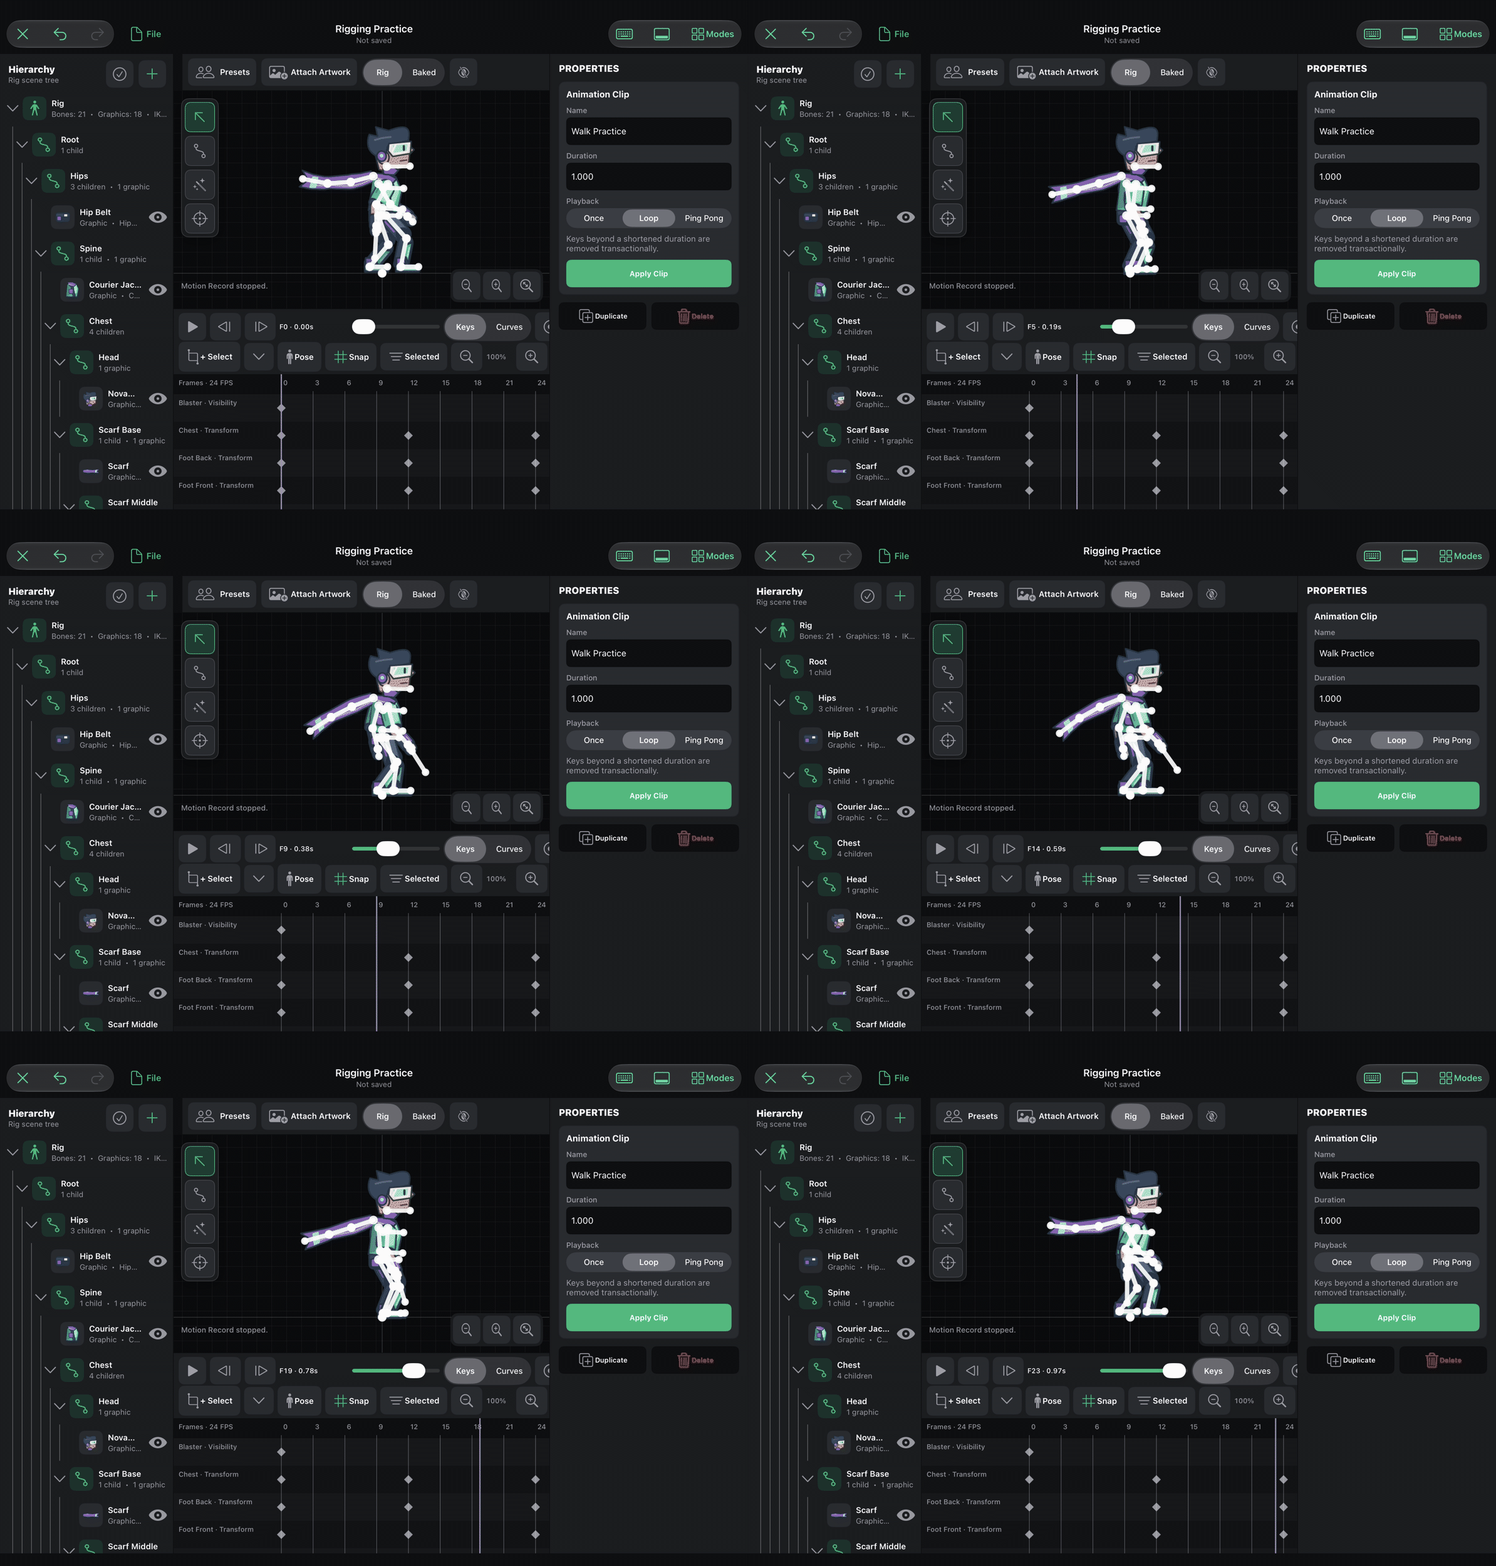
Play the clip. It should repeat without a sudden jump at the boundary, but the steps will still feel flat and mechanical. This is useful: it shows why two contact poses are not a finished walk.
5. Give the free foot clearance: passing poses at frames 6 and 18
At frame 6, keep the supporting foot on the ground and lift the other foot past it. Bend the free knee enough to make room; do not simply slide a straight leg through the planted one. Enter the frame 6 values, then the corresponding frame 18 values for the other half.
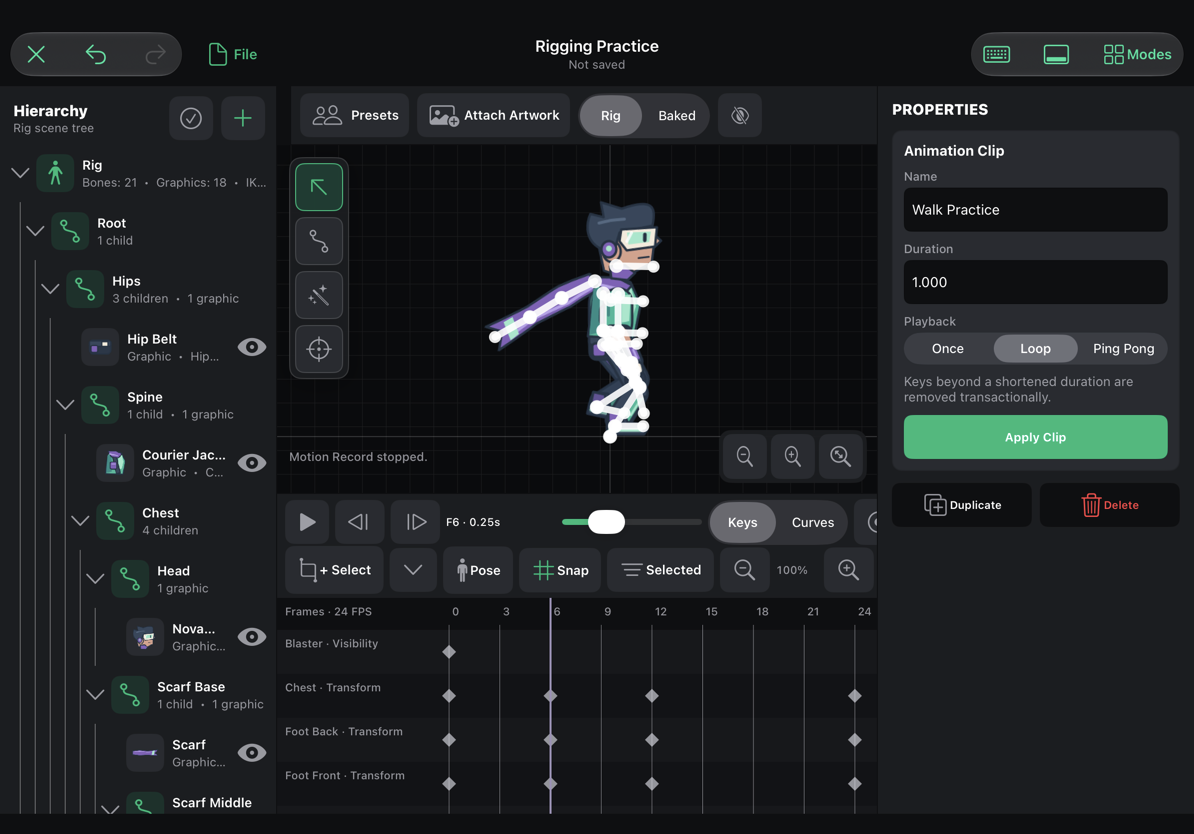
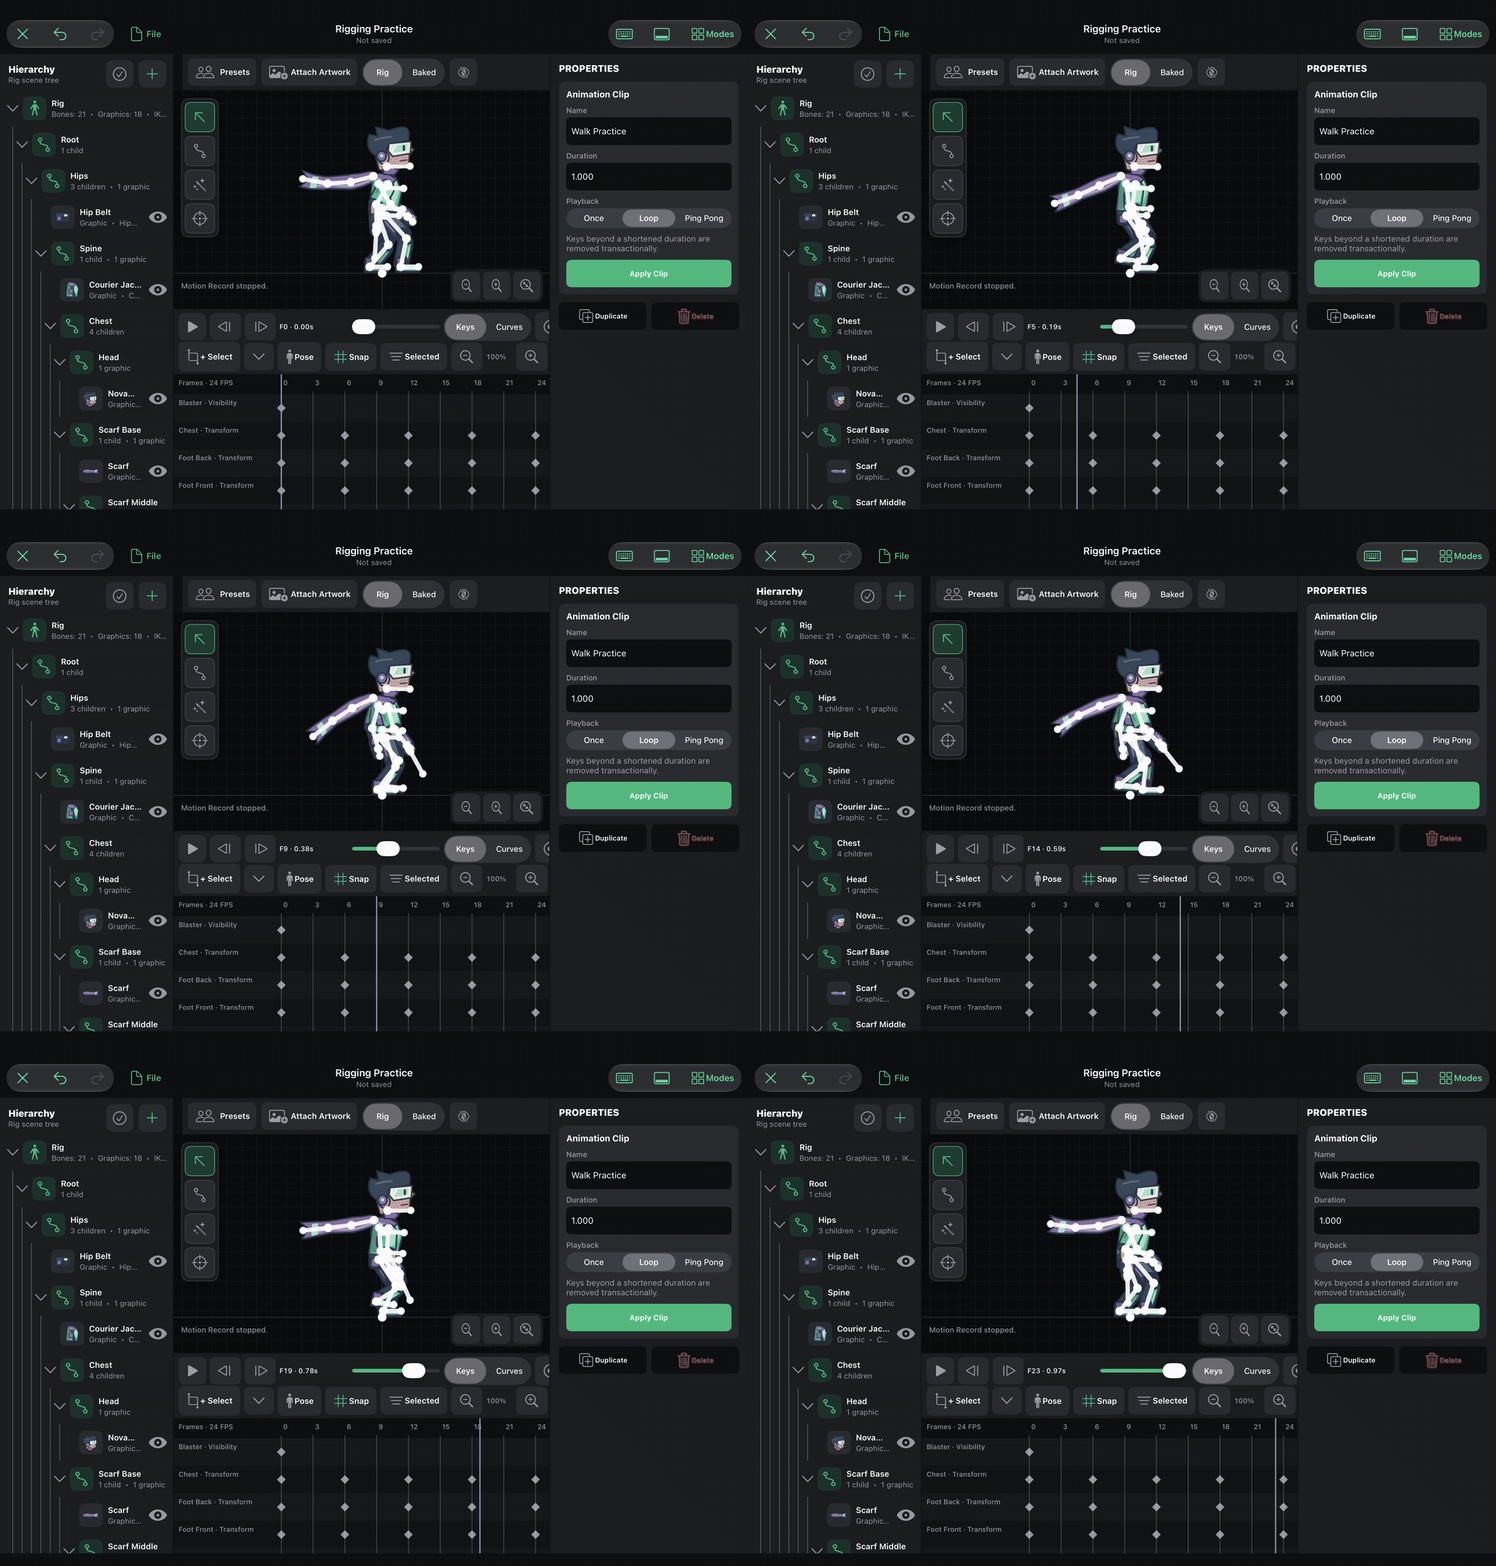
Check: follow one boot for the whole loop. It should move backward along the ground during stance, then lift and travel forward. A foot that reverses while still planted will look as if it is sliding.
6. Add weight: down poses at frames 3 and 15
Between contact and passing, lower Hips Y slightly. Bend the supporting knee so the body can accept weight without pushing the sole through the ground. Add the frame 3 and frame 15 values.
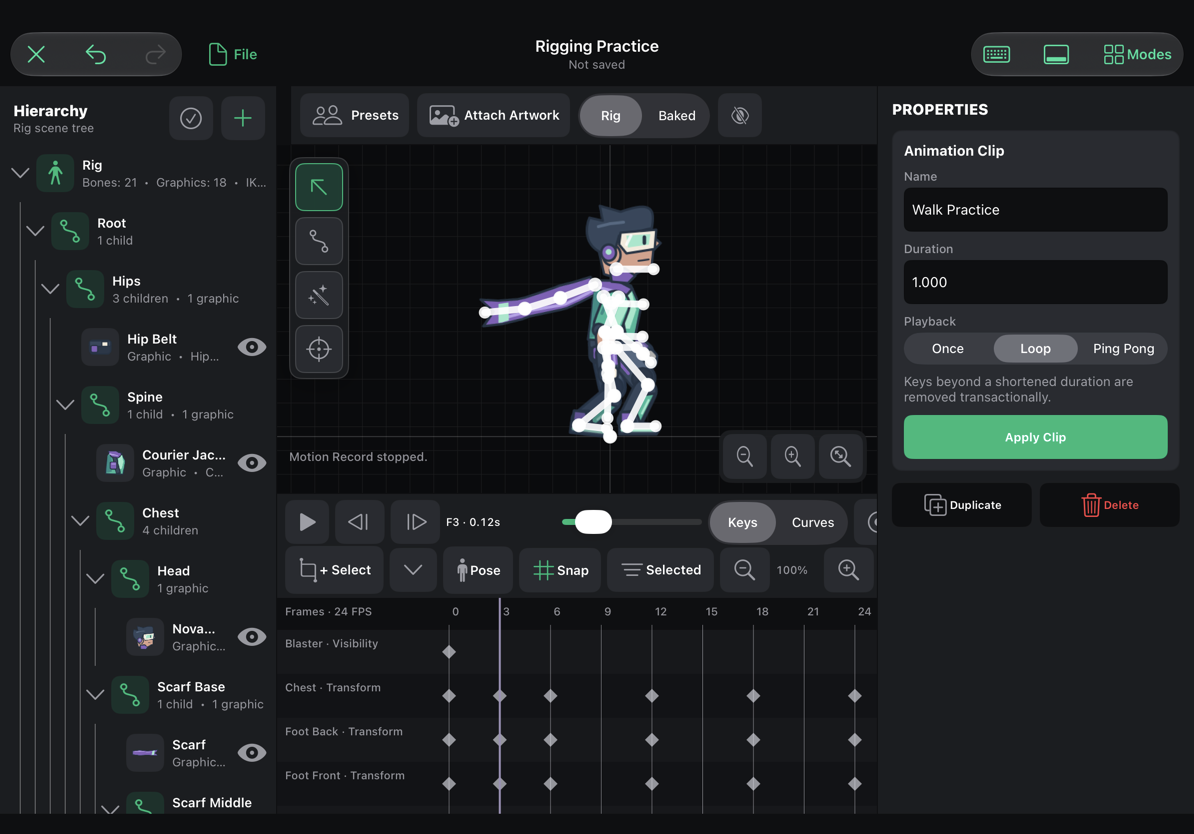
The pictured walk uses a small vertical movement. Large hip changes turn it into a bounce. Keep the head comparatively steady and let the legs do the work.
7. Finish the stride: up poses at frames 9 and 21
Between passing and the next contact, raise the hips slightly. Let the free leg reach forward, and let the opposite arm continue its swing. Add frames 9 and 21.
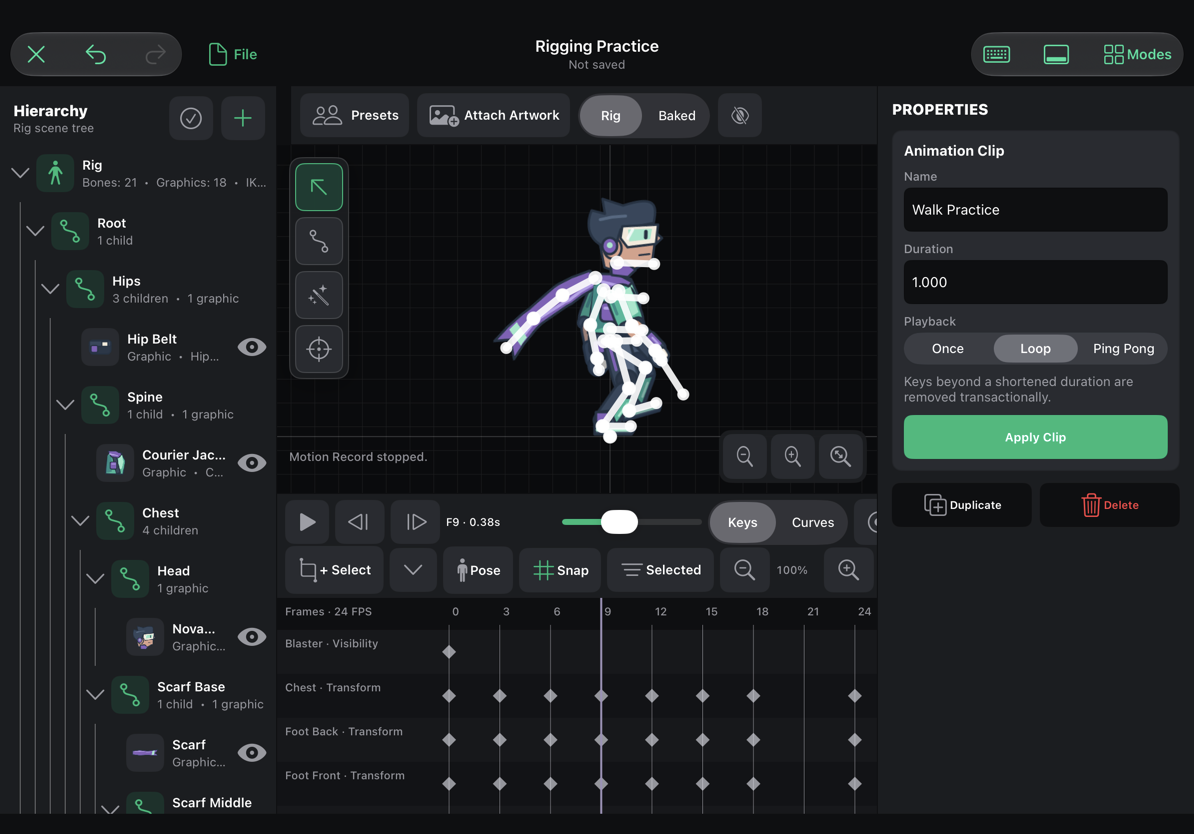
Your key-pose order is now:
| Frame | Time | Pose |
|---|---|---|
| 0 | 0.000 s | First contact |
| 3 | 0.125 s | First down |
| 6 | 0.250 s | First passing |
| 9 | 0.375 s | First up |
| 12 | 0.500 s | Opposite contact |
| 15 | 0.625 s | Opposite down |
| 18 | 0.750 s | Opposite passing |
| 21 | 0.875 s | Opposite up |
| 24 | 1.000 s | Same pose as frame 0 |
8. Keep the transitions moving
Select a transform key and open Curves. Begin with Linear interpolation for the leg movement. Strong easing at every contact, passing, and up pose slows the feet repeatedly and can make the character hesitate.
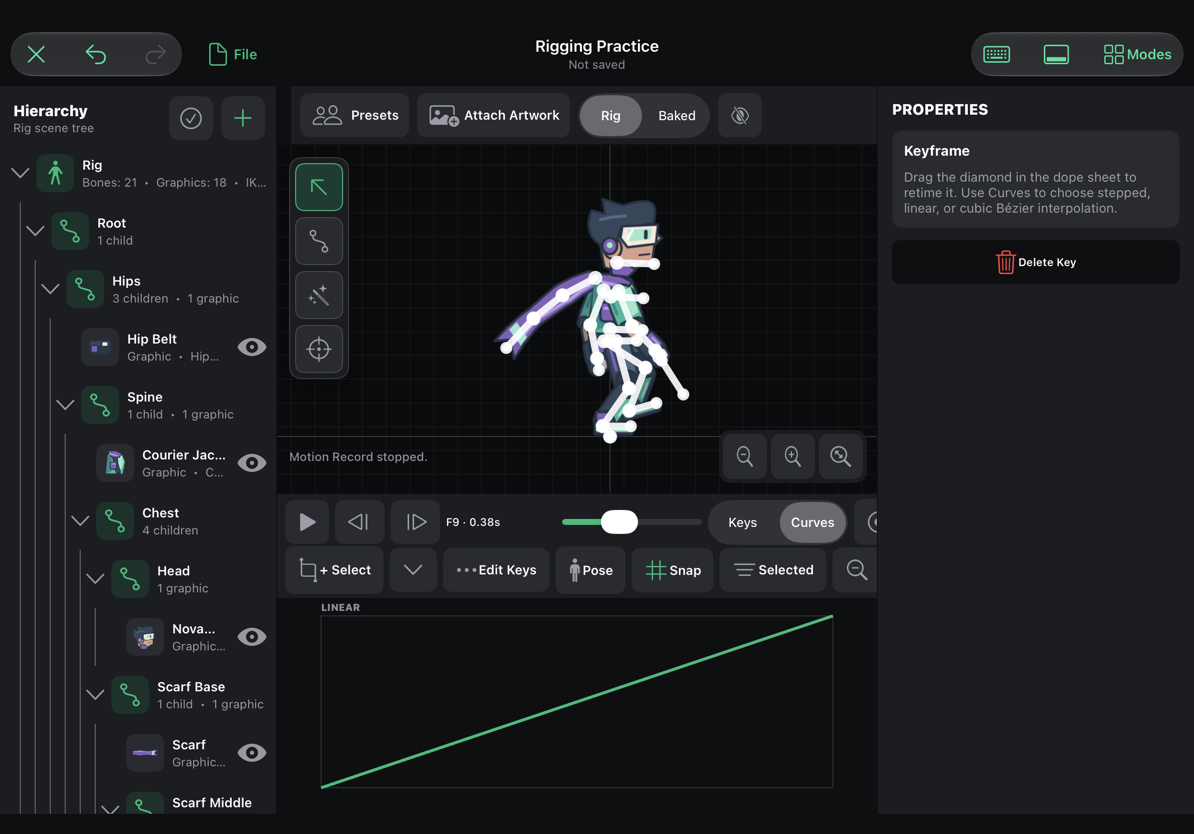
Use Pose Ghosts to inspect spacing. During the planted part of a step, the boot positions should progress backward evenly. During the free part, they should form a clean arc. Adjust an intermediate pose if the knee pops or the toe clips the floor.
For the upper body, small counter-rotation helps: hips and chest do not need to swing as one rigid block. Bend the elbows and let the hands relax. The optional torso, hand, and scarf values in the numeric guide add this secondary movement. Keep it subtle until the feet work.
9. Judge the whole loop
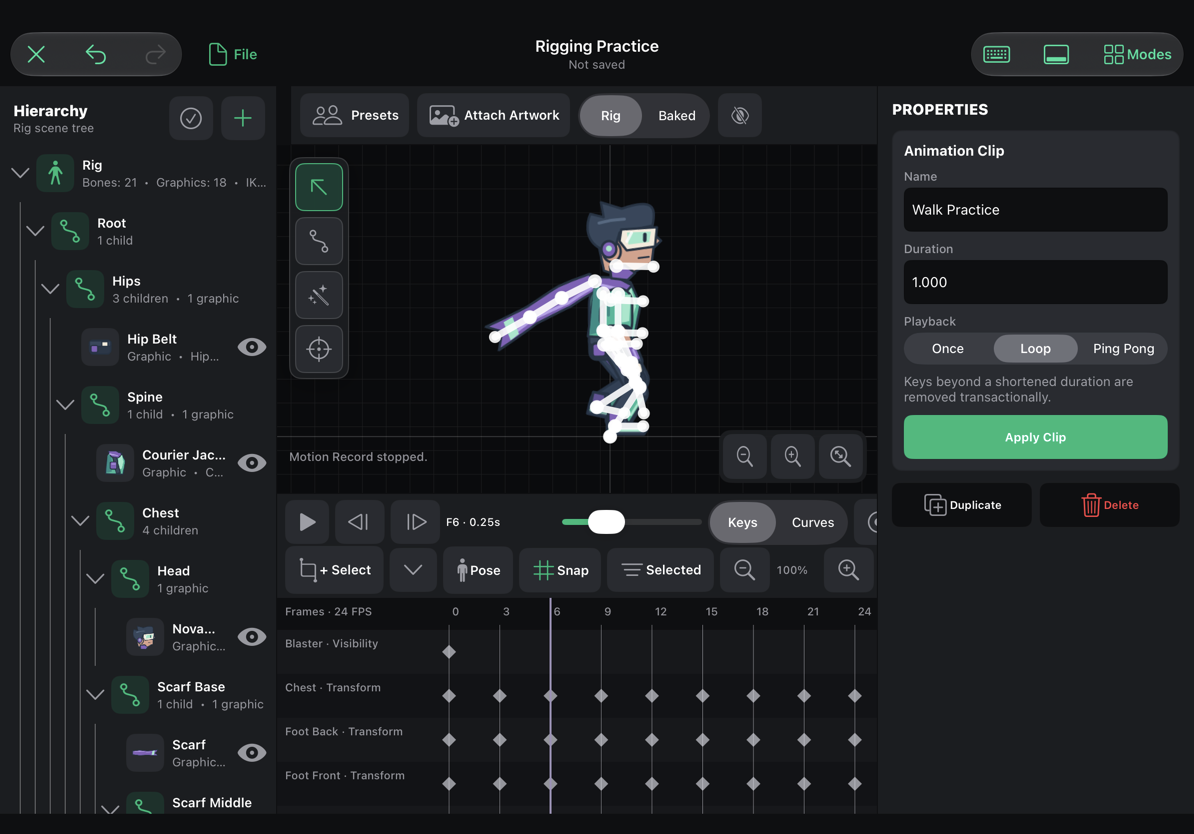
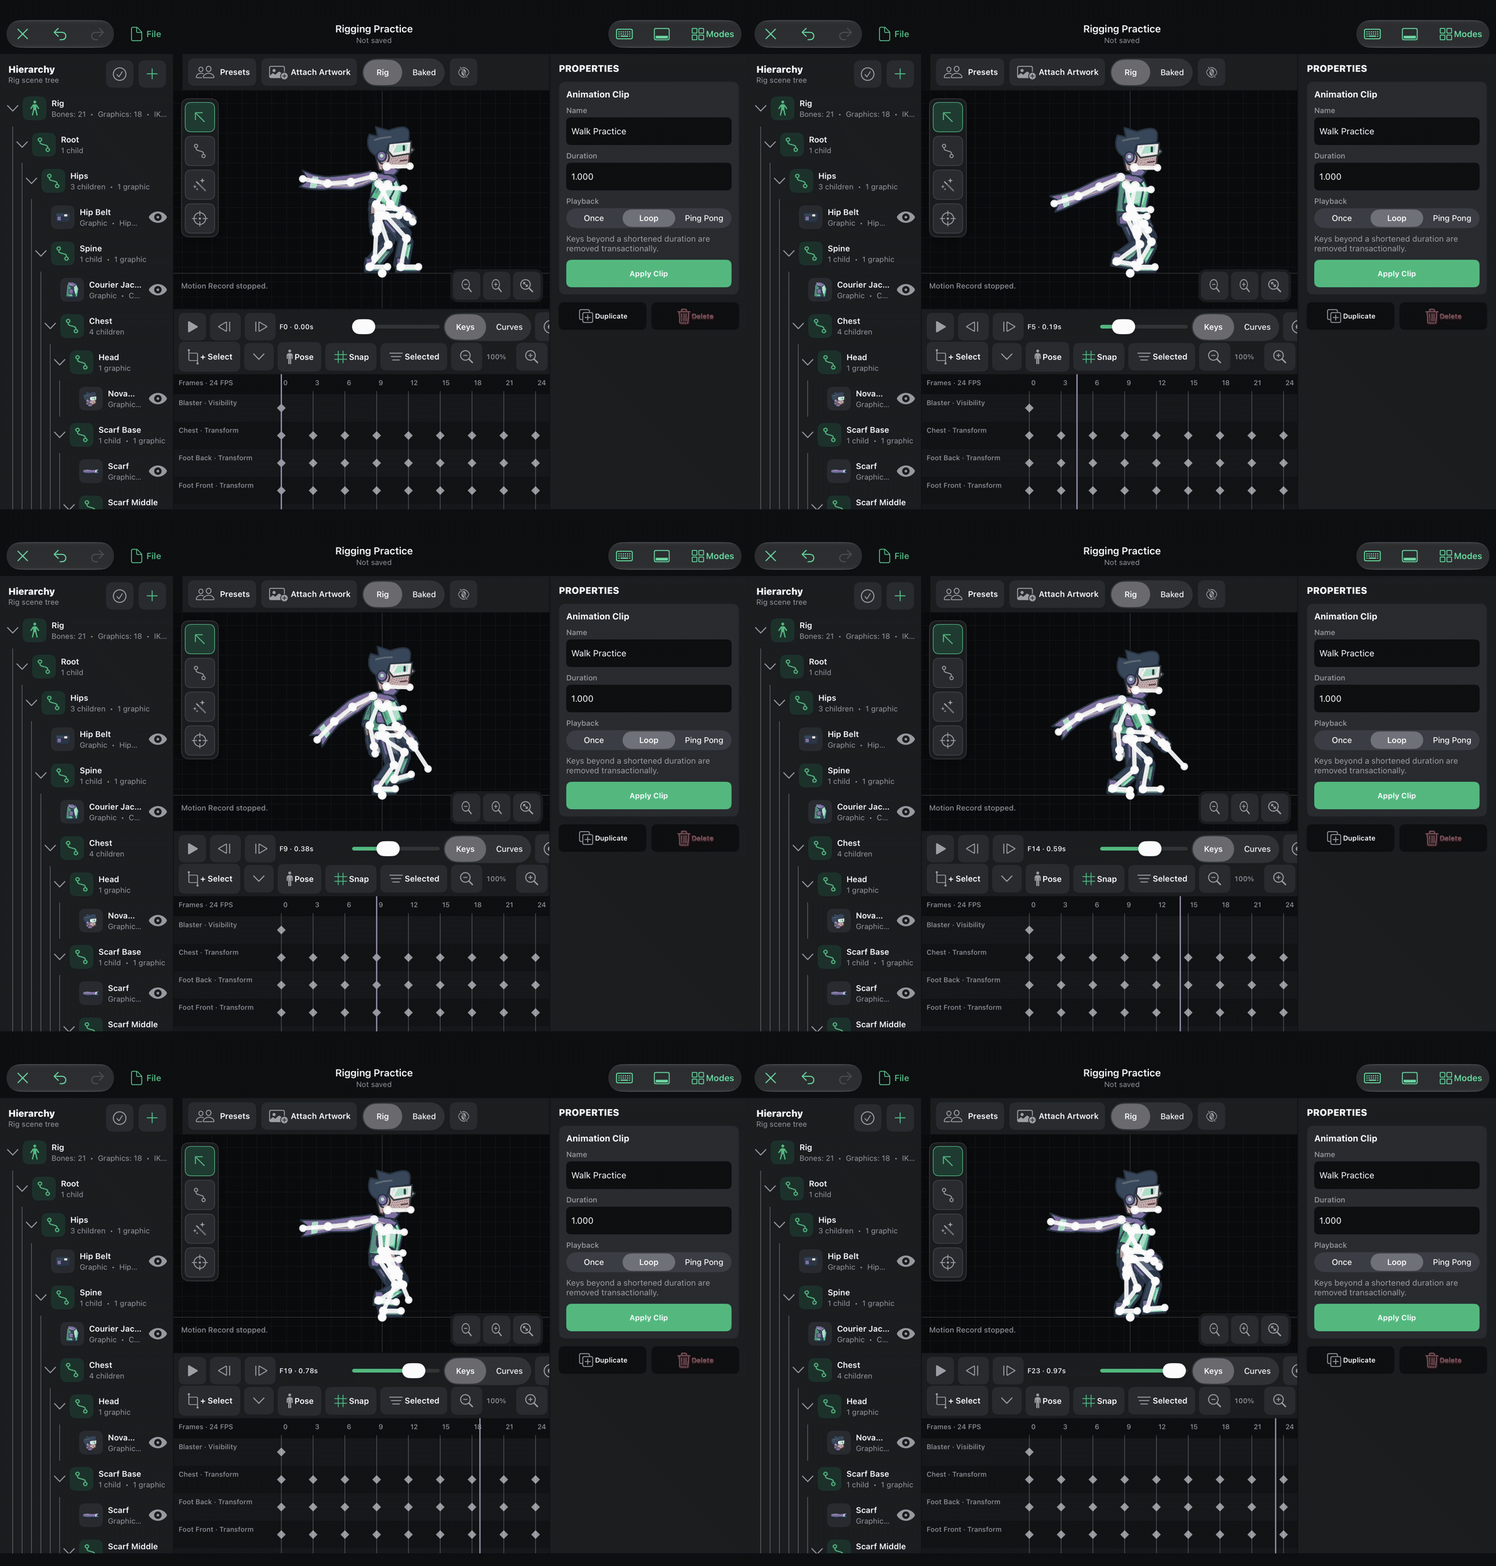
Play several loops with bones visible, then use H to hide them. Judge the graphics as a player will see them.
- Watch each planted foot independently. Does it stay at ground height?
- Check that the returning foot clears the supporting leg.
- Look for a jump from frame 24 back to frame 0.
- Check the head and hands for sudden angle changes.
- Check the front/back order of the arms, torso, and scarf.
- Confirm the Root stays in place.
This is a practical first cycle with eight main poses and a closing pose. You can add intermediate keys wherever the movement needs more control. More keys are useful when they solve a visible problem; they are not a substitute for a readable pose or well-timed step.
Numeric guide for the pictured walk
The values below reproduce the new practice clip. Start with the legs and hips, then add arms, torso, and scarf. All translations other than Hips Y keep Nova's original setup values; all scales remain 1. Frame 24 repeats frame 0.
Hips
| Bone / field | F0 | F3 | F6 | F9 | F12 | F15 | F18 | F21 |
|---|---|---|---|---|---|---|---|---|
| Hips Y | 62.0 | 59.8 | 62.0 | 64.2 | 62.0 | 59.8 | 62.0 | 64.2 |
| Hips rotation | 0.0 | 1.0 | 1.4 | 1.0 | 0.0 | -1.0 | -1.4 | -1.0 |
Legs and feet
| Bone / field | F0 | F3 | F6 | F9 | F12 | F15 | F18 | F21 |
|---|---|---|---|---|---|---|---|---|
| Thigh Front | -48.2 | -50.5 | -62.6 | -75.7 | -82.6 | -89.9 | -60.9 | -37.9 |
| Shin Front | -53.0 | -66.9 | -61.2 | -50.2 | -51.4 | -50.9 | -93.1 | -84.0 |
| Foot Front | 101.2 | 116.4 | 122.3 | 124.8 | 134.1 | 135.2 | 143.3 | 138.7 |
| Thigh Back | -71.3 | -79.0 | -51.5 | -33.6 | -46.7 | -43.0 | -52.3 | -64.4 |
| Shin Back | -58.7 | -62.1 | -97.1 | -78.1 | -40.7 | -61.0 | -59.5 | -53.0 |
| Foot Back | 130.0 | 133.5 | 135.1 | 126.6 | 87.4 | 105.1 | 113.2 | 118.4 |
Arm swing
| Bone / field | F0 | F3 | F6 | F9 | F12 | F15 | F18 | F21 |
|---|---|---|---|---|---|---|---|---|
| Upper Arm Front | -117.8 | -109.0 | -87.6 | -66.0 | -57.0 | -65.8 | -87.3 | -108.8 |
| Upper Arm Back | -58.3 | -66.9 | -87.6 | -108.1 | -116.6 | -107.9 | -87.3 | -66.7 |
Secondary motion: torso and head
| Bone / field | F0 | F3 | F6 | F9 | F12 | F15 | F18 | F21 |
|---|---|---|---|---|---|---|---|---|
| Spine | -2.6 | -2.6 | -2.6 | -2.6 | -2.6 | -2.6 | -2.6 | -2.6 |
| Chest | 0.6 | -0.5 | -1.3 | -1.4 | -0.6 | 0.5 | 1.3 | 1.4 |
| Head | 2.7 | 2.0 | 1.3 | 1.0 | 1.4 | 2.2 | 2.9 | 3.1 |
Secondary motion: elbows and hands
| Bone / field | F0 | F3 | F6 | F9 | F12 | F15 | F18 | F21 |
|---|---|---|---|---|---|---|---|---|
| Forearm Front | 30.4 | 26.6 | 23.2 | 22.4 | 24.6 | 28.5 | 31.8 | 32.6 |
| Hand Front | -3.7 | -6.4 | -9.4 | -10.9 | -10.0 | -7.3 | -4.4 | -2.9 |
| Forearm Back | 24.6 | 28.5 | 31.8 | 32.6 | 30.4 | 26.6 | 23.2 | 22.4 |
| Hand Back | -10.0 | -7.3 | -4.4 | -2.9 | -3.7 | -6.4 | -9.4 | -10.9 |
Secondary motion: scarf
| Bone / field | F0 | F3 | F6 | F9 | F12 | F15 | F18 | F21 |
|---|---|---|---|---|---|---|---|---|
| Scarf Base | 196.2 | 203.0 | 209.1 | 210.9 | 207.3 | 200.5 | 194.5 | 192.7 |
| Scarf Middle | -10.5 | -4.1 | 4.7 | 10.7 | 10.5 | 4.1 | -4.7 | -10.7 |
| Scarf Tip | -14.1 | -11.3 | -1.8 | 8.7 | 14.1 | 11.3 | 1.8 | -8.7 |
All rotation rows use degrees. The scarf base passes 180° naturally: keep the listed values rather than changing an angle to its negative equivalent, which could introduce an unwanted full turn between keys.
For the first pass, concentrate on the hips, legs, feet, and upper arms. The secondary-motion tables reproduce the pictured torso, hands, and scarf after the basic walk works.
Turn the exercise into your own walk
Try one change at a time and use Save As to keep versions:
- Cautious walk: shorten the stride and reduce the arm swing. Keep the feet planted longer.
- Confident walk: lift the chest slightly and make the opposing arm swing clearer.
- Heavy character: make the down pose more pronounced, then give the recovery enough time.
- Run: build a separate clip. A run needs different contact timing and an airborne phase, not just a faster playback rate.
If you want a quicker starting point after completing the exercise, duplicate the included Walk clip or copy its poses into a new clip, then edit the result. That is a useful production workflow once you understand what each pose contributes.
Save the project. When you are ready to use the animation in a game, export the desired full clip through File → Export Game Asset and check its baked preview. Exporting does not replace the editable Walk Practice keys.