

Art Studio: Body Parts and Animation Blending
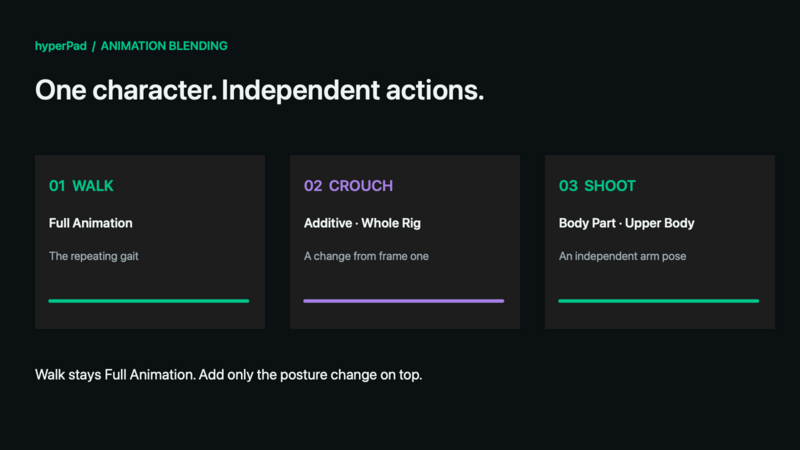
Make a character walk while shooting, crouch while walking, or aim its head independently of its legs. A live Rigged Object combines animation clips on its skeleton during gameplay. You still select the complete character in a behaviour; Body Parts choose which bones that behaviour's animation controls.
This guide describes the live-rig update. Use a build that includes Rigged Objects. A public release date has not been assigned. Existing sprite animations keep their frame-based workflow.
Choose the right kind of asset
Save your editable Art Studio project, then use File → Export Game Asset → Rigged Object…. Place that exported asset in the scene. Saving the project alone does not refresh an existing exported asset.
A Baked Rig Animation contains complete pictures. It can play sprite cycles, but its arms and legs cannot play independent clips. Keep the Studio project when you want to change the skeleton or export a live rig later. See projects and exports.
What a Body Part means
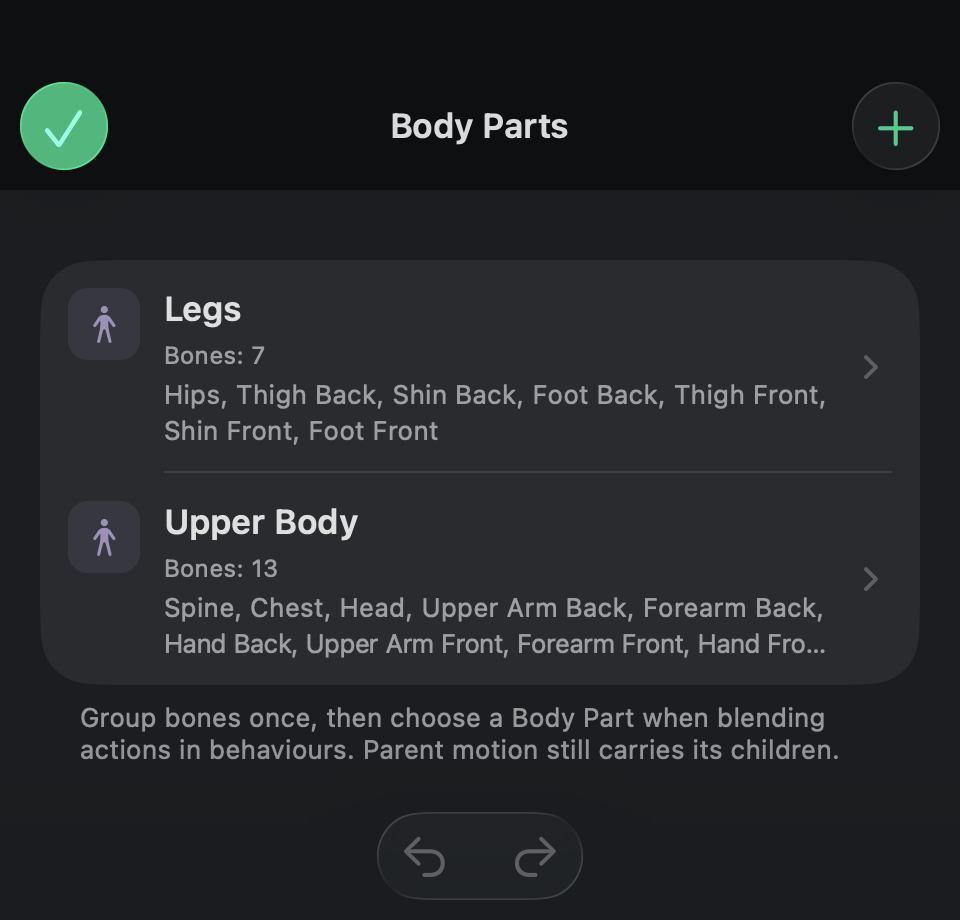
A Body Part is a named selection of bones, also called an animation mask. Upper Body might contain the spine, chest, head, both arms, hands, and weapon. Legs might contain the hips and both leg chains.
It is not a new object, collision shape, drawing layer, skin, or mesh weight. The character still moves and collides as one scene object. Get Object does not return the bones as separate objects.
Groups can overlap, and a bone can belong to more than one group. Make a new group when you need an action to have its own scope or independent playback. Two behaviours using the same mode and Body Part share a playback layer; making many behaviours does not automatically give each one a separate layer.
Are Legs and Upper Body enough?
They are a useful starting point for walking or jumping while shooting. They are not a required limit.
| Group | Useful for | Check before using it |
|---|---|---|
| Legs | Jump, Fall, or a lower-body action | Include the complete leg chains; decide whether hips should move the whole torso too. |
| Upper Body | A two-handed shot, attack, or reload | Include the arm chains and relevant weapon bones. |
| Front Arm / Back Arm | Independent one-handed actions | Include upper arm, forearm, hand, and held-item controls. |
| Head | Looking, nodding, or facial motion | It still follows chest and neck movement. |
| Torso | Leaning or breathing | Moving a torso parent carries the head and arms. |
| Tail / Wings / Turret | Creatures and vehicles | Choose your rig's actual bones, not a humanoid naming convention. |
Start with the groups your game needs. Add more when an action should animate independently. A separate Head group, for example, can keep a look animation independent of a shooting arm.
Add or edit Body Parts in Art Studio
- Open the editable Studio project and choose Modes → Rig & Animate.
- Choose Body Parts above the canvas. The list shows each group's name, bone count, and member preview.
- Choose + to add a group, or tap an existing group to edit it.
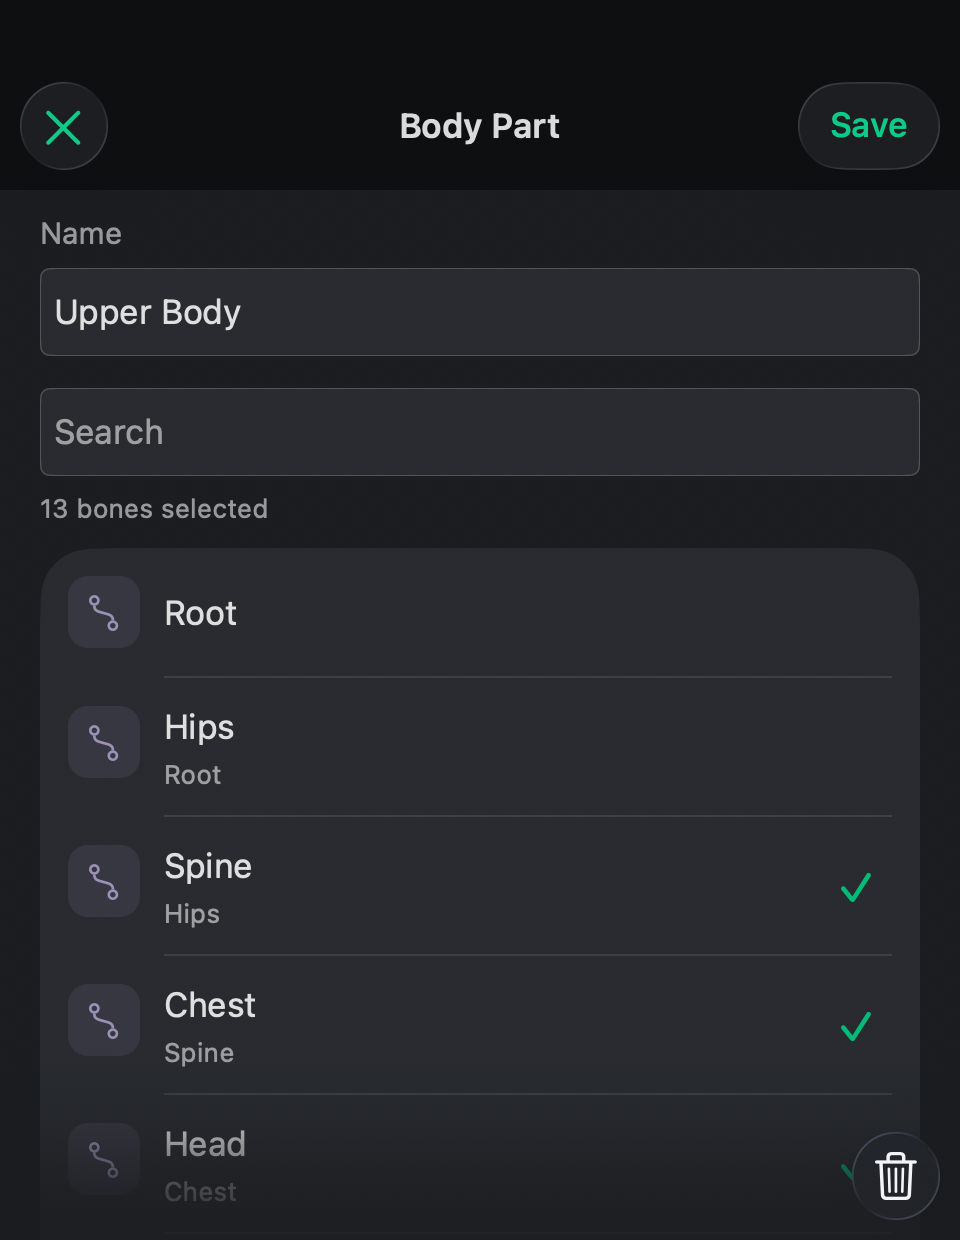
- Enter a clear, unique name, such as
Front Arm. - Search for bones and tap the rows you want. The selected count updates as you work. A group's membership is explicit: choosing a parent alone does not automatically select all its children.
- To include a whole chain, hold a bone row on touch, or use its secondary-click menu with a pointer, then choose Select Branch. Review the selected descendants.
- Choose Save. A group needs a name and at least one valid bone. Cancel leaves the original group unchanged.
- Save the Studio project, then export or update the Rigged Object so the game's asset receives the new groups.
- Return to the behaviour's animation picker and choose the group.
Use ⌘N to create a group from the list, ⌘F to search while editing, ⌘S to save the group, and Escape to cancel. The list's Undo/Redo controls and ⌘Z / ⇧⌘Z undo or redo saved authoring changes.
Renaming a group keeps its identity. Replacing only the artwork can reuse the groups. Removing bones changes their membership; a group with no remaining bones is removed. Review animation selections after deleting groups, changing the skeleton, or replacing a runtime asset. Copying a name such as “Legs” onto an unrelated rig does not make its clips or bone IDs compatible.
Choose a playback mode
Open a rig animation slot in Play Animation, Joystick Controlled, Jump, or another behaviour that selects an animation. Choose a clip, then use the three buttons near the top of its settings.
On a wide picker, select a clip to see a small, automatic looping preview above the list. Narrow pickers keep the preview hidden to show more cycles. Tap a cycle’s play icon to reveal it, and use its close button to restore the list space. Try different clips to compare their motion; nothing is saved until you choose Select Animation. Even one-shot clips repeat here so you can inspect them. This does not change how they play in your game. The preview shows the selected clip on its own, not its combination with other behaviours. Test that combination in your scene.
On a wide screen, the clip list and settings appear together. On a compact screen, use Animation to select a clip and Playback to configure it. Next takes you to Playback; Select Animation confirms the complete choice. If it is disabled, read the validation message above it.
| Mode | What it does | Typical use |
|---|---|---|
| Full Animation | Plays the main animation on the rig. | Idle, Walk, Run, or an action that takes over the complete character. |
| Body Part | Uses the clip's pose on the selected group's bones, leaving other local bone poses to the underlying animation. A valid group is required. | Shoot on Upper Body; Jump and Fall on Legs. |
| Additive | Adds changes measured from the clip's first frame over the pose underneath. Choose Whole Rig or a particular Body Part. | Crouch over Walk, recoil, breathing, or a small lean. |
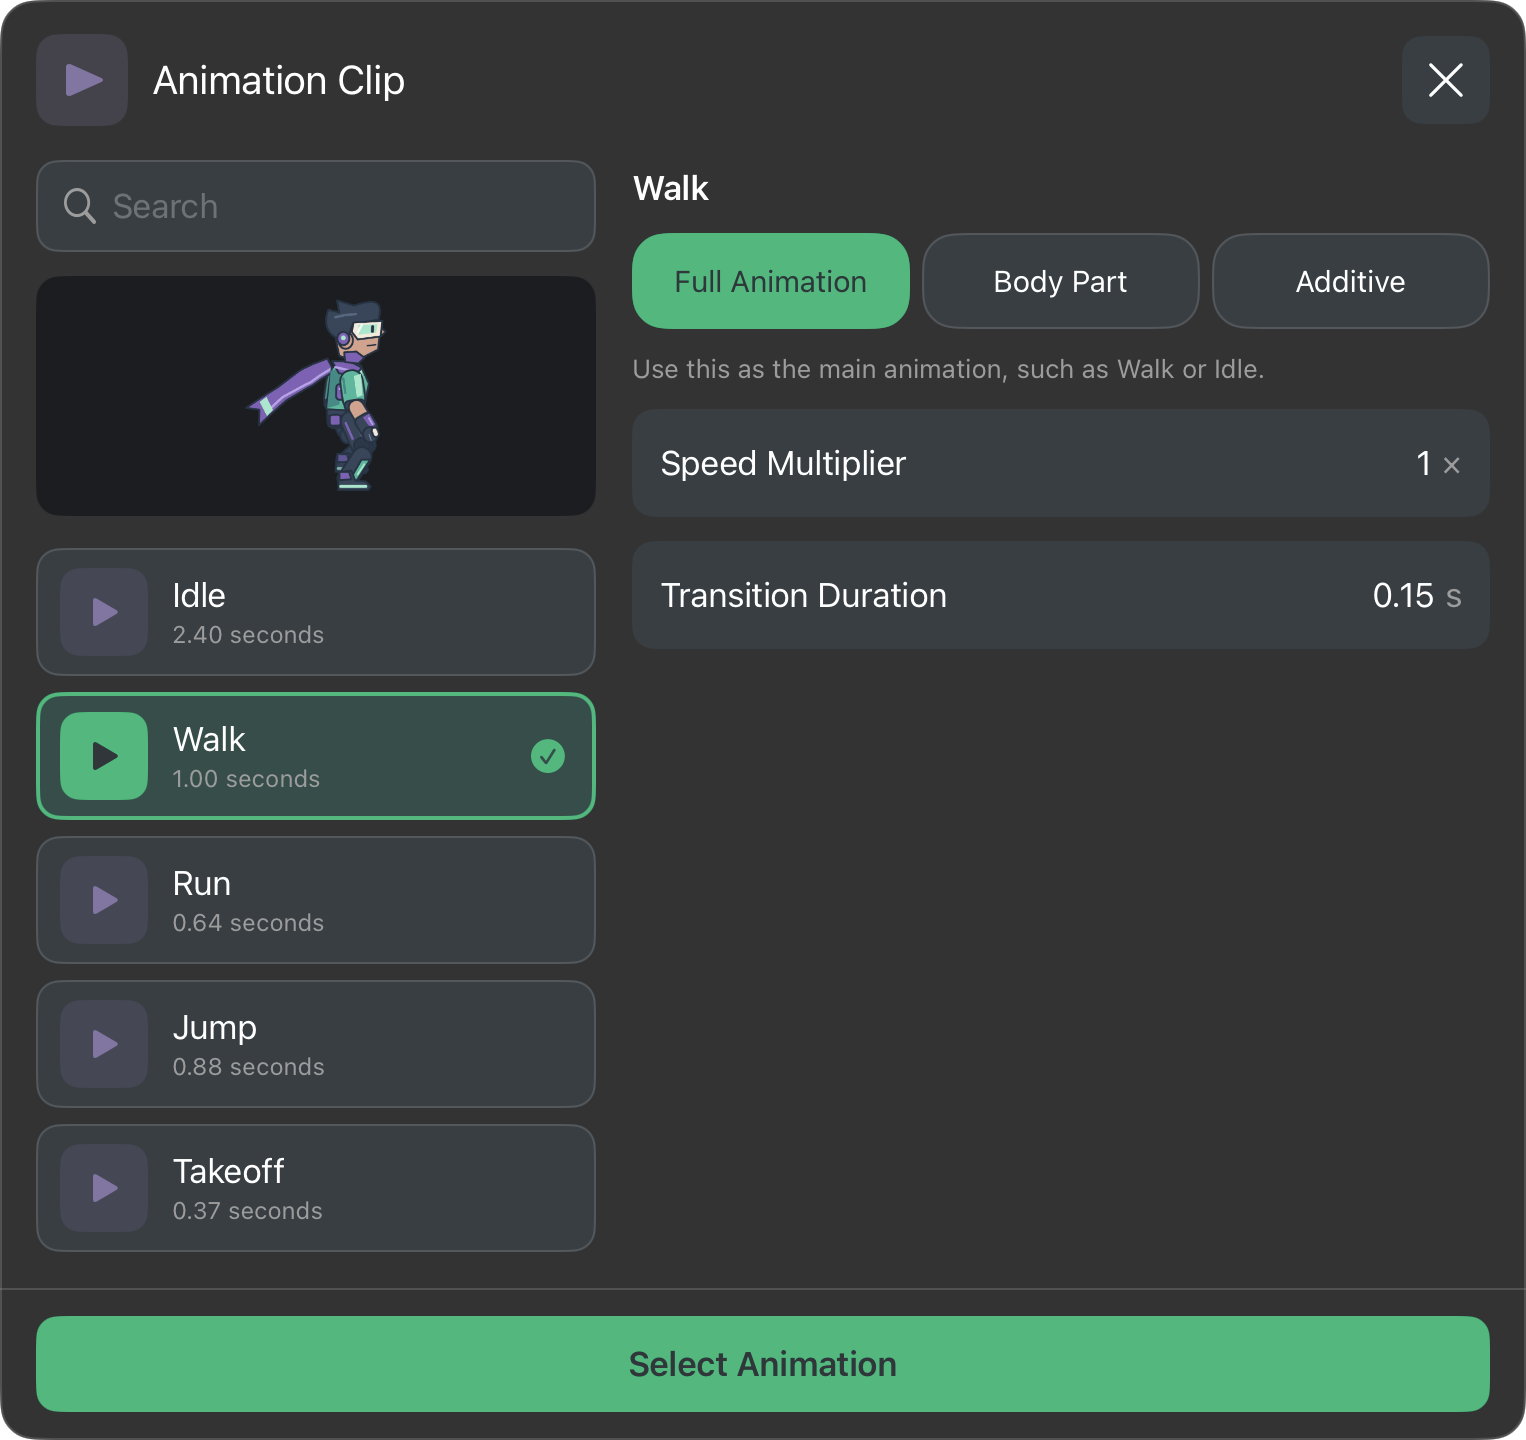
Speed Multiplier changes how quickly this selected clip runs: 1× is its authored speed, 2× is twice as fast, and 0.5× is half speed. Rig clips use time-based interpolation, so the sprite-frame FPS control is not shown for them.
Transition Duration controls how long the change between animations or layer influence takes. Try 0.15 seconds for a soft entry into a posture. Use a shorter value for a quick reaction. A transition smooths a change; it is not the same thing as playing independent body parts simultaneously.
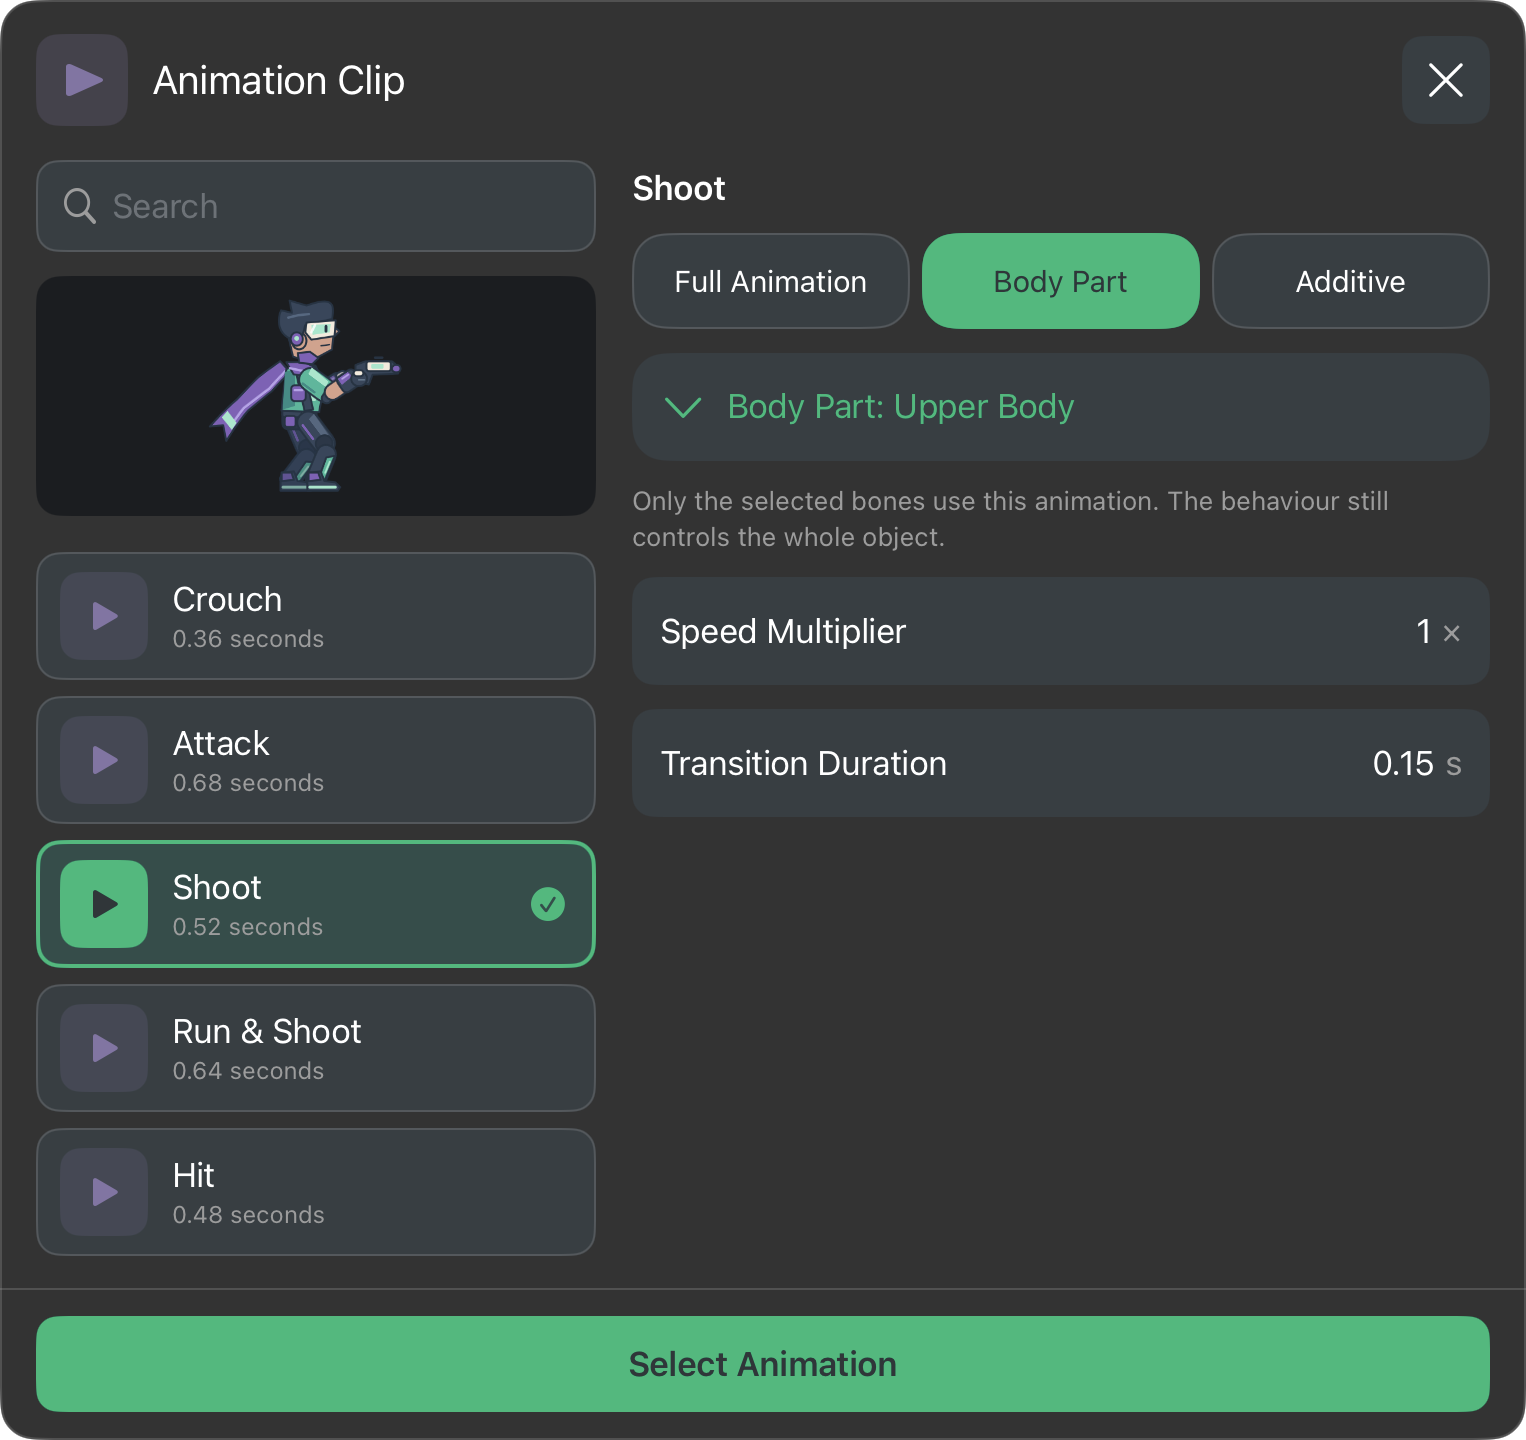
Why Walk is Full Animation and Crouch is Additive
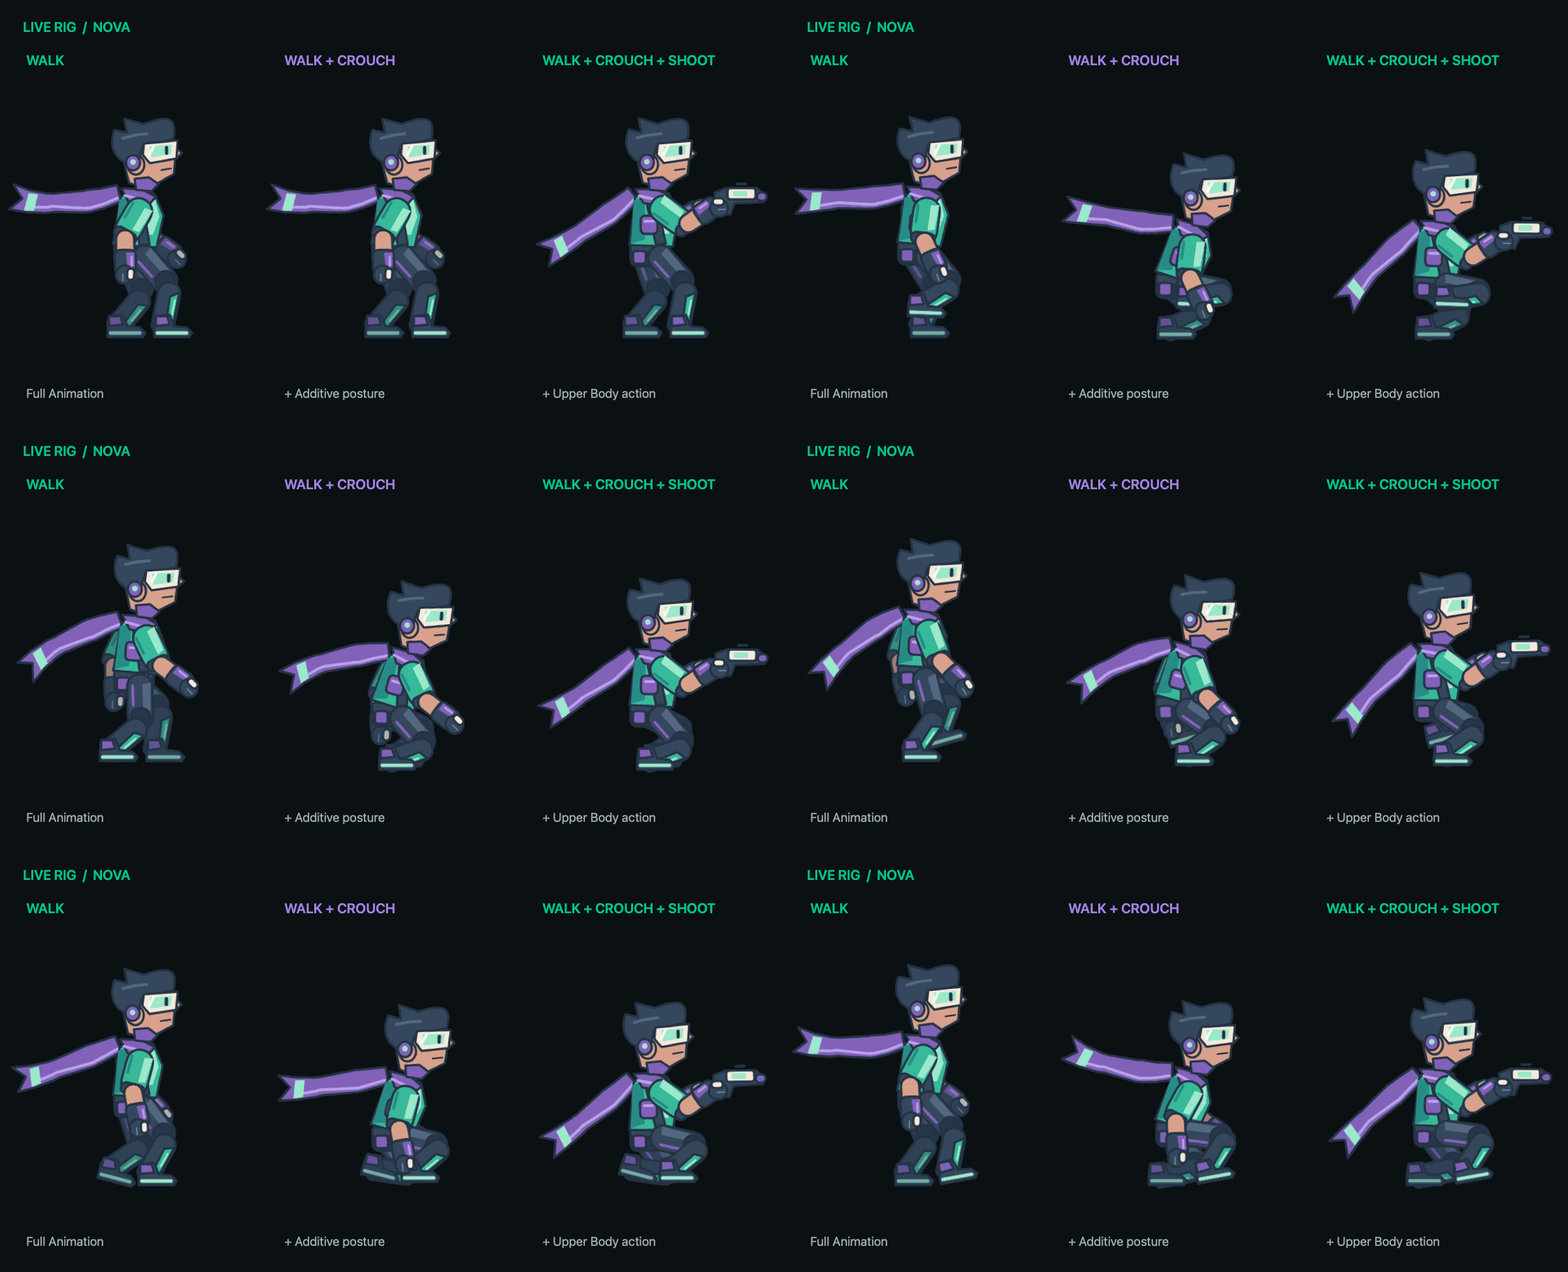
Walk supplies the repeating footwork. Crouch supplies a change in posture: hips lower and legs bend. The desired result is the walking motion plus the crouch offset.
Set Left and Right to Walk → Full Animation. Set Down to Crouch → Additive → Whole Rig. Making both clips Full Animation makes them compete for the main animation. Making Walk additive treats its movement as an offset from its first frame instead of using it as the foundation. That is a different result and is not the intended setup here.
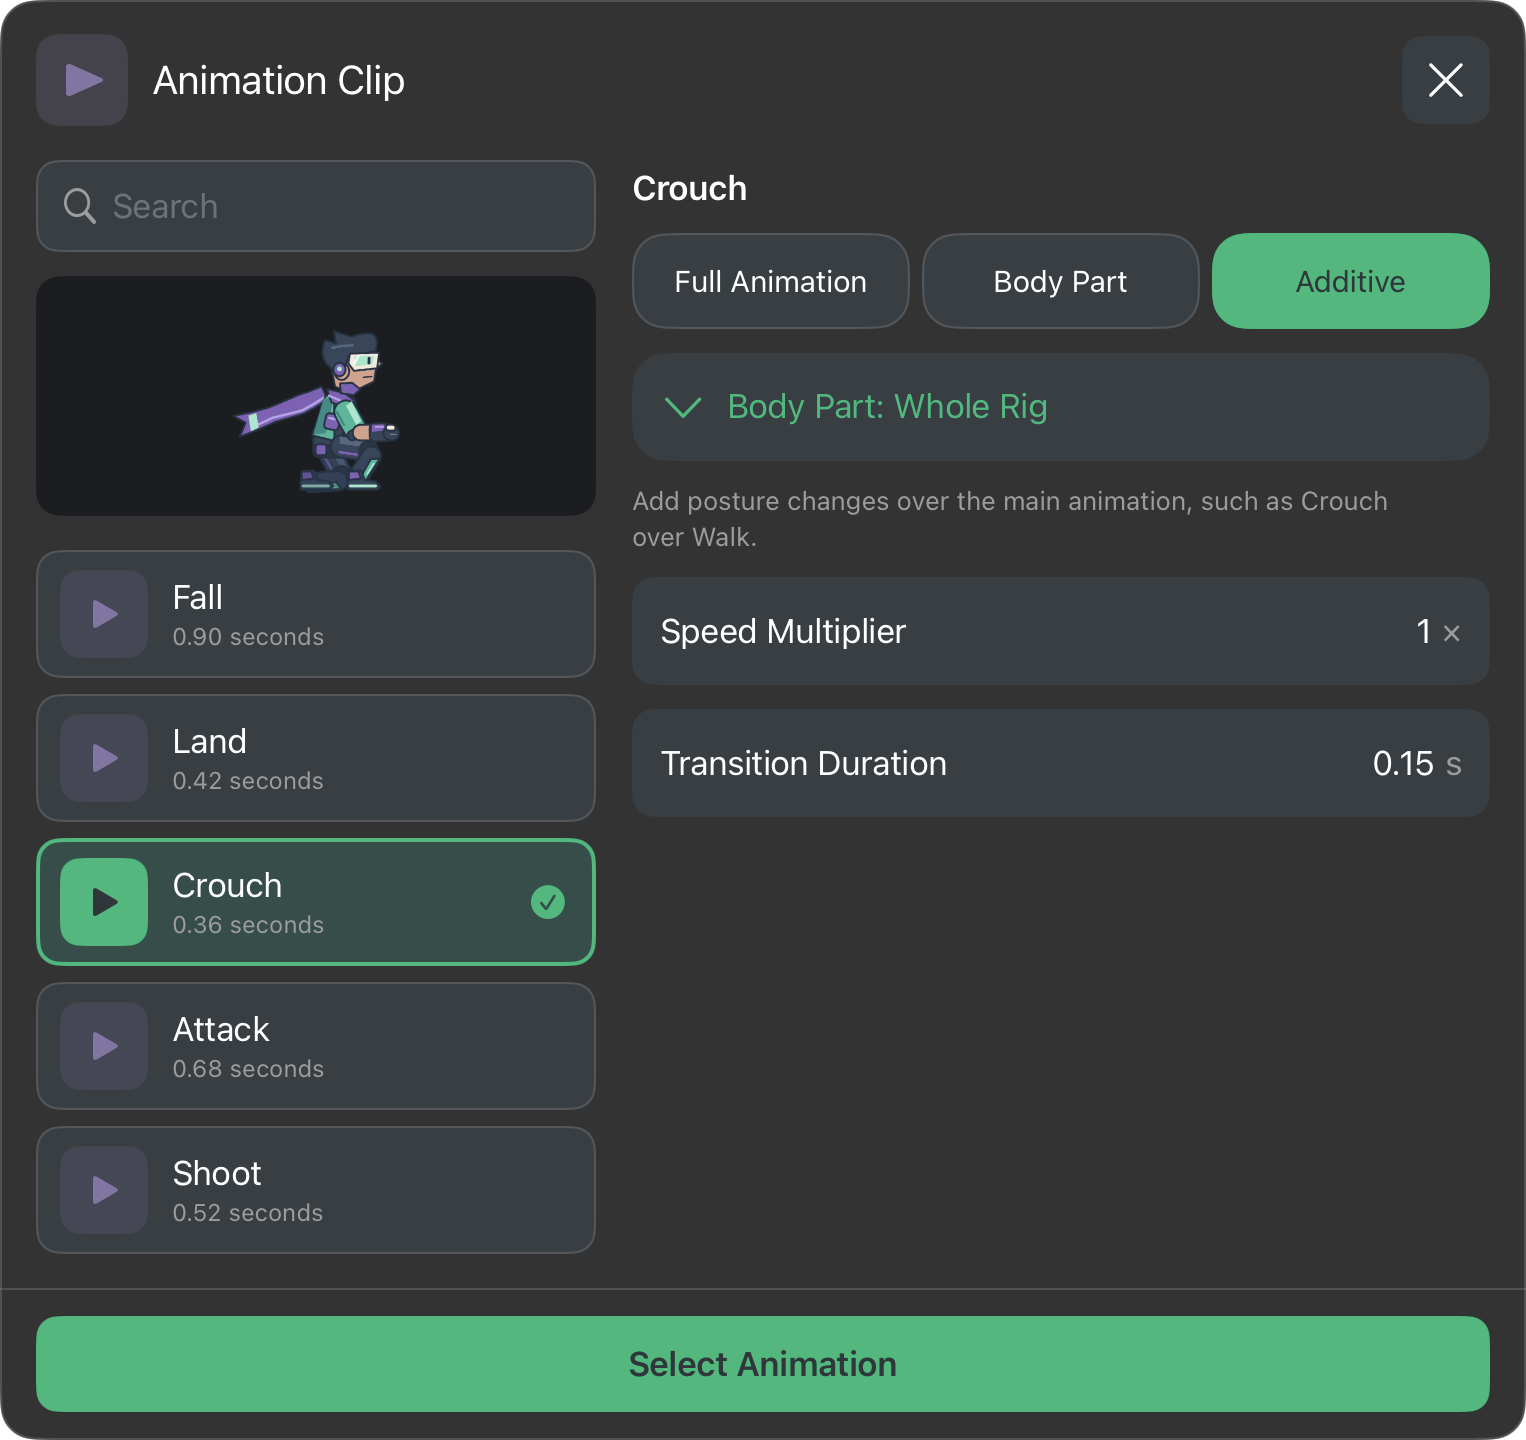
The first-frame rule
Additive compares the clip's current pose with its own first frame, then applies that difference over the underlying animation. For a translation, think current crouch position − first-frame position. Rotations add an angular change, and scale applies a relative ratio.
Author an additive Crouch with a neutral first frame and a later crouched pose. If the clip starts crouched and never changes, its difference from frame one is zero: it adds no crouching. Do not fix this by enabling additive on Walk too. Fix the Crouch clip's reference and poses instead.
For a held joystick crouch, use a Once clip. It reaches the crouched pose and holds while Down remains pressed. A Loop clip repeats while held and can make the character repeatedly stand and crouch. Releasing Down fades only the additive layer using its transition time.
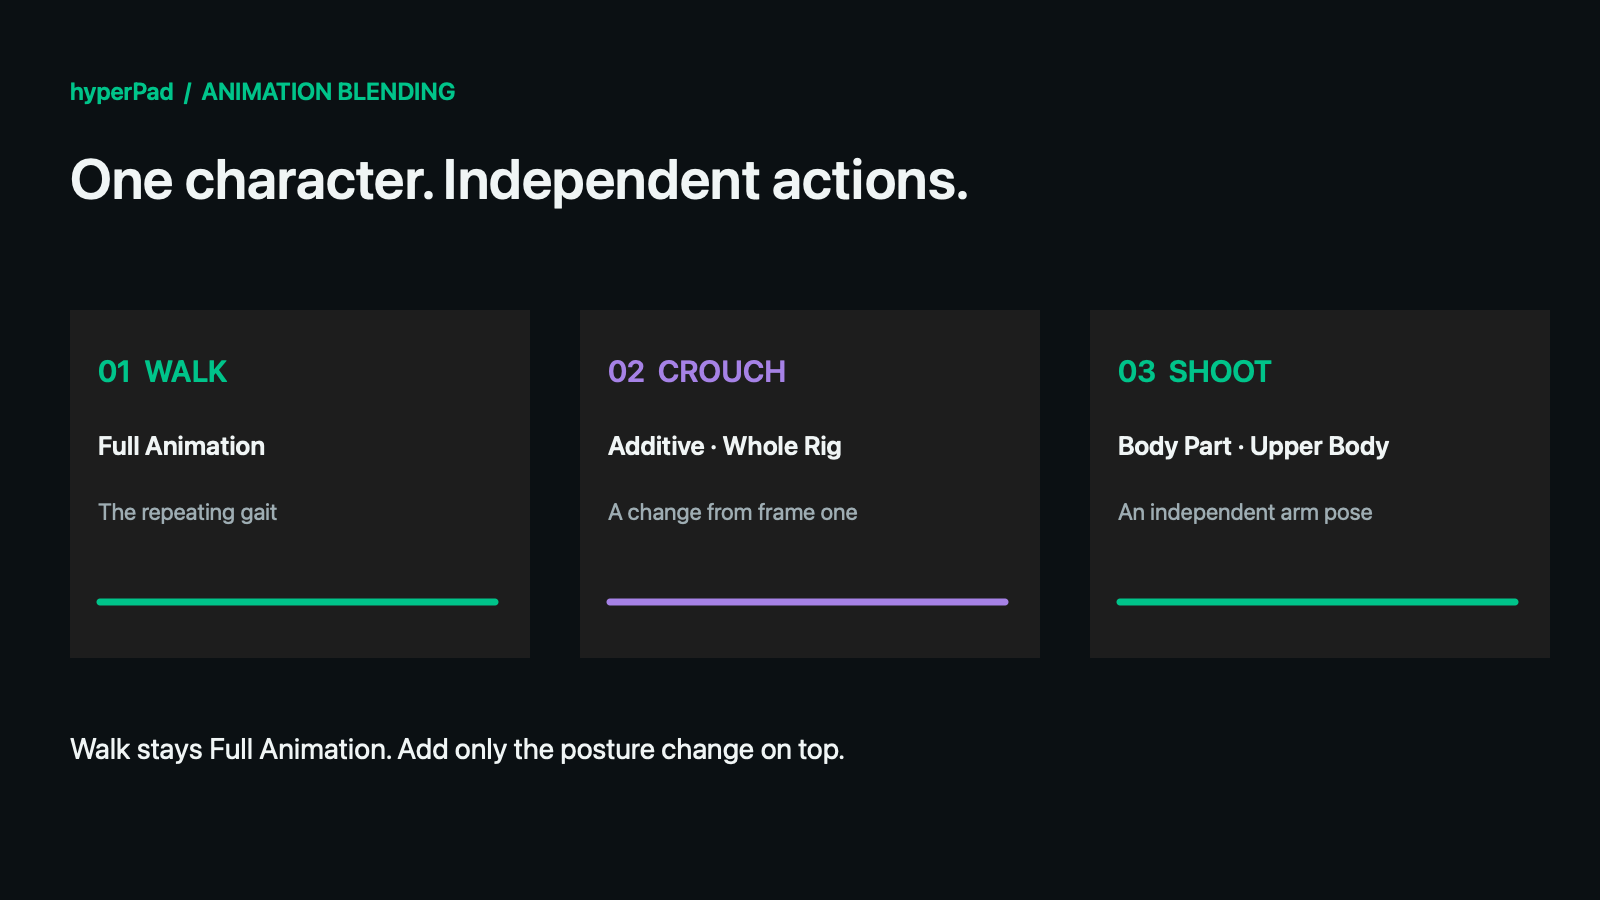
Additive does not automatically repair foot sliding, solve contacts, or retarget an unrelated skeleton. Preview the combination at gameplay speed. Strong crouches may need an authored crouch-walk clip for exact footwork. Small, deliberate offsets tend to combine more predictably.
Rules for combining actions
- Give the character a base. Idle or Walk normally uses Full Animation. In scene properties, choose Idle and enable Start on Play to animate as soon as the scene starts.
- Use Body Part to replace a local pose. A shooting arm should use its authored aiming pose rather than add a second arm swing onto Walk.
- Use Additive for a relative change. Crouch, lean, and recoil can be useful offsets when authored with a suitable first frame.
- Check priority. A layer below the active main animation's priority does not override it. Equal-priority body-part layers can affect the main animation; higher-priority overlaps take precedence. Use equal movement/action priorities to begin, then raise a specific interruption such as a hit reaction deliberately.
- Check overlap. The same mode and Body Part share a layer. Different groups can still overlap on the same bones. At equal priority, additive posture is applied before Body Part replacement, so a shooting action can retain its arm pose. Other equal-priority overlaps depend on activation order; do not rely on accidental ordering for an important pose.
- Remember parents. Lowering the hips carries the torso, even if the torso bones are outside Legs. Rotating the chest carries the arms. A mask limits local animation channels; it does not detach a limb from its parent.
- Check completion. Play Animation's Loop and Restore settings still apply. Additive is not a universal “hold until released” switch. Joystick, jump, and shoot controllers manage the layers they own for their particular action.
Artwork, meshes, and IK
Body Part mode also scopes associated artwork and mesh animation by the artwork's bone. Additive combines compatible transform, mesh-deformation, and IK offsets; it does not add visibility, colour, artwork swaps, or draw-order changes. Those remain supplied by the underlying animation.
For a masked IK animation, include the complete solved bone chain in the Body Part. A partial chain is not enough. Procedural bone/IK controls run after animation composition, so a persistent override may hide the effect of an animation. Use Clear Rig Overrides when handing control back to clips.
Custom and dynamic objects
For a custom rig, create the Body Parts yourself. hyperPad does not guess which bones are legs from their names. A sample's groups can be reused when its skeleton is retained, but every changed group must reach the exported runtime asset.
If the behaviour's object is supplied dynamically by an Object ID, choosing an animation first asks for a reference asset in the Asset Library. That asset determines whether you see sprite frames or rig clips. The dynamic object input stays dynamic. At runtime it must resolve to a compatible object using that rig asset and clip/group identities; choosing a reference does not convert arbitrary objects or match clips by name.
Troubleshooting
| Symptom | Check |
|---|---|
| Select Animation is disabled | Body Part mode needs a valid group. Choose one below the mode buttons, or create it in Studio and update the live asset. |
| Crouch replaces Walk | Keep Walk Full Animation and select Additive only for Crouch. |
| Crouch has no effect | Inspect its first frame, its actual changes, priority, and any active overrides. A static crouched clip has no additive delta. |
| Crouch repeatedly bobs | Use a Once crouch clip for the held joystick posture. |
| Shoot changes the legs | Choose Body Part and a group containing only the intended upper-body bones. Check parent motion. |
| Jump interrupts shooting | Use Legs for both Takeoff and Fall, and Upper Body for Shoot. Check their priorities. |
| Idle starts only after moving | Enable Start on Play in the scene rig's properties. |
| Newly created groups are missing | Save the source, update the exported Rigged Object, then reopen its animation picker. |
| Pausing one action pauses everything | Pause/Resume/Stop and Set Animation State address the object's playback as a whole. They are not per-Body-Part controls. |
| Crouching still hits a low ceiling | Animation does not resize the object's collision shape. Configure gameplay collision separately. |
Continue with Walk, Crouch, Jump, and Shoot together for a complete setup, or Rig behaviour reference for manual bone, IK, artwork, and follower controls.