

Art Studio Tutorial: Walk, Crouch, Jump, and Shoot Together
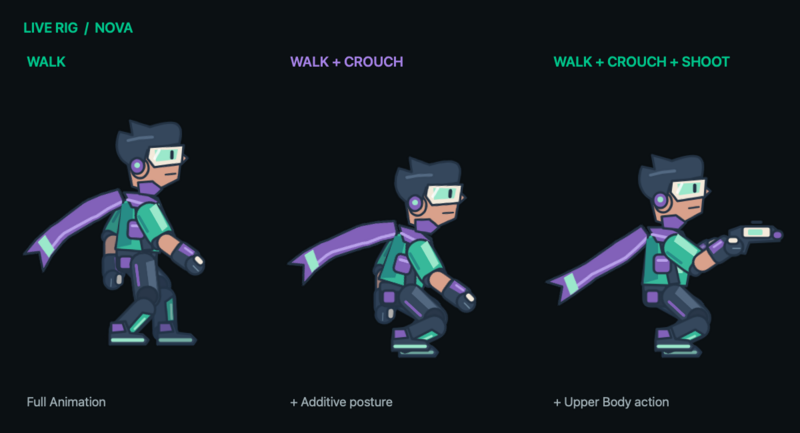
Build a platform character whose legs keep moving while its upper body fires, and whose crouch adds a posture change over its walk. This tutorial uses Nova · Platformer Courier from Art Studio so the artwork, clips, and skeleton start together.
Requires the live-rig update and a build with Rigged Objects. A release date has not been assigned. A baked sprite animation cannot perform the independent bone blending shown here.
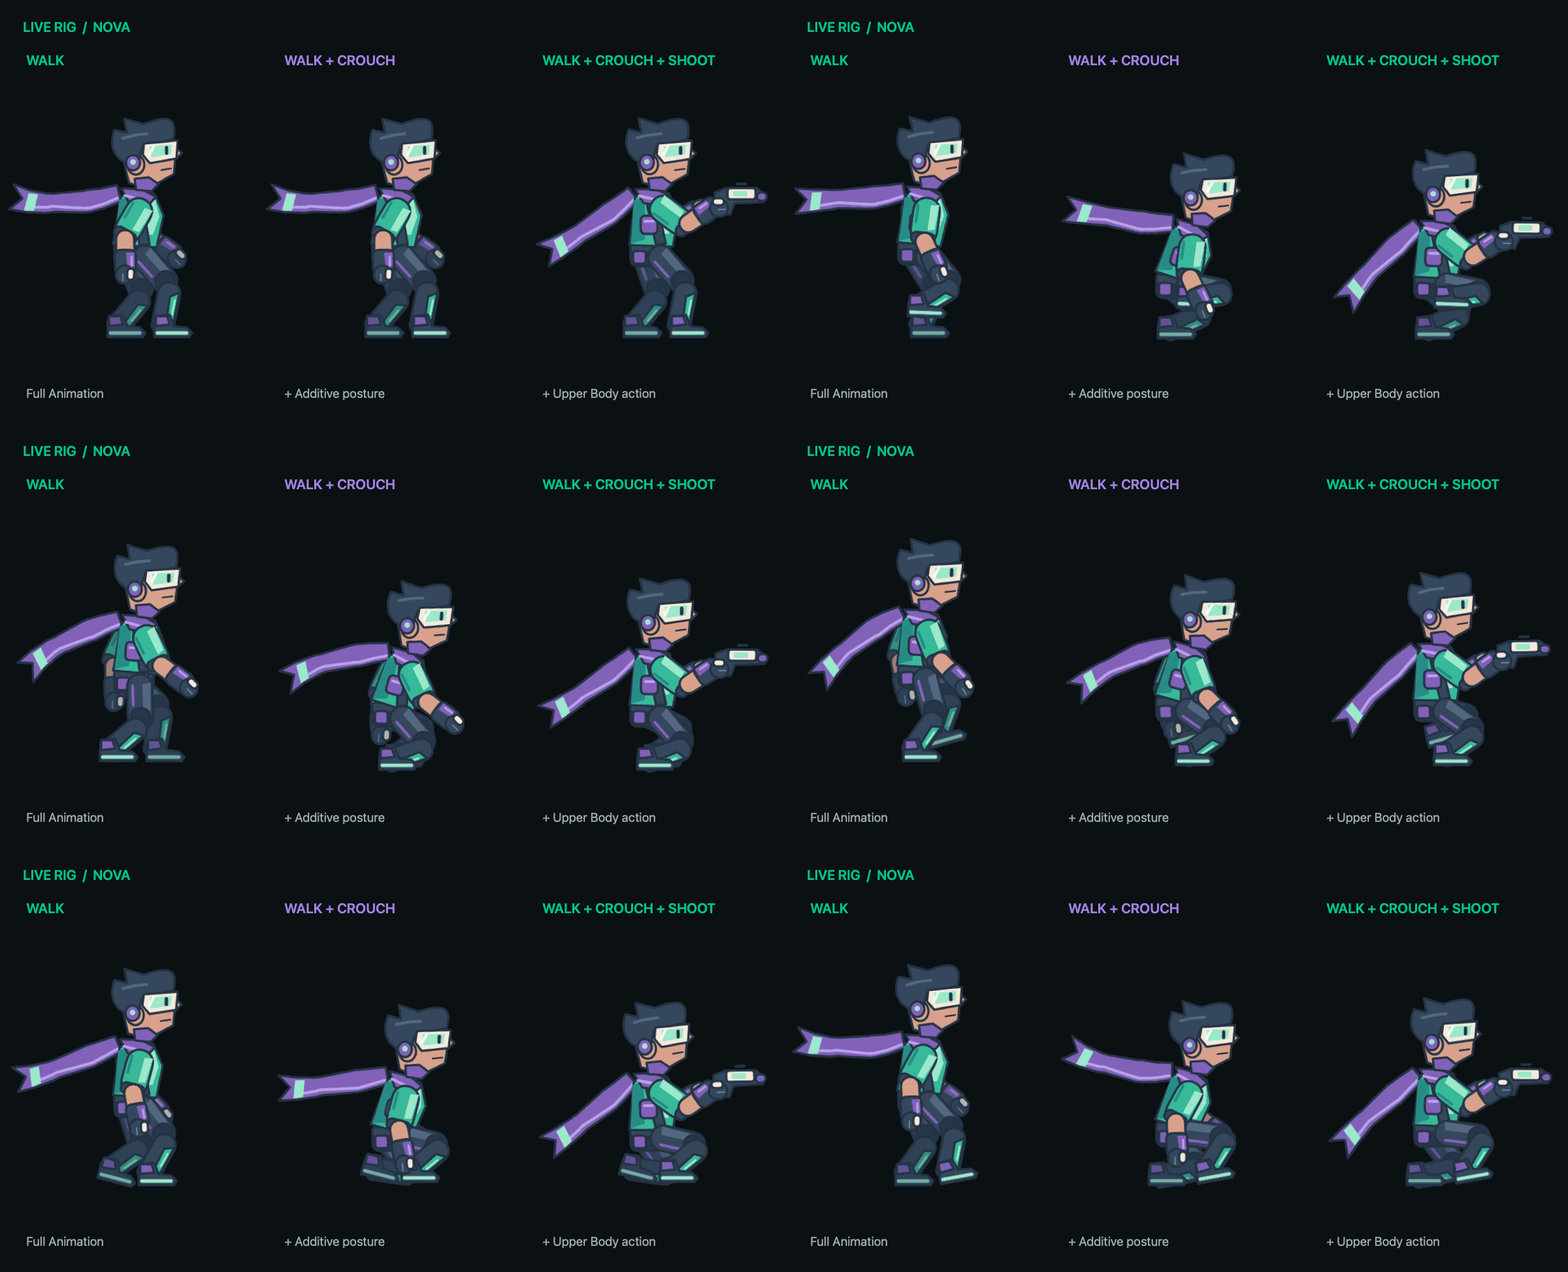
1. Prepare the source character
- Create an Art Studio project with Bones / Rig, or switch to Modes → Rig & Animate.
- Open Presets, choose Nova · Platformer Courier, and choose Use Preset. Save a separate practice project if you already have a character.
- Preview Idle, Walk, Crouch, Shoot, Takeoff, and Fall. Hide bones when checking the artwork.
- Open Body Parts and inspect Legs and Upper Body. Legs should contain the intended lower-body chain; Upper Body should contain the torso and shooting chains.
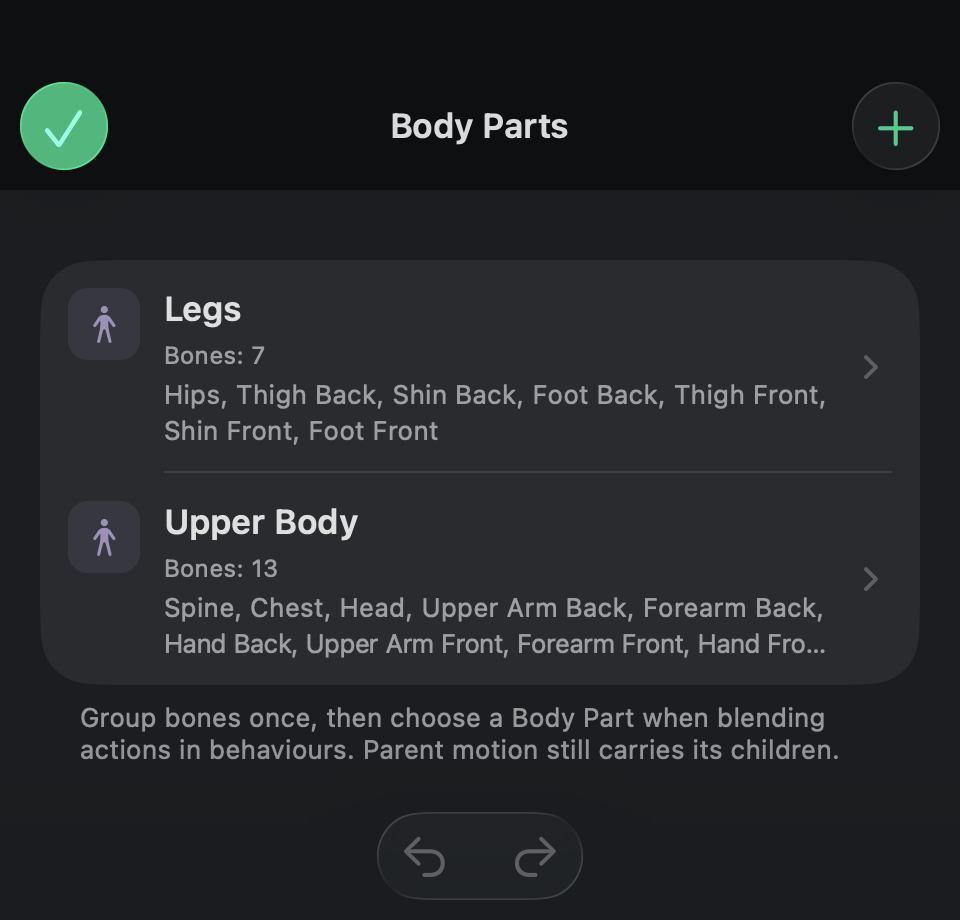
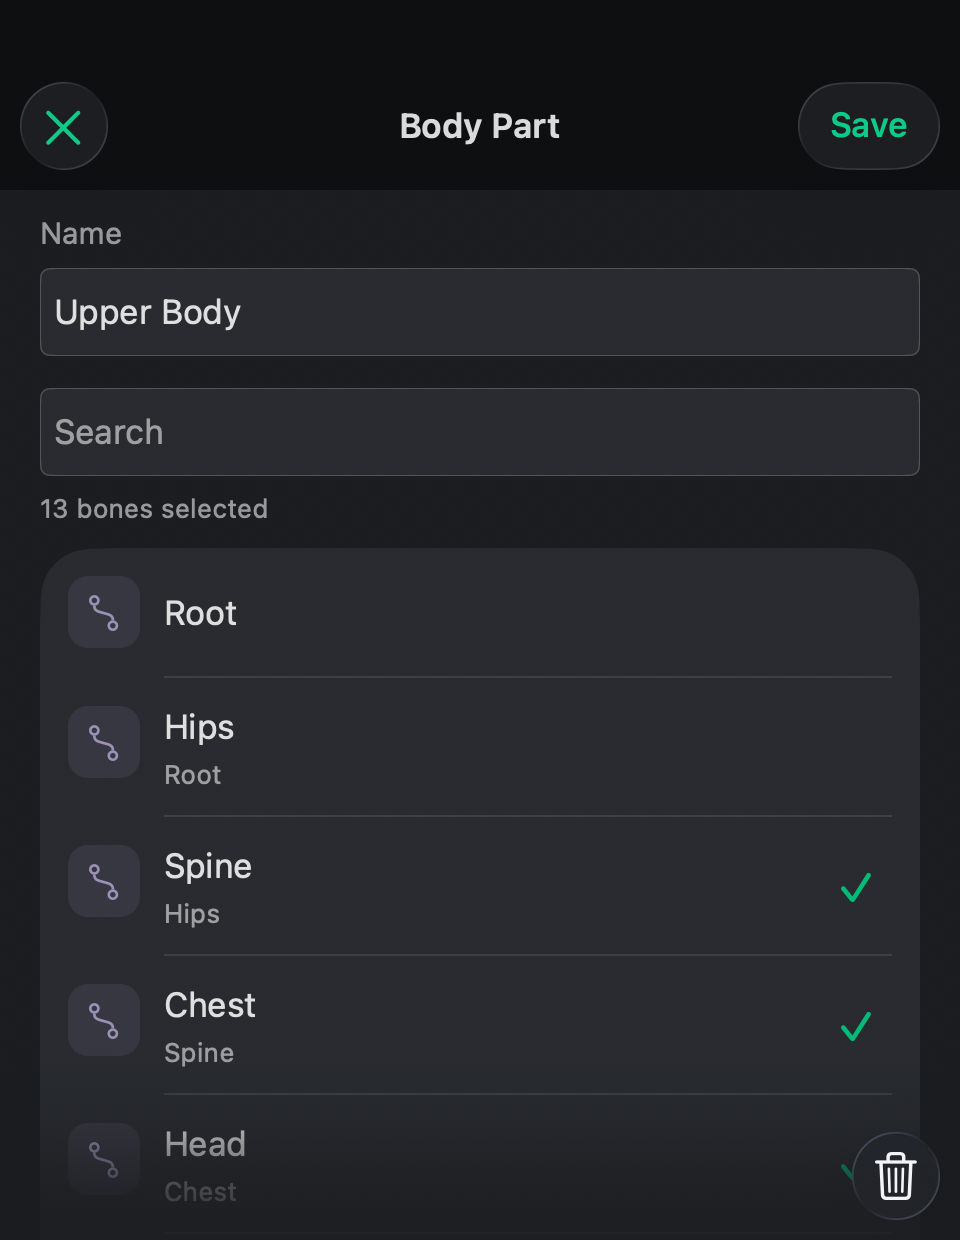
For your own skeleton, use +, give the group a name, and select its bones. Hold or secondary-click a bone and choose Select Branch to include its descendants. Save the group. The Body Parts guide explains membership, parent motion, and optional arm/head groups.
2. Export a live rig and place it
- Save the Studio project.
- Choose File → Export Game Asset → Rigged Object….
- Include Idle, Walk, Crouch, Shoot, Takeoff, and Fall in Animation clips. Start with Fit Artwork for automatic logical bounds.
- Export to the Asset Library. Select the asset labelled Rigged, add it to the dock, and drag it into the scene.
- Configure the character as a physics object on a solid platform. Inspect its collision shape and placement; the graphic's animated limbs do not create separate colliders.
- In its Rigged Object properties, choose Animation: Idle, Speed: 1×, and turn on Start on Play.
- Run the scene briefly. The character should idle before you touch a control.
The editable Studio Project opens for editing; the exported Rigged asset is the one you place. Re-export after changing groups or clips. See saving and exports.
3. Make Walk the main movement animation
Add Joystick Controlled. Object A is the joystick; Object B is the character. Enable Play Animations and open Custom Animations.
For both Left and Right, choose Walk, choose Full Animation, keep Speed Multiplier: 1×, and confirm with Select Animation. Start with a 0.15 s transition. Keep horizontal movement enabled; for a side-scroller, downward physical movement can remain disabled.
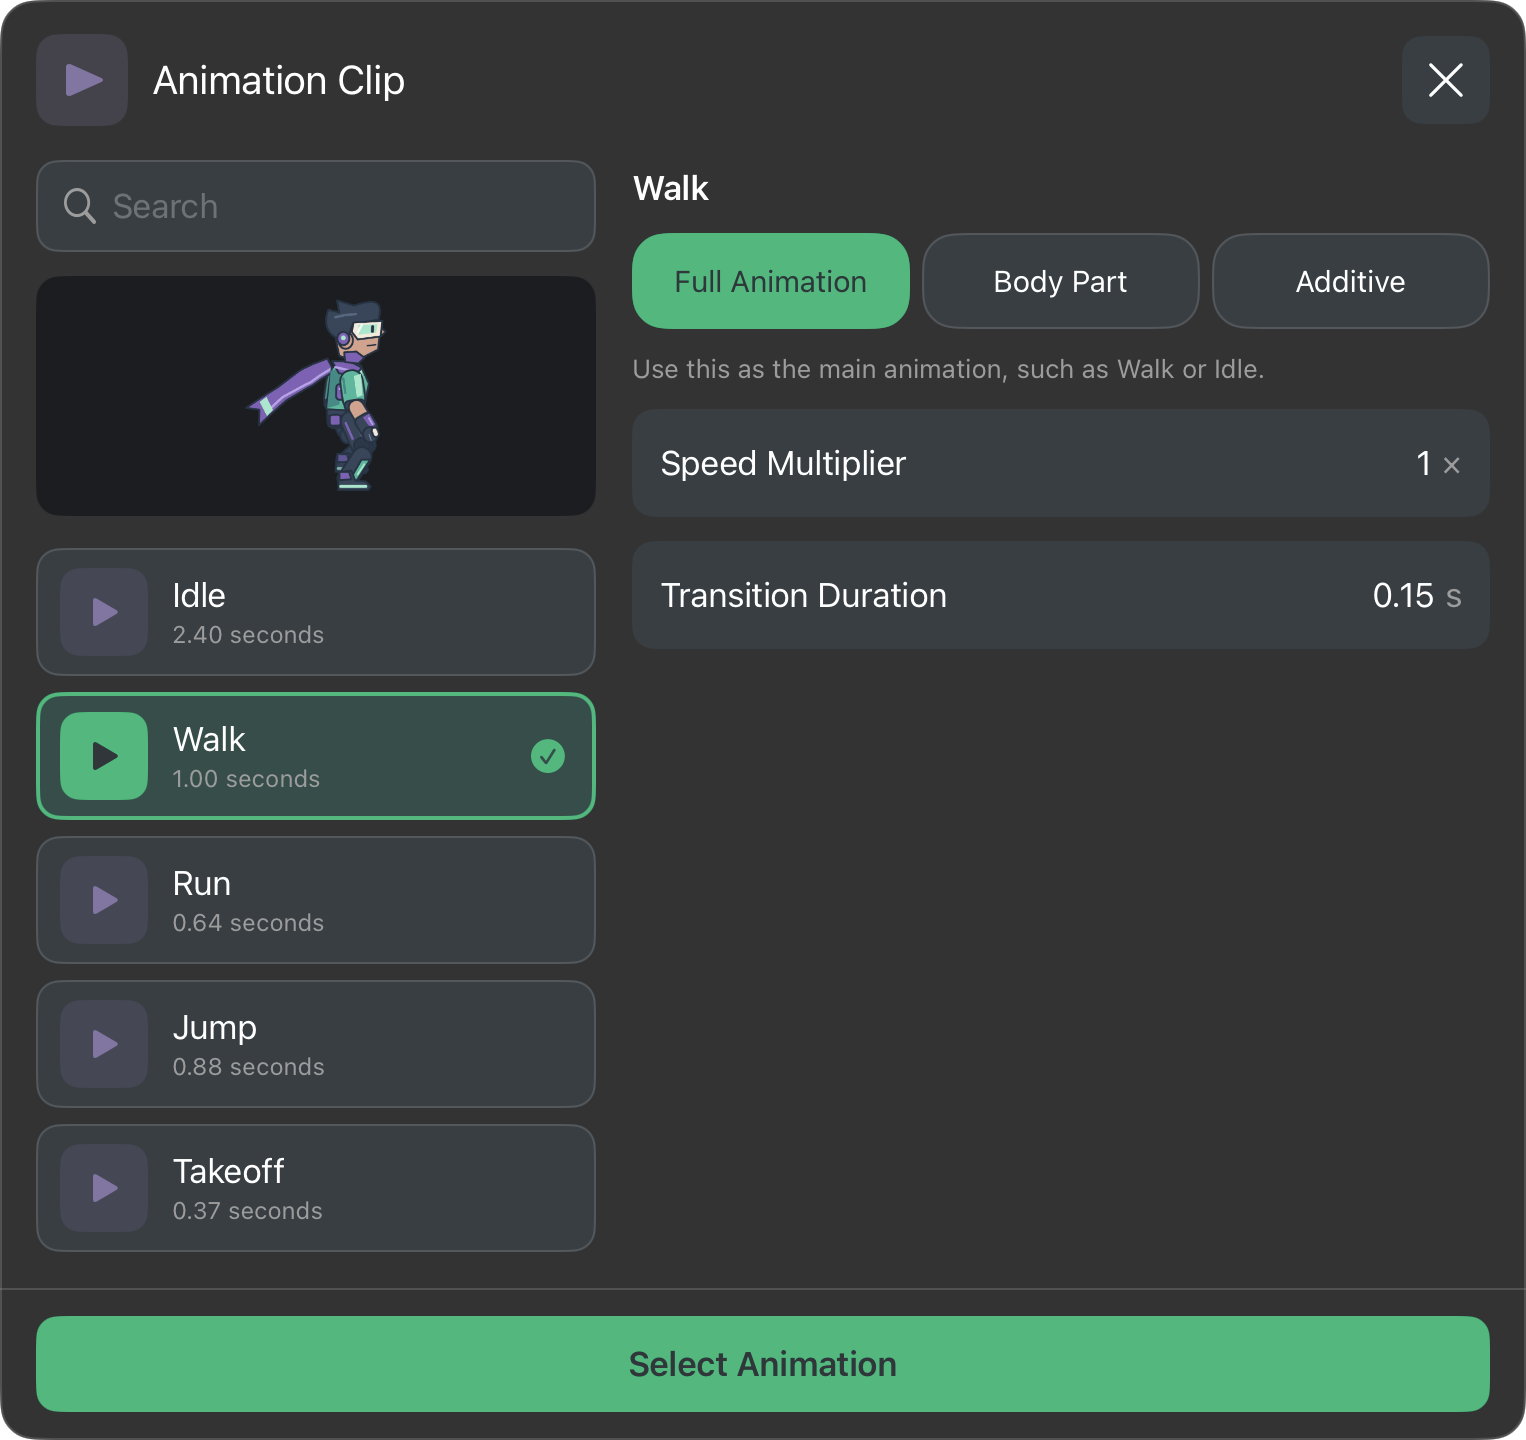
Run the scene and move left/right. Test this before adding more actions. If the stride looks too fast or slow, adjust the clip multiplier separately from the character's physical movement speed.
4. Add Crouch over Walk
Open the Down animation slot in the same Joystick Controlled behaviour.
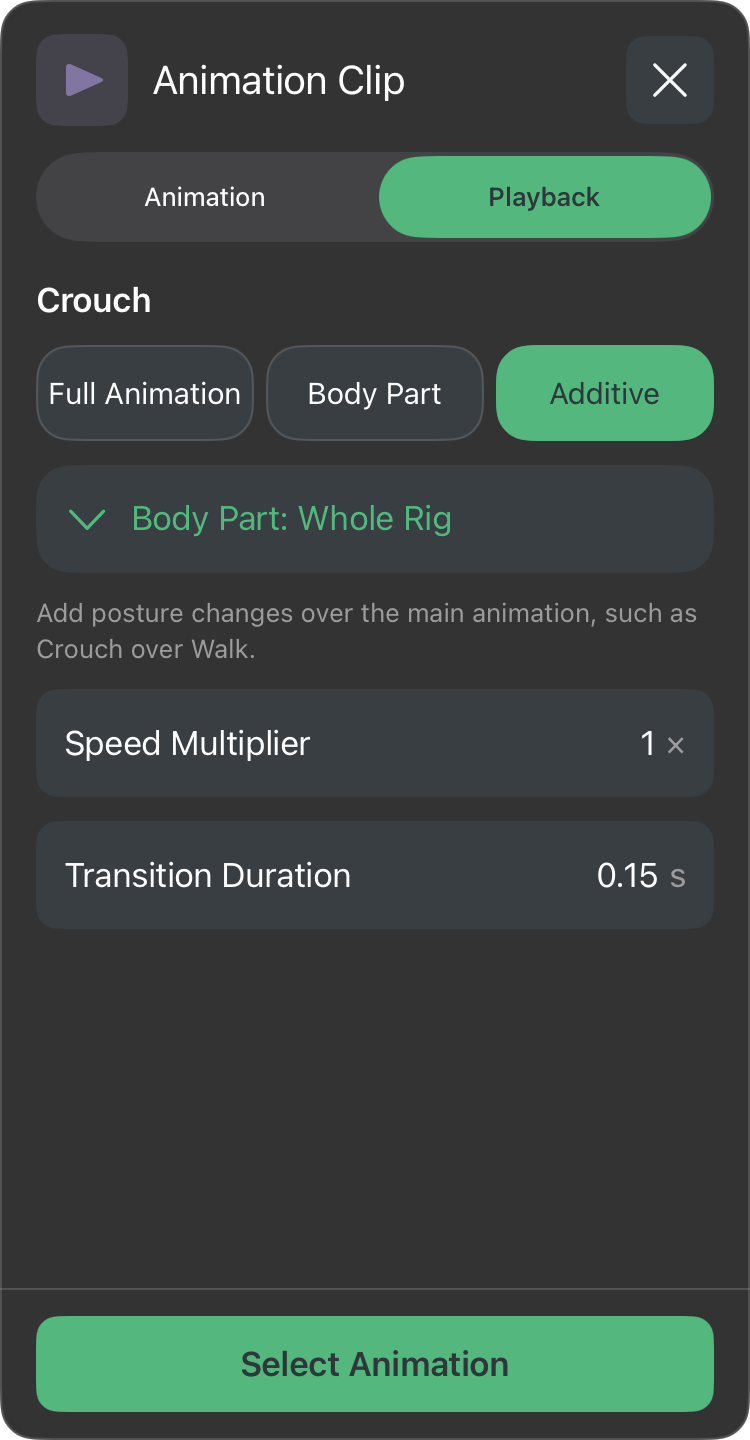
- Choose Crouch.
- Choose Additive.
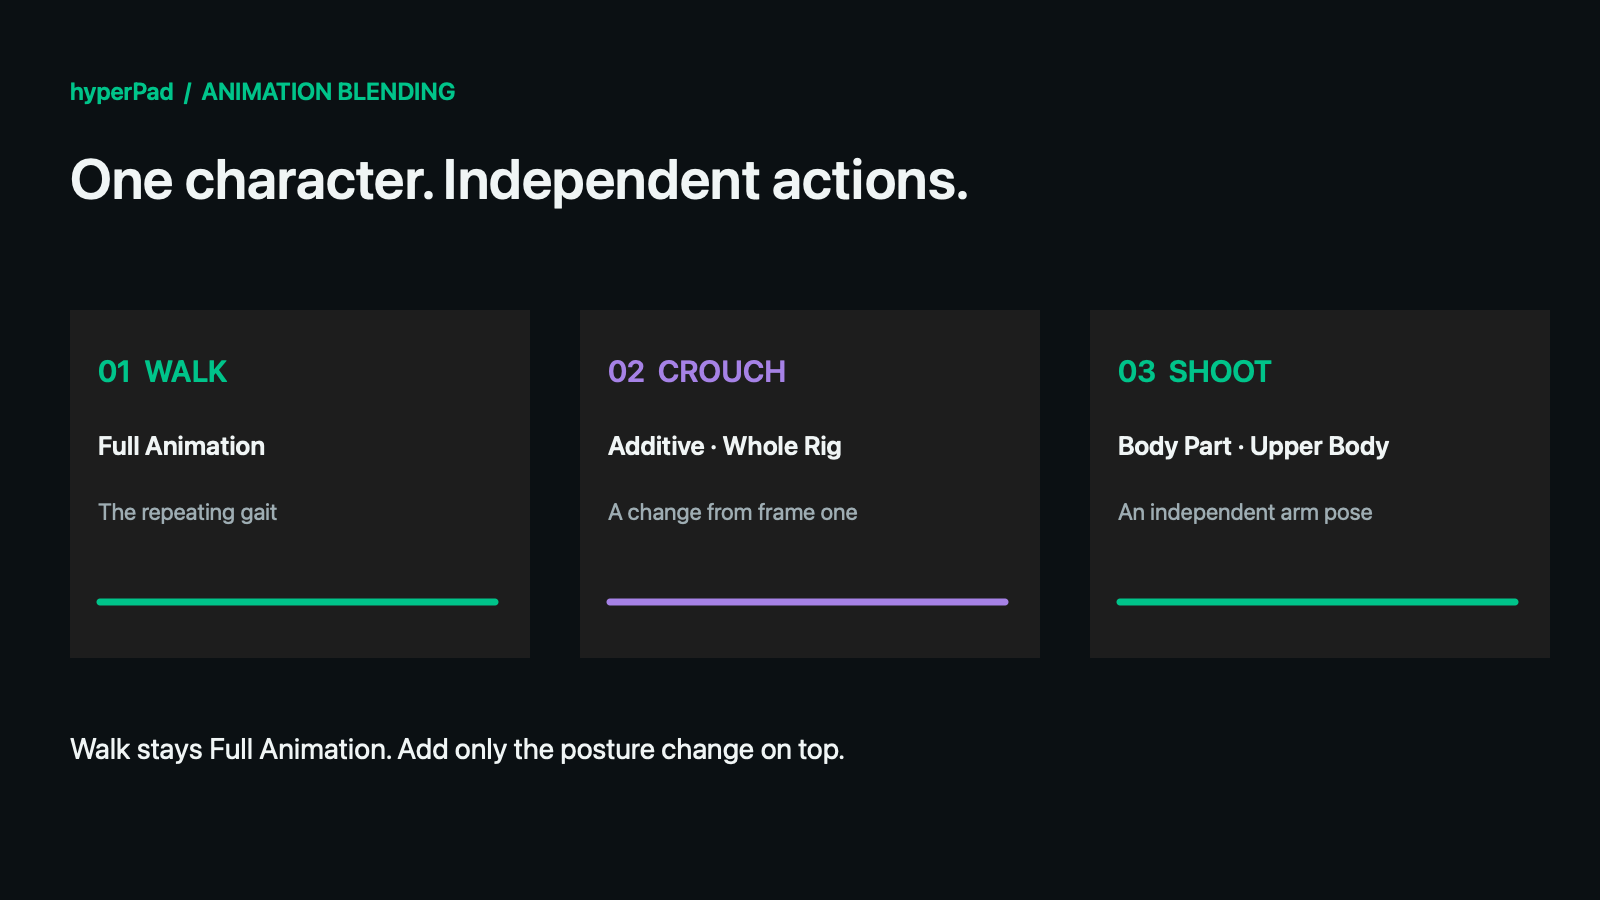
- Immediately below the mode buttons, choose Body Part: Whole Rig.
- Keep Speed Multiplier: 1× and set Transition Duration: 0.15 s.
- Choose Select Animation.
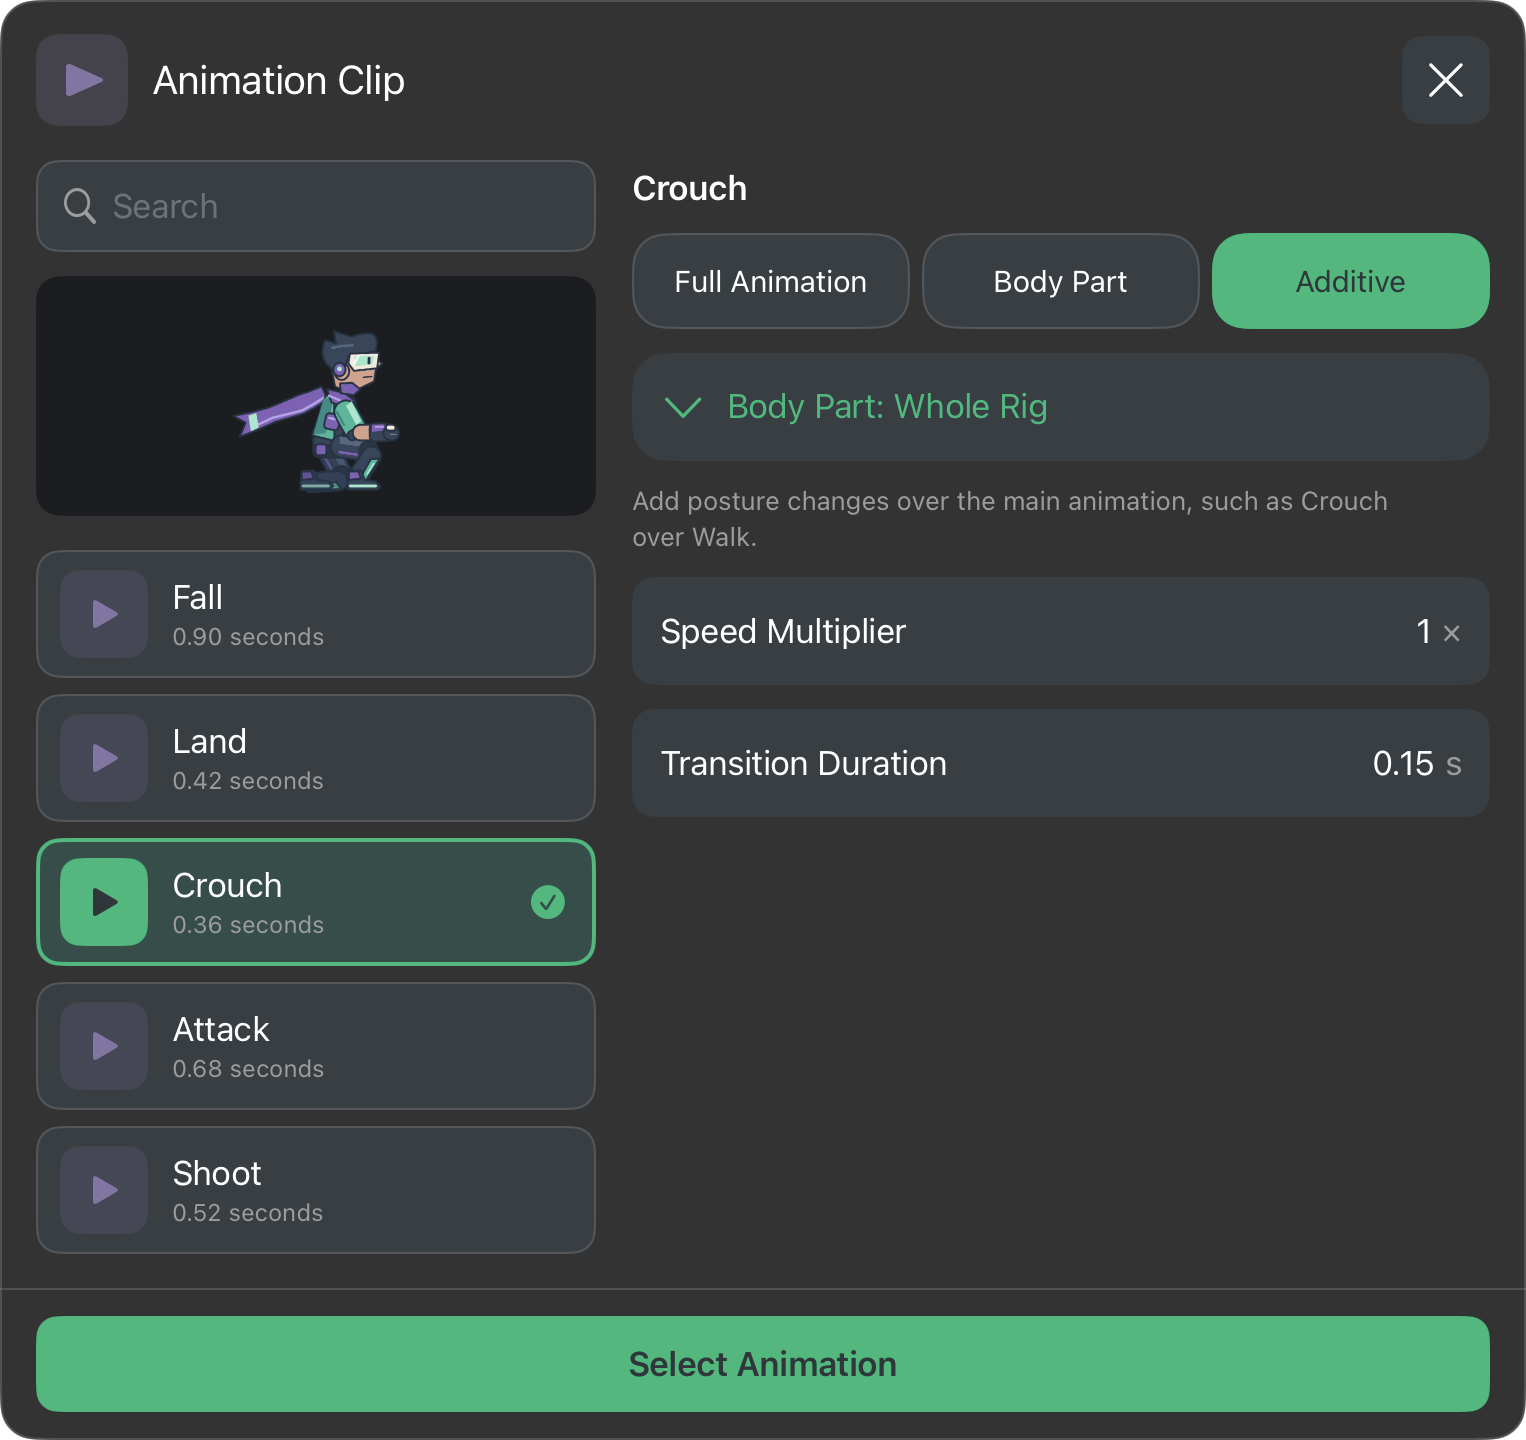
On a wide picker, selecting a clip shows it looping in the preview. A narrow window initially shows only the cycle list. Tap a cycle’s play icon for a preview, and close the preview when you want the space back. Then tap Next to open Playback for these settings. The selected mode and Body Part appear before the numeric settings.
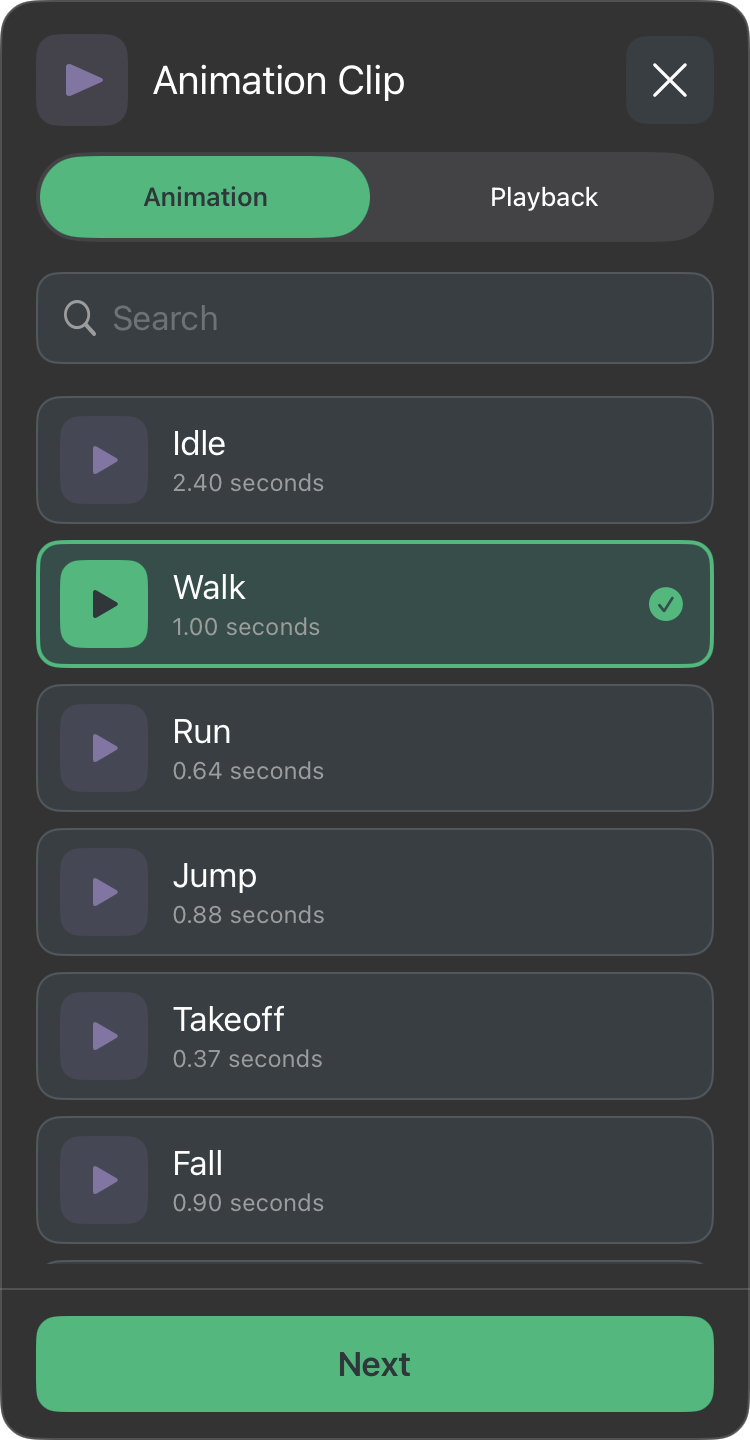
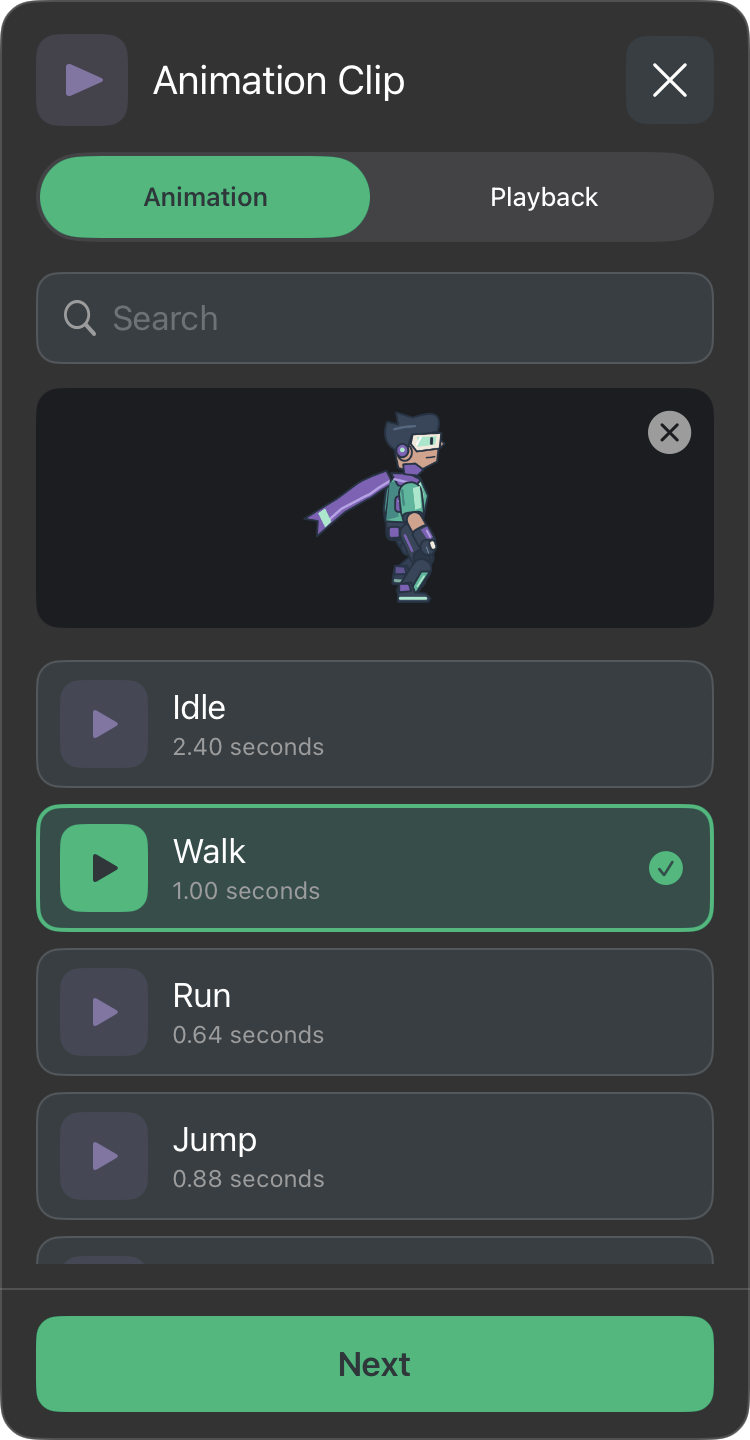
Test four cases: Down alone crouches; Down + Right crouches while walking; releasing only Down stands up while continuing to walk; releasing the joystick returns to the scene's Idle.
Why only Crouch is additive: Walk supplies the full repeating gait. Crouch supplies a difference from a neutral first frame. Two full animations would compete; two additive clips would no longer provide the intended full Walk foundation. If your custom Crouch starts already crouched, re-author it with a neutral first frame and a later crouched endpoint. Use Once playback so the joystick can hold that endpoint.
5. Shoot without stopping the feet
Add Shoot with Button and configure its normal bullet graphic, firing direction, and other gameplay settings. Object A is the button and Object B is the character. The shooting animation changes the character's pose; it does not replace the behaviour's projectile settings.
In its custom shooting animation, choose Shoot → Body Part → Upper Body. Use the same starting Animation Priority as movement, or a higher value if this action must override an overlap. Confirm the selection.
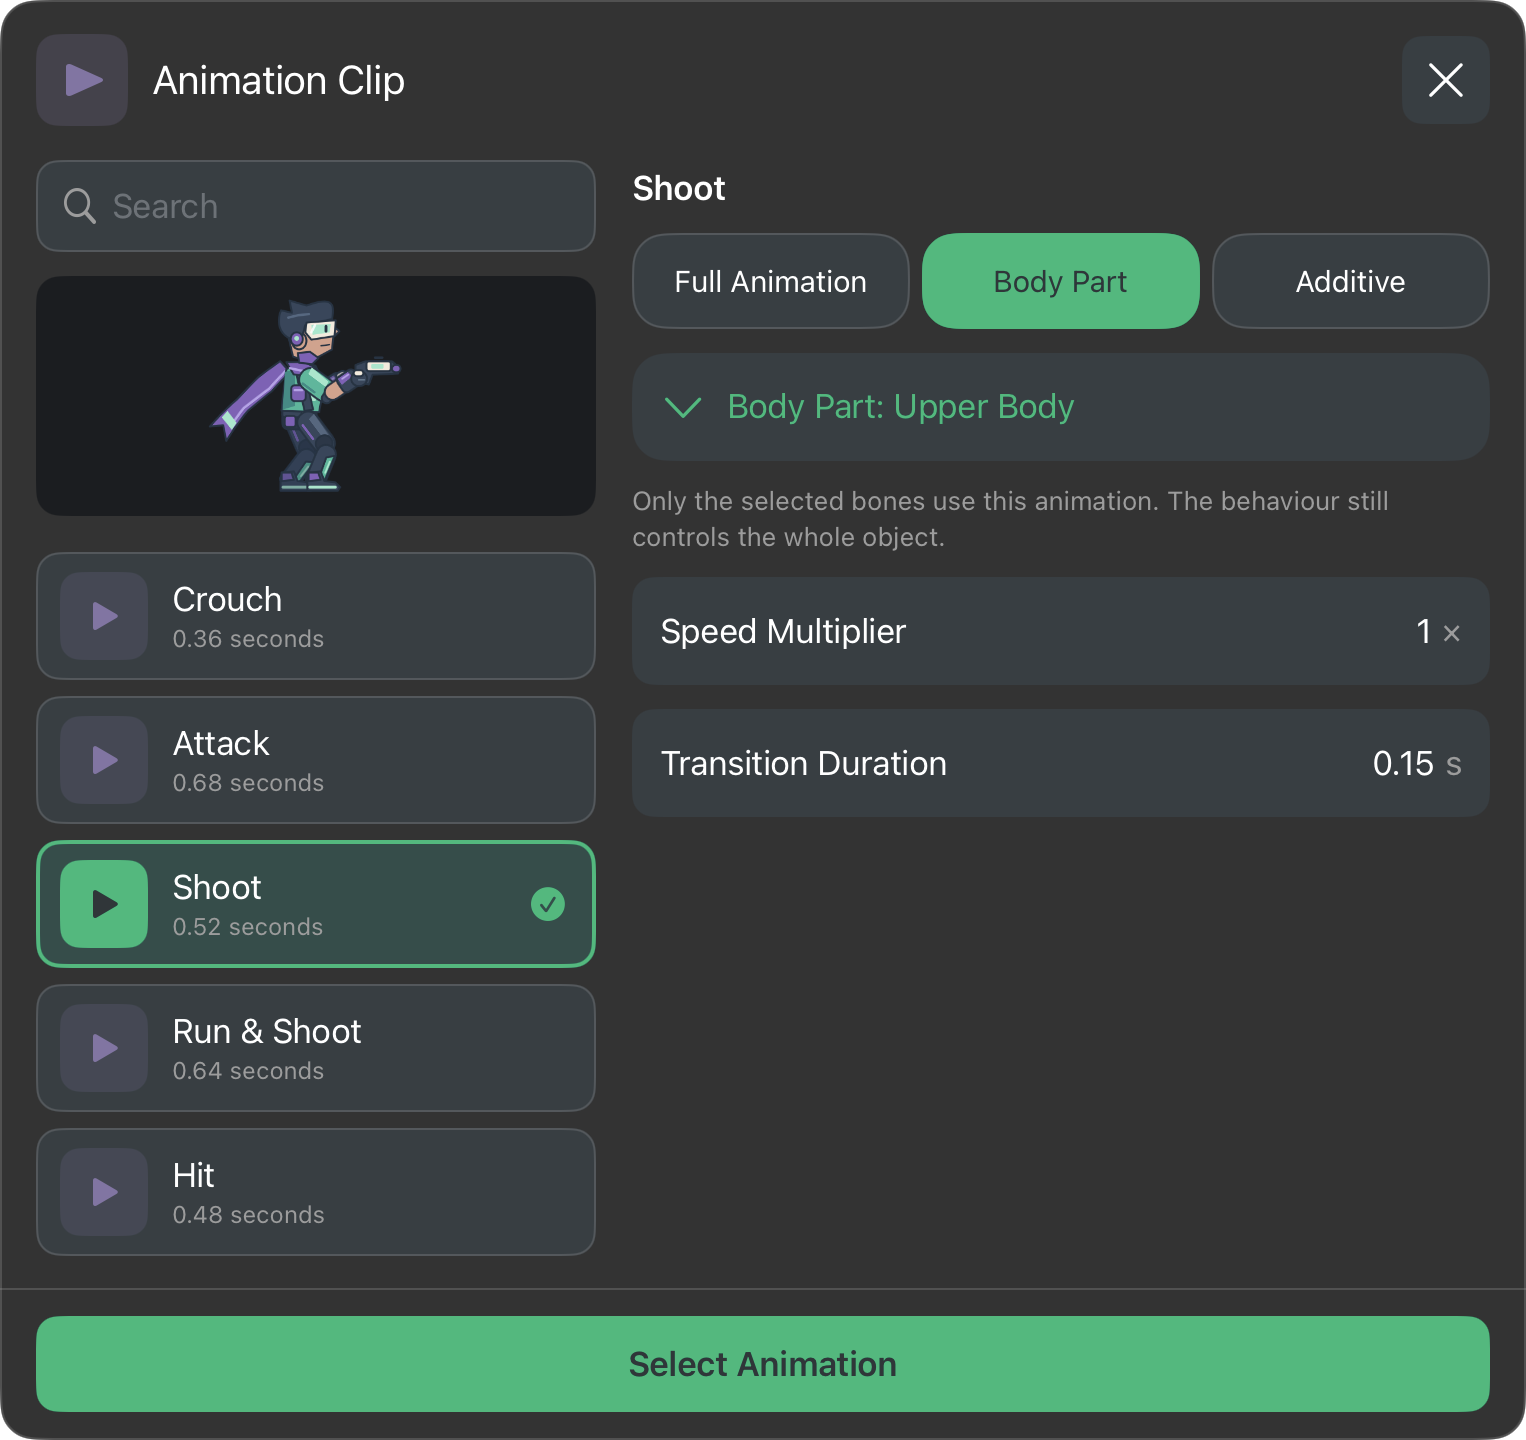
Run the scene. Shoot while standing, walking, and crouch-walking. The controller releases its shooting layer after completion so the underlying pose returns. If the legs stop moving, check that Shoot is Body Part, not Full Animation, and inspect the group's membership.
A one-handed action can use a separate Front Arm group instead. Include its upper arm, forearm, hand, and weapon controls. Parent chest motion will still carry that arm.
6. Let the jump follow actual physics
Add Jump with Button. Again, Object A is its button and Object B is the character. Configure jump power and enable Play Animations.
| Animation slot | Clip | Mode | Body Part |
|---|---|---|---|
| Initial jump | Takeoff | Body Part | Legs |
| Falling | Fall | Body Part | Legs |
Choose Fall explicitly. Naming a clip “Fall” does not assign it. Keep jump's Animation Priority at least as high as movement so Walk cannot take its leg pose back in midair.
Takeoff plays once and holds its ending pose while the character is rising. The controller changes to Fall at the physical apex and repeats the falling pose during descent. Landing releases the airborne layer. Upper-body shooting can continue throughout.
The sample's complete Jump animation is useful for a fixed-length performance or a baked cycle. Takeoff + Fall works better when gravity, platform height, or jump power changes the time spent in the air.
7. Check the whole combination
| Test | Expected result |
|---|---|
| Start scene without input | Idle plays. |
| Left / Right | Walk plays and the character moves. |
| Down | Crouch reaches its endpoint and holds. |
| Down + Left / Right | Walk continues with a crouched posture. |
| Release Down while moving | Crouch fades out; Walk continues. |
| Shoot while moving | Upper Body fires; legs continue Walk. |
| Jump while shooting | Legs use Takeoff, then Fall; shooting remains independent. |
| Land and release controls | The controller releases its layers and the underlying idle/movement returns. |
Crouching changes the pose, not the collision shape. A low tunnel may still need a separate gameplay collision setup. Blending also cannot guarantee planted feet for arbitrary poses: check the combination visually and refine the authored clips when necessary.
If an action persists unexpectedly, inspect Play Animation's Loop/Restore options, overlapping groups, animation priorities, and procedural bone/IK overrides. Avoid a whole-object Stop Animation when you only mean to finish one action; it affects the object's animation playback, including other layers.
Adapt this setup
- Enemy: use Patrol for its movement animation, and separate shooting or hit actions on appropriate Body Parts.
- Turret vehicle: keep the chassis as the main movement animation and create a Turret group for independent aiming or recoil.
- Creature: group the actual head, tail, wings, or legs. Names alone do not define membership.
- Dynamic character target: choose a reference asset when the animation picker asks, then supply a compatible character's Object ID at runtime. The reference asset does not change the dynamic target into a fixed object.
See Body Parts and Animation Blending for detailed rules and Rig Behaviours for manual bone, IK, and artwork control.