

Art Studio Tutorial: Replace Rig Artwork and Deform a Mesh
Use this chapter when you want to keep a useful skeleton and its motion but change how it looks. You will replace one of Nova's parts, edit a rig image in Drawing, inspect a weighted scarf, and modify the Mochi jelly sample with mesh points.
Work in a saved practice copy. File → Save As… gives you an independent project before changing the included artwork. If you need an introduction to bones, attachments, and clips, start with Rig & Animate.
Drawing and rig artwork are connected in two ways
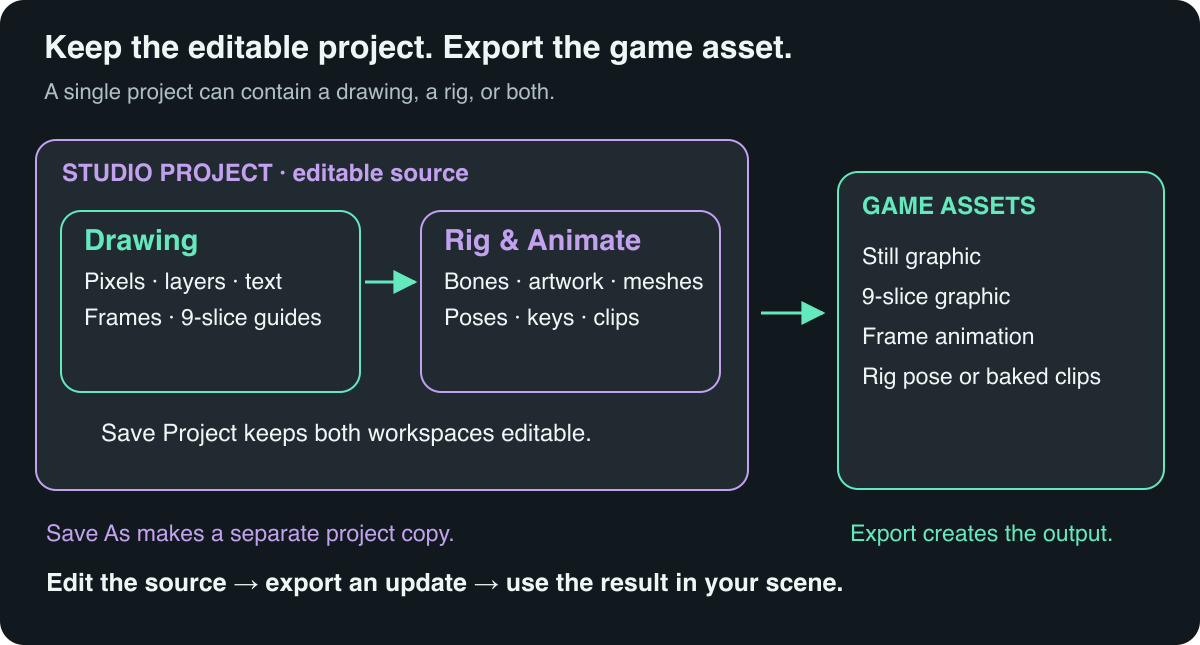
Drawing layers can supply rig parts. Draw an upper arm, forearm, and hand on separate named layers. In Rig & Animate, select a bone and choose a layer for it. Named drawing animation cycles can also supply animated artwork for an attachment; sprite-sheet cells can supply individual graphics.
Rig parts can have their own editable images. Presets bring their artwork with them. These parts do not have to appear as a flattened character on the main Drawing canvas. Open them through File → Project Artwork, edit their pixels, and return to the rig.
An empty main Drawing canvas therefore does not mean a preset character was lost. Look in the rig hierarchy and Project Artwork. The saved project contains those parts as well as the rigging work.
Tutorial 1: replace a sleeve without rebuilding the arm
- Load Nova · Platformer Courier and choose Walk. Pause at a pose where the front arm is easy to see.
- Select Front Sleeve in the hierarchy. This selects the graphic; Upper Arm Front selects its bone.
- In the inspector's Artwork card, choose Replace Artwork…. Choose a Drawing layer, image, or other suitable artwork from the available sources.
- The replacement preview shows the full character so you can judge the new part in context. Choose Walk, then try another clip such as Attack or Shoot.
- Start with Fit. Turn on Show original to compare the previous part. Adjust the sizing choice if necessary.
- Choose Replace Artwork when the result is ready. Cancel leaves the current part unchanged.
- Play the animation again. If the shoulder or elbow looks disconnected, use the placement controls described below. Undo restores the previous artwork if the replacement is unsuitable.
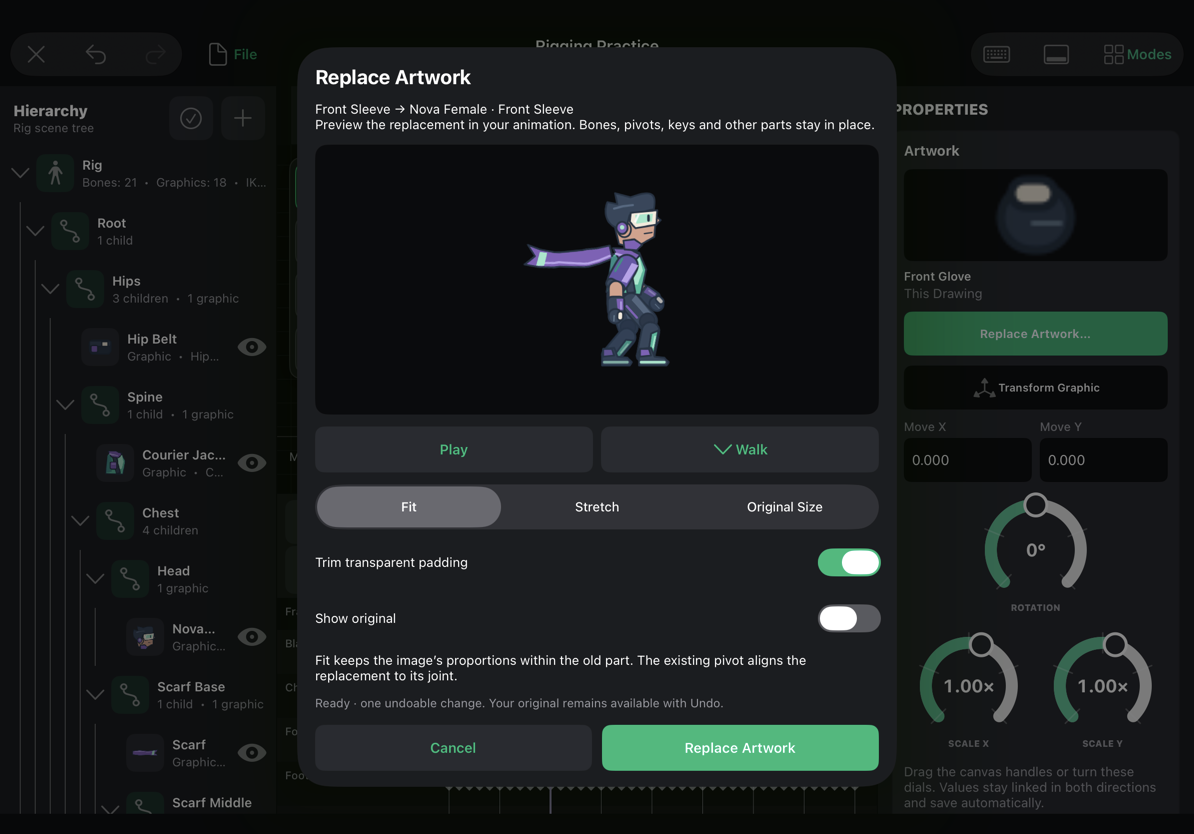
The preview above uses the female Nova preset's sleeve as a concrete compatible example. Your imported image can be an entirely different design, provided its joint and proportions make sense for this arm.
Choose a sizing method
| Setting | Result | When to use it |
|---|---|---|
| Fit | Keeps the replacement's proportions within the old part's footprint. | A different sleeve or a slightly different silhouette. |
| Stretch | Fills the old footprint, potentially changing proportions. | A matching texture layout, especially for an existing mesh. |
| Original Size | Uses the imported pixel dimensions. | A rigid part whose new dimensions should be preserved. This option is unavailable for a meshed attachment. |
| Trim transparent padding | Ignores empty borders when sizing. Animated replacements use one common crop across their frames. | An imported image with a large empty border. |
| Show original | Temporarily shows the old artwork in the preview. | Checking what actually changed before committing. |
Replacement preserves the attachment's identity, bone relationship, pivot, animation keys, and mesh weights. It does not guess the anatomical meaning of a different drawing. A short round paw placed on a long narrow hand rig may need fitting, changed poses, or a different skeleton.
Fit the graphic, not the skeleton
Select the attachment and turn on Transform Graphic. Move, rotate, or scale the graphic using its handles or inspector values. The skeleton stays in place. This is useful when a replacement's painted shoulder is slightly offset from its old image.
Use Pivot (P) to position the purple rotation centre. Place it at the appropriate joint. Moving this pivot preserves the image's visible placement, so you can correct the rotation centre without chasing the graphic across the canvas.
Use Backward / Forward in the attachment inspector, or [ / ], when a sleeve, hand, or weapon is drawing on the wrong side of another part. Check the whole clip after changing the order.
Tutorial 2: paint directly on a rig part
- Select the graphic you want to edit, such as Jelly Body on Mochi.
- Open File → Project Artwork → Edit Selected Part. You can also choose a named Rig Part from the same menu.
- Drawing opens for that part. Paint a small, obvious detail so the change is easy to verify: a spot, eyebrow, badge, or coloured trim.
- Save the part's edit using the drawing editor's save action, then return to the rig.
- Scrub and play the animation. The edited pixels should follow the same attachment and deformation as before.
- Save the whole project when you want to keep the combined work.
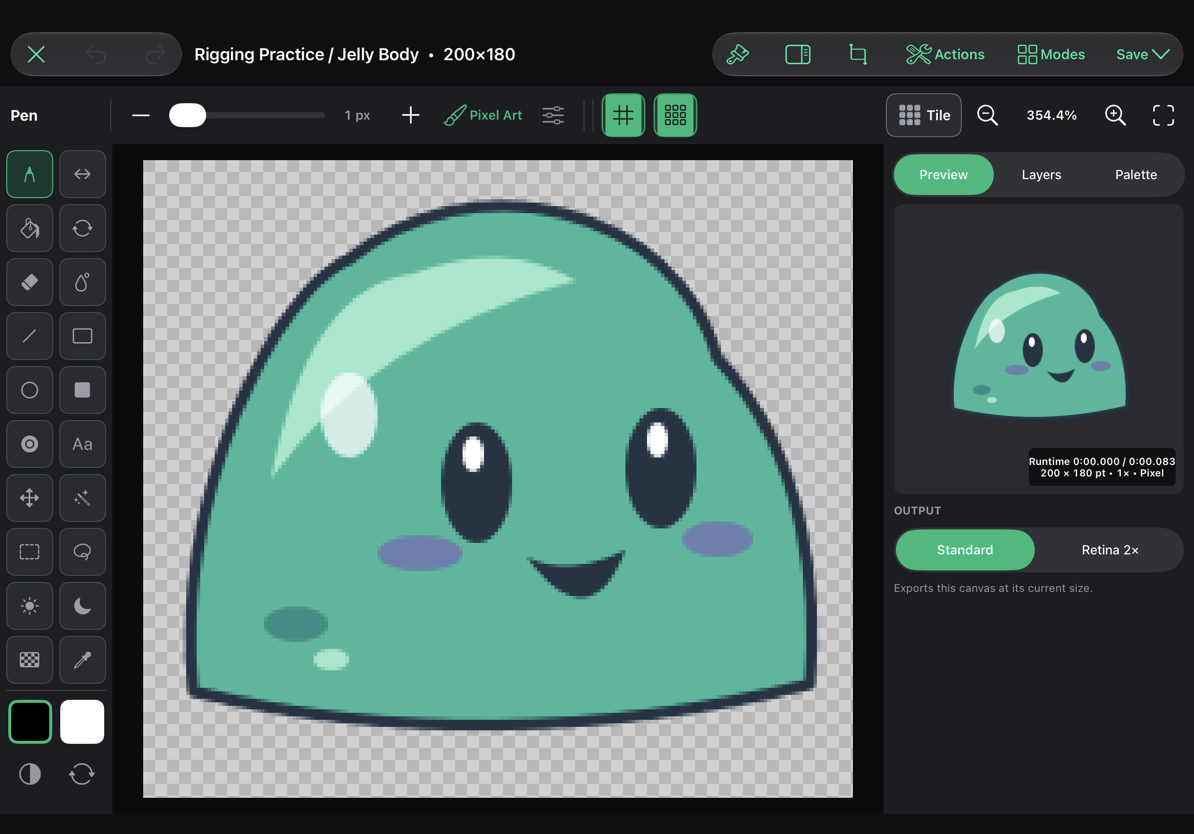
Keep the part document's canvas dimensions and single-frame structure when editing an existing rig image this way. This workflow updates the part in place. Use Replace Artwork when you need a different image size or source arrangement.
If the selected part is already linked to a main Drawing layer, Edit Selected Part takes you to that layer and frame instead. Return to Rig & Animate to see it on the character. This is useful for characters you build from your own layered drawing.
Assemble your own layered drawing
For a simple arm, make three transparent Drawing layers: upper arm, forearm, and hand. Leave a little overlapping painted area around the joints so bending does not expose a gap.
In Setup, create a connected three-bone chain. Select each bone and choose its matching artwork. Position the graphics and their pivots, then test several poses before animating. The artwork gallery's Auto Match Named Layers action can help with a consistently named rig, but inspect the assignments rather than assuming similar names always mean the correct joint.
An imported flattened image is still useful for rigid props or a flexible mesh. It does not automatically become separate cutout limbs.
Meshes: broad bends and local shape changes
A rigid graphic follows one attachment bone. A mesh divides that graphic into triangles. The renderer can then bend the triangles while continuing to use the same image.
There are two ways to move a mesh:
- Bone weights let several bones bend the image. This is well suited to a scarf, tail, wing, or long piece of cloth.
- Deformation keys offset individual points at a particular time. This is useful for squash, stretch, ripples, and small silhouette adjustments.
You can combine the two. Keep broad motion in the bones and use point deformation for the details that the bones cannot describe conveniently.
Tutorial 3: inspect Nova's weighted scarf
- Open Nova, select Scarf, then open Mesh (M).
- Choose Edit Mesh Points. The points and triangle connections appear over the image.
- Select a point near the middle of the scarf and open Mesh again.
- Choose Weights for Point …. This action appears after selecting a point on a bound mesh.
- Inspect the bone influences. Neighbouring scarf bones should share intermediate points rather than each point switching abruptly to a completely different bone.
- Make a small adjustment and choose Apply, or Cancel to keep the existing weights. Scrub Walk or Run and compare the bend.
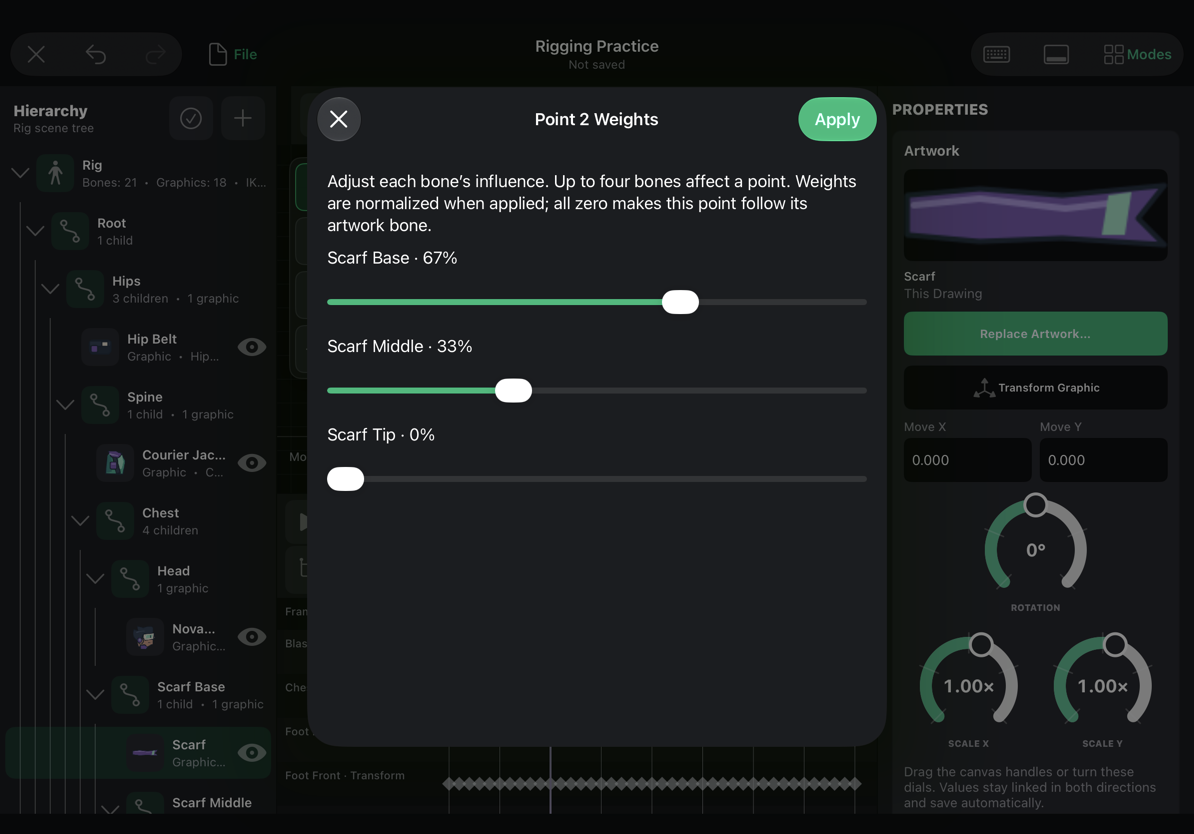
Up to four bones affect one point. Weights are normalized when you apply them, so they behave as shares of the total influence. Setting every influence to zero makes that point follow the artwork's own bone. It does not pin the point to the world.
To bind a new mesh, use Auto-bind to Bone Chain. If you multi-select specific bones first, the action becomes Auto-bind to Selected Bones. Check which descendants belong to that chain before binding; a broad selection can give an unrelated bone influence over the image.
For a flag, keep its leading edge assigned to the pole-side control and let the free edge follow the cloth bones. For a scarf, gradually move influence from its base through its middle to its tip.
Tutorial 4: change Mochi's squash and stretch
The Mochi sample already contains a mesh and deformation keys, which makes it a useful controlled exercise. Work in your practice copy so you can compare against a freshly loaded preset later.
- Load Mochi · Jelly Creature and show the timeline.
- Choose Hop. Play it once, then pause and scrub to the compression before the hop.
- Select Jelly Body, open Mesh, and choose Edit Mesh Points.
- Inspect the existing silhouette. Move one upper edge point a small distance sideways or down. In Animate, releasing the drag records deformation at the playhead.
- Move its counterpart on the other side if you want a balanced squash. Keep the bottom edge near the ground rather than moving the entire body through the floor.
- Scrub to a later frame and inspect the result. If the shape changes too abruptly, adjust the neighbouring deformation key or add a gentler intermediate shape.
- Press Escape, or use Mesh → Done Editing Points, when you finish. Play the clip with bones hidden to judge the actual artwork.
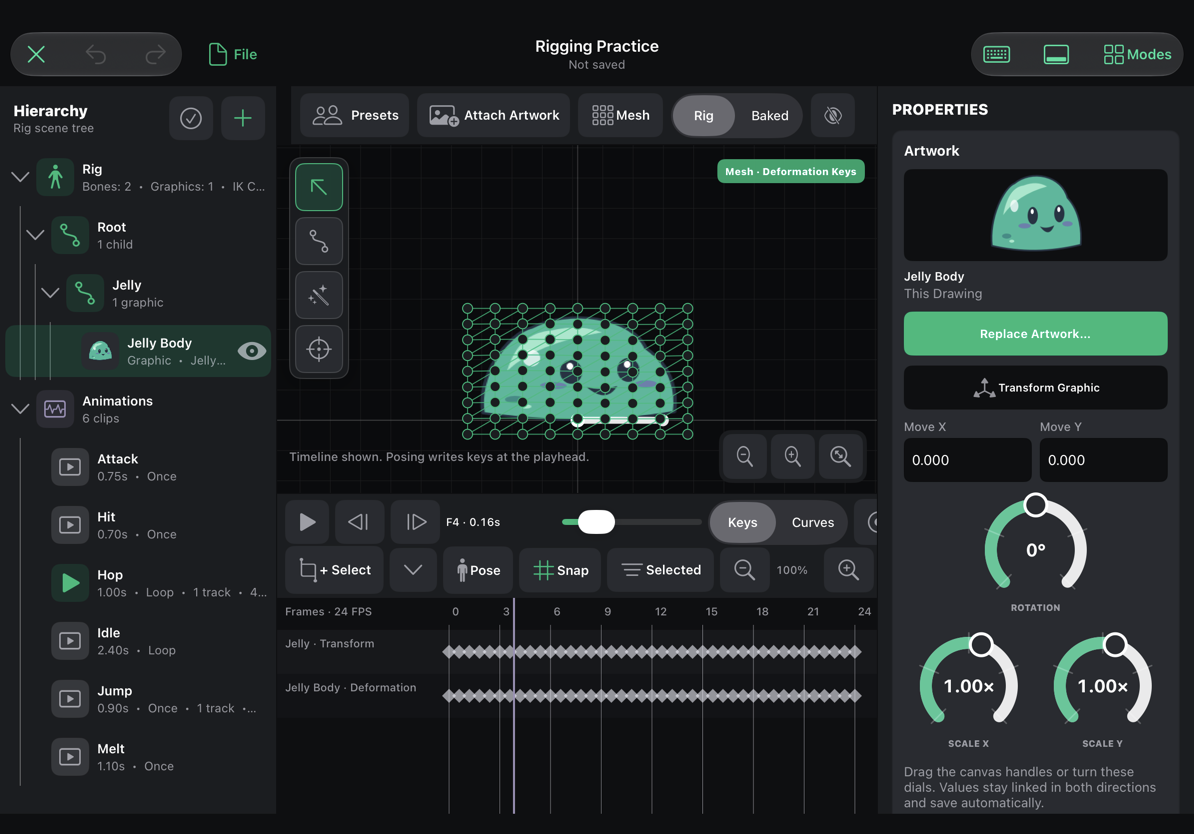
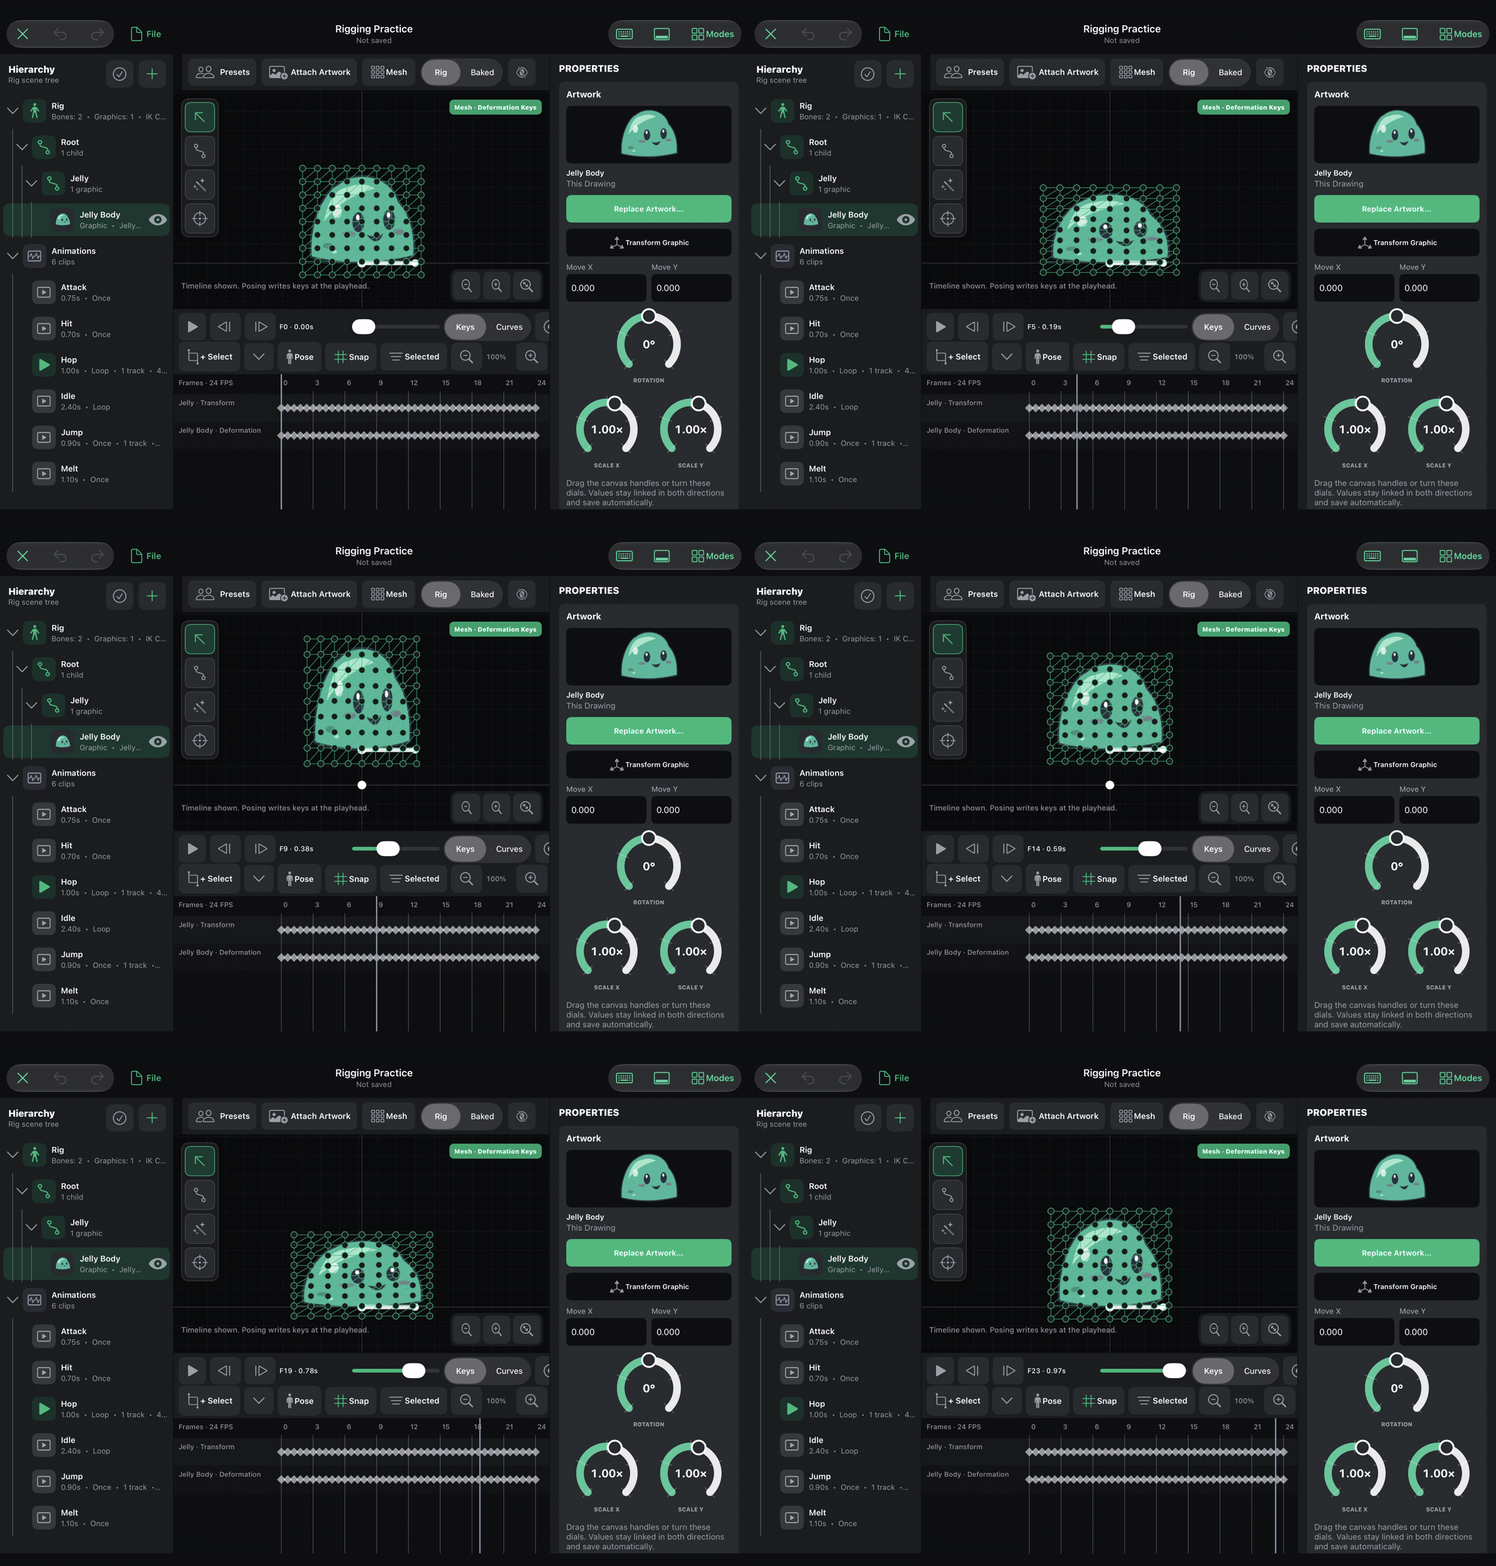
Setup edits the base shape; Animate writes deformation keys. If the timeline is hidden, a point drag changes the underlying mesh. Show it before making a change that should exist only at one time.
Keep the volume believable
When the jelly gets shorter, let it become a little wider. When it stretches upward, narrow it slightly. A large width and height increase at the same time makes it look as though it is inflating.
Move neighbouring points smoothly. One far-away point creates a spike; a group of gently offset points creates a rounded contour. Watch the face: because it is part of the same artwork, the mesh deforms it too. Keep that distortion intentional.
Work with deformation keys
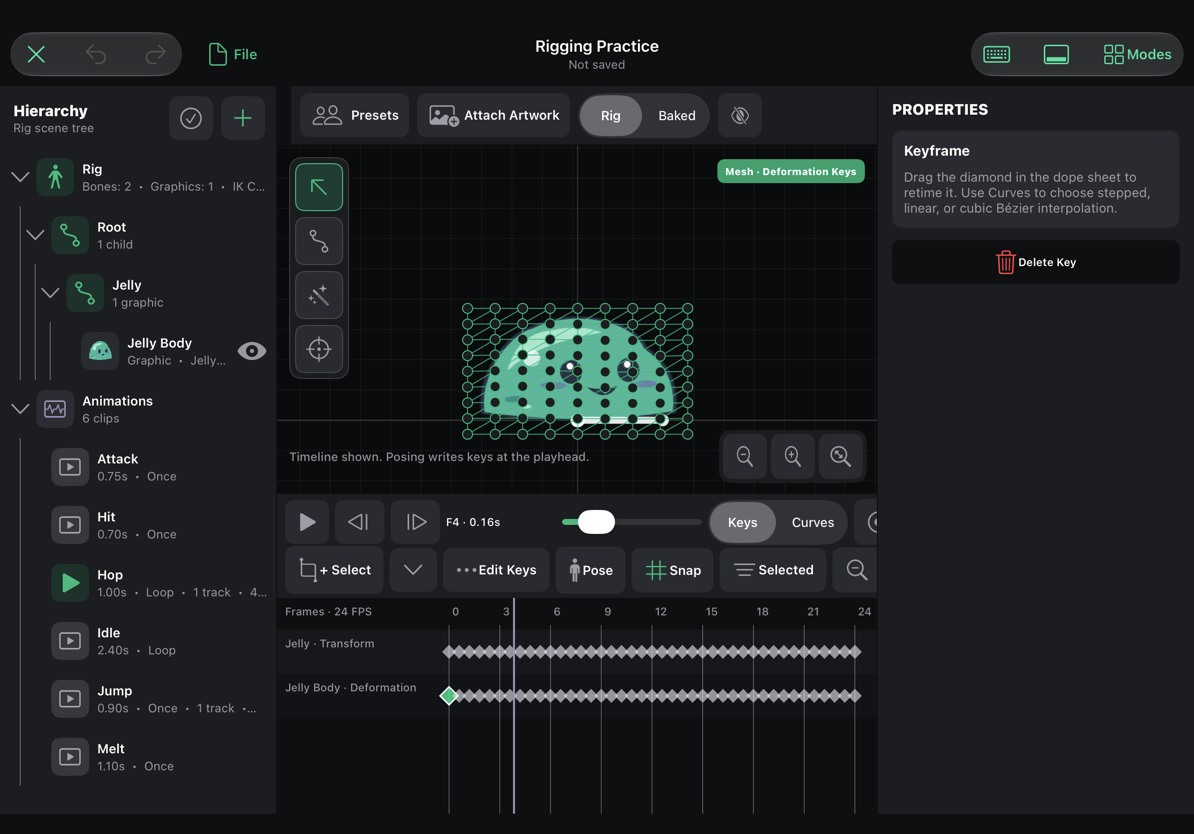
Use Mesh → Key Current Deformation to store the current shape without dragging a point. This is useful for a starting shape or a held pose.
To repeat a mesh shape later, select its deformation diamond and use Copy Keys, move the playhead, then Paste at Playhead. A bone Copy Pose operation is different; use key copy when you want the mesh deformation itself.
Continuous deformation keys support interpolation. Try Linear first, then adjust Bézier easing if the squash should arrive or settle more gradually. Retiming a deformation key changes when the shape occurs without changing its point offsets.
Arrow keys nudge the selected mesh point. Hold Shift for a larger 10-unit move. With no mesh point selected, the left/right arrows return to frame stepping, so confirm which editing state you are in.
Create or rebuild a mesh carefully
Select an attachment and open Mesh. New graphics can use Create 2 × 2 Grid, Create 4 × 4 Grid, or Create 8 × 8 Grid. Start with the smallest grid that can describe the bend you need. A rigid sign may need no mesh; a flexible flag benefits from more points along its free edge.
Once an attachment has a mesh, those actions become Replace with … Grid. Replacing the grid or removing the mesh replaces its shape and weights and removes that attachment's deformation keys from every clip. Art Studio asks before doing this, and the change can be undone. Use point editing when you only need to adjust the existing mesh.
Unbind Weights (Rigid Follow) keeps the mesh but removes its multi-bone bindings, making it follow the attachment bone. That is different from removing the mesh entirely.
Final checks before saving and exporting
- Play more than one clip after replacing artwork. A part that looks correct in Idle may disconnect during an attack.
- Hide bones and check the silhouette, drawing order, and transparent gaps.
- Inspect a meshed replacement at its most extreme bend, not only its rest pose.
- Scrub across the loop boundary and through any attachment swaps.
- Save the project, close it, and reopen it to verify the editable parts and animation.
- Export the desired full animation through File when you need a game asset. Keep the editable project for future artwork changes.