

Art Studio: Start Here
Art Studio is hyperPad’s workspace for drawing graphics, making frame animations, designing stretchable panels, and animating characters with a rig. You can start with a blank canvas, open existing artwork, or learn from a complete animated sample.
This guide introduces the workspace. Follow the linked tutorials when you are ready to make something of your own.
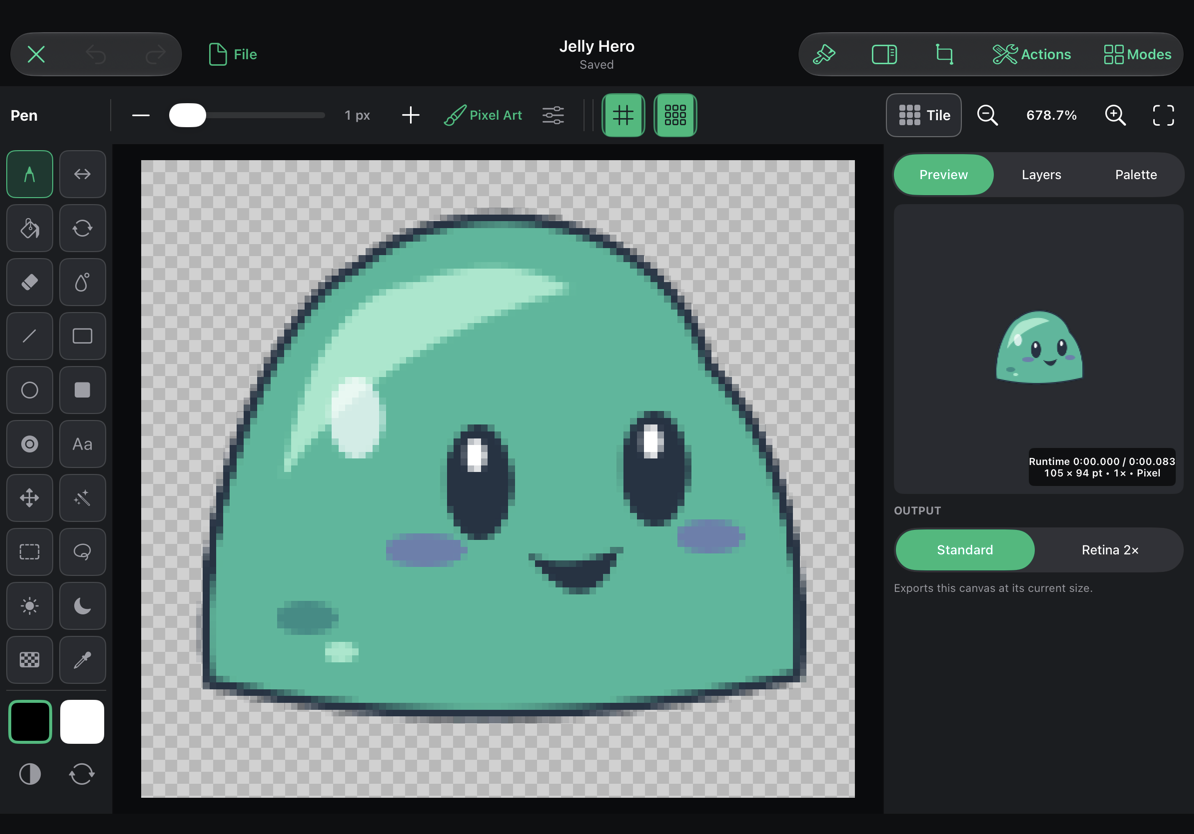
Make your first project
- Open your hyperPad game and open the Asset Library.
- Choose Create in the Asset Library toolbar, then Graphics in Create Asset. The New Art Studio Project window opens.
- Give the project a useful name. Choose Start with to open the tools that suit your idea.
- Set the canvas size, then choose Create. These are the dimensions of your artwork, not the size of the editor window.
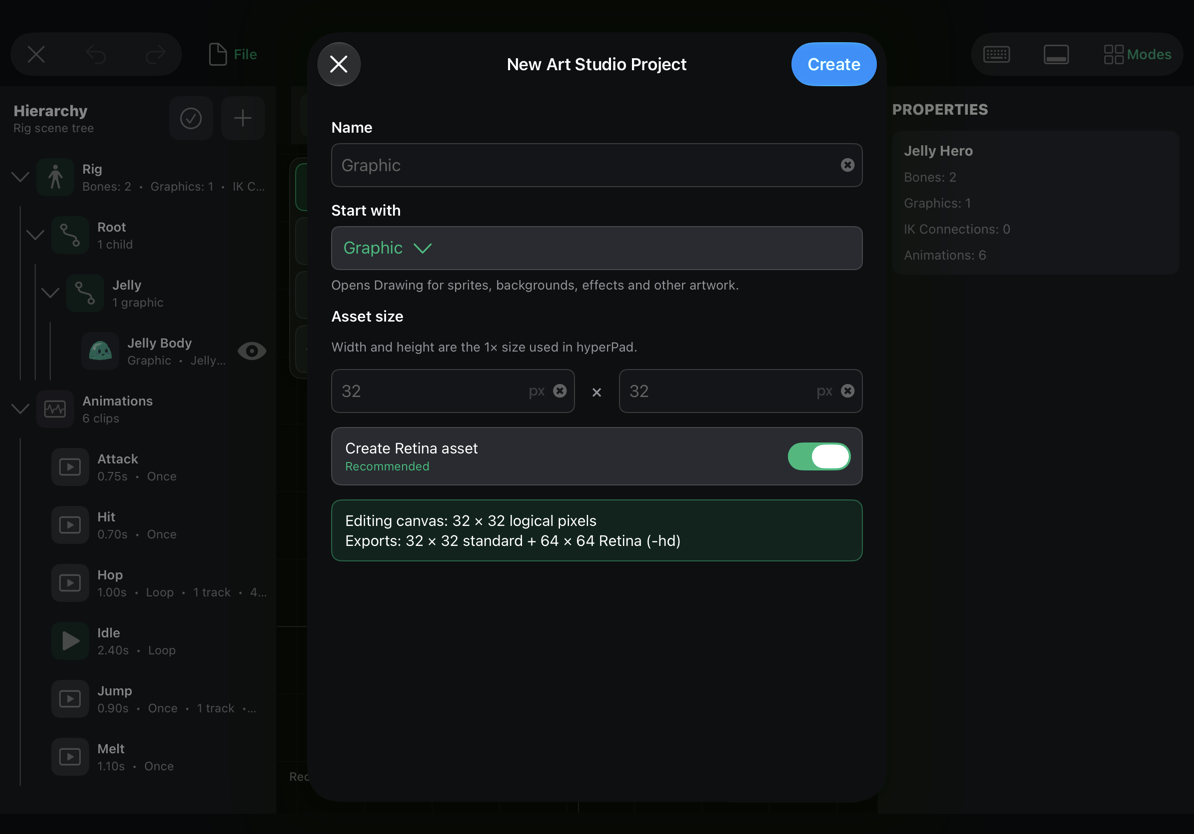
| Start with | Choose this for |
|---|---|
| Graphic | A sprite, icon, texture, background, or other still drawing. |
| Keyframe Animated Object | A drawing with a frame timeline ready for animation. |
| Bones / Rig | A character or object built from movable parts. Opens Rig & Animate. |
| 9-Slice Graphic | A panel or button whose middle and edges can stretch while its corners keep their shape. |
| Editable Text | A text-based graphic whose wording and appearance remain editable in the project. |
Your choice sets up the workspace; it does not lock you into a particular kind of asset. Modes lets you turn on other tools later.
Get comfortable with the workspace
The top toolbar stays with your project as you switch workspaces.
| Area | What it does |
|---|---|
| Close | Leave Art Studio. If you have changes, choose whether to save or discard them. |
| Undo / Redo | Step backward or forward through edits in the active workspace. |
| File | Save or open a project, import artwork, find project artwork, and export finished work. |
| Project name and save status | Identify the source project and see whether it has unsaved changes. |
| Modes | Switch between Drawing and Rig & Animate, and enable tools such as frame animation or 9-slice. |
| Canvas | Draw or pose your artwork. Zooming changes your view, not the exported dimensions. |
| Side panels | Change the selected tool, layer, bone, attachment, or keyframe. Their controls depend on what you are editing. |
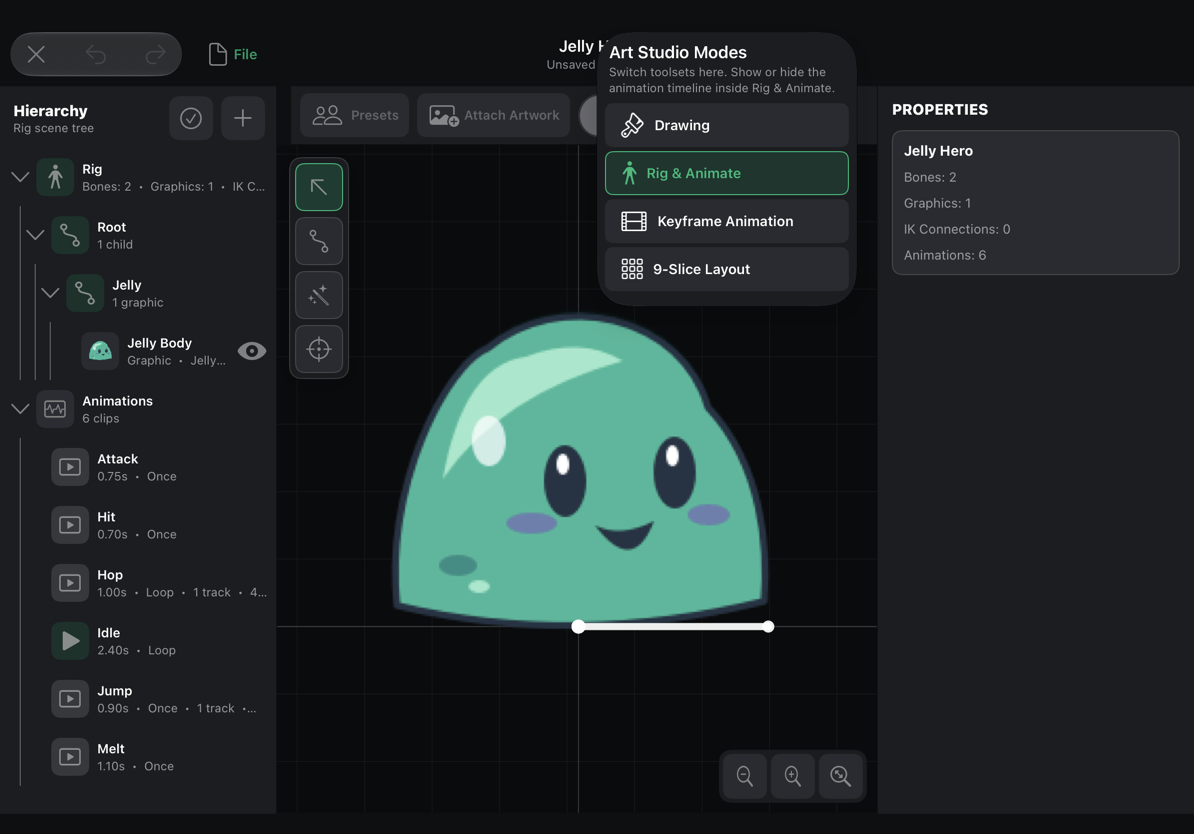
On a smaller window, some controls collapse into buttons or panels. Open those panels when you need them, then return to the canvas. You do not need to keep every panel visible while drawing.
Move around without changing the art
Pinch to zoom and use two fingers to pan on iPad. With a mouse, scroll the wheel over the canvas to zoom toward the pointer. With a trackpad, scroll to pan or hold Command while scrolling to zoom. You can also pinch on the trackpad.
In Drawing, the zoom percentage tells you how magnified the canvas is, and 100% returns to its normal canvas scale. Both workspaces provide Fit to bring the artwork back into view. A 32 × 32 drawing stays 32 × 32 when you zoom in.
Hover over controls for tooltips when using a pointer. Open Keyboard Shortcuts from the workspace’s actions/help controls to search the commands available there. See the complete shortcut reference for mouse, trackpad, and keyboard navigation.
One project, two connected workspaces
Drawing edits pixels, layers, and text. Its timeline lets you create animation by changing the artwork from frame to frame.
Rig & Animate assembles artwork onto bones. You pose those bones, add keyframes, and let the editor calculate the movement between poses. A mesh lets an individual piece of artwork bend instead of moving like a rigid cutout.
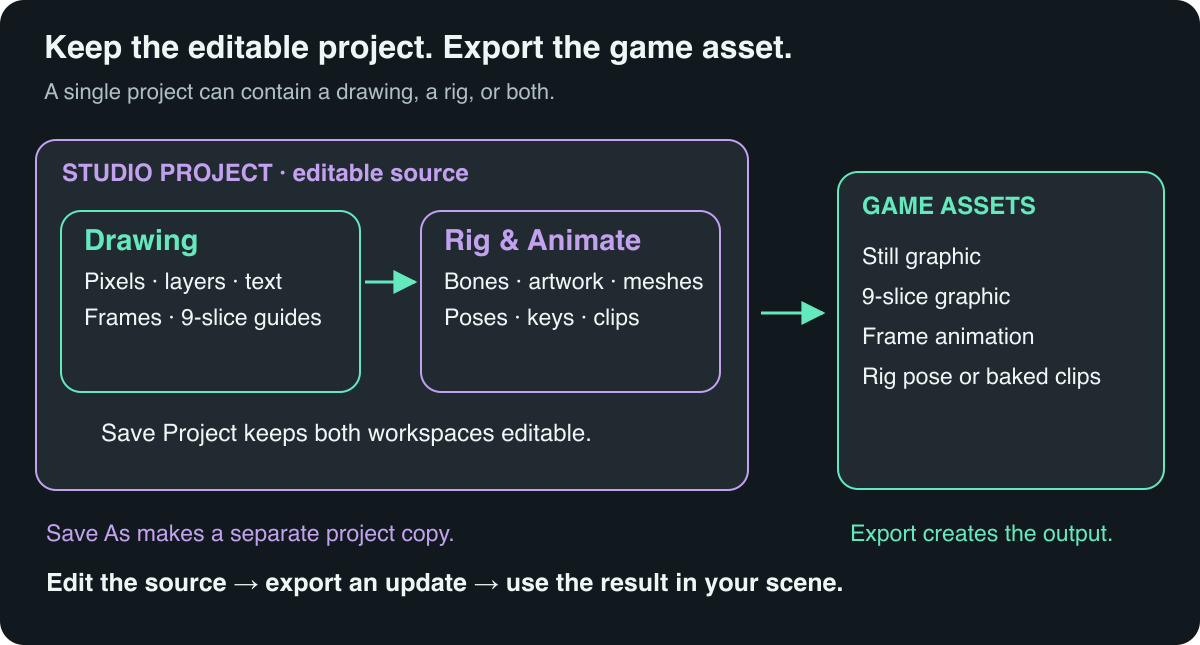
You can use either workspace by itself. A rig sample already has its own artwork, so your main Drawing canvas may be empty even though the character is complete. File → Project Artwork helps you find both Drawing layers and the rig’s individual pieces.
To paint a rig part, select the part and use its artwork-editing command. Save and close that part editor to return to the assembled rig. To build a rig from your own drawing, keep movable pieces on separate layers, then attach the artwork in Rig & Animate. See Bones / Rig & Animate and Replace artwork and deform a mesh for the full workflows.
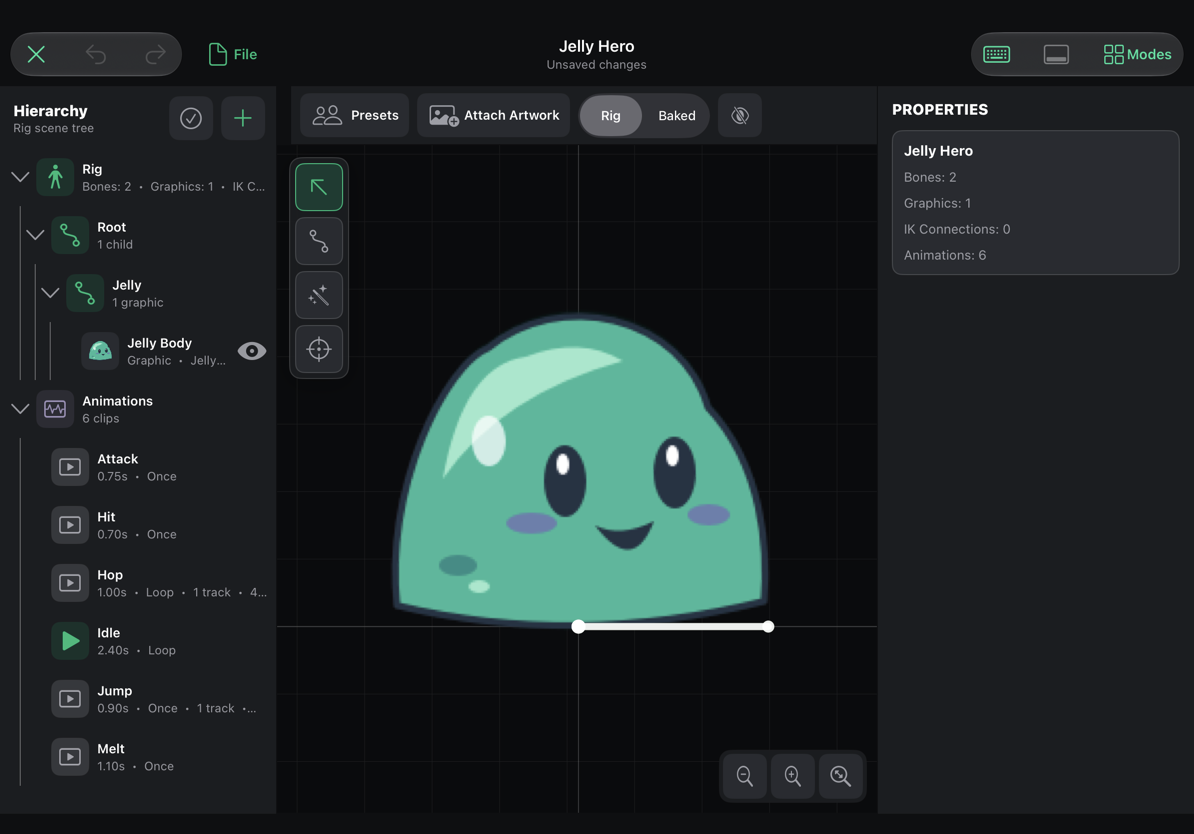
Save the project, then export what the game needs
Choose File → Save Project or press Command-S to keep editable work. A Studio Project remembers the Drawing document and rig, including layers, text, meshes, and animation clips.
Game projects store these sources under Studio Projects → Art in the Asset Library. Their Studio icon identifies them as editable projects. Tap a Studio Project to open it; it does not become a dock item to drag into a scene.
When you want to use the result in your game, choose File → Export Game Asset, then choose the output you need. For example, export a Still Graphic for a drawn coin, or Baked Rig Animation… for a walking rigged character. Still exports let you review the image, name, and destination. Baked animation export lets you choose clips and output quality.
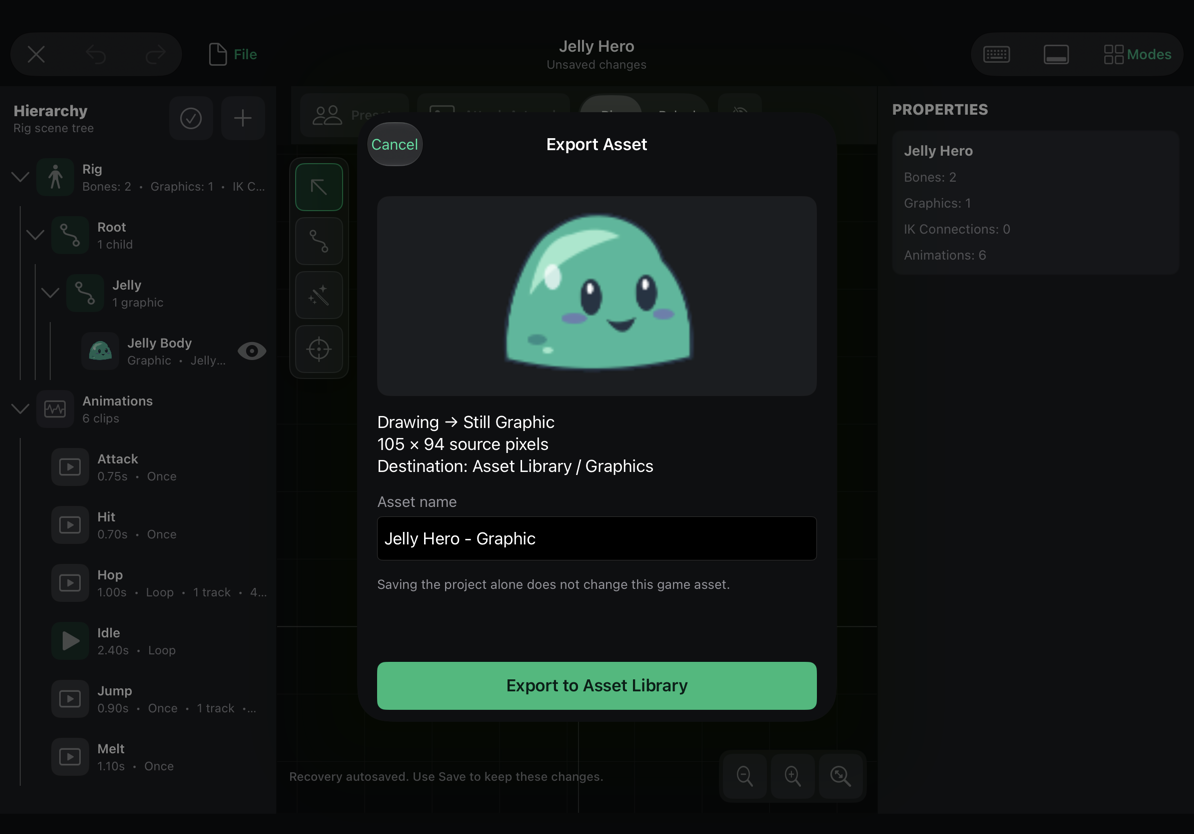
The exported graphic or animation is a separate game asset. You can select it in the Asset Library, add it to the dock, and place it in a scene. Saving more edits to the project does not silently change that exported result; use its update export action when the new version is ready.
Use Save As to make an independent copy, choose another game or folder, or save a portable .hpstudio project to Files or Finder. Export Drawing Files creates files such as PNGs and GIFs from Drawing. Those are different from saving the editable Studio Project.
The projects and exports guide explains every destination and format, updating existing exports, and moving projects between games.
Pick a learning path
You can follow these in order or jump to the result you want to create.
| I want to… | Start here |
|---|---|
| Understand every drawing tool | Drawing tools and canvas controls |
| Make my first sprite | Draw a Glowbot, step by step |
| Animate a drawing frame by frame | Make a frame animation |
| Create a seamless texture or a stretchable panel | Tiles and 9-slice graphics |
| Understand bones, attachments, clips, and the rigging interface | Bones / Rig & Animate: the complete guide |
| Build a walk cycle from poses | Create a walk animation |
| Reuse a sample with my own art, or bend artwork | Replace artwork and deform a mesh |
| Save, copy, export, or update an asset | Studio Projects and exports |
| Find a key command or solve a common problem | Shortcuts and reference |
Start with one small result: draw a sprite, save its project, export a graphic, and put it in your scene. That gives you the complete workflow before you add layers of animation or rigging.