

Map Control Inputs
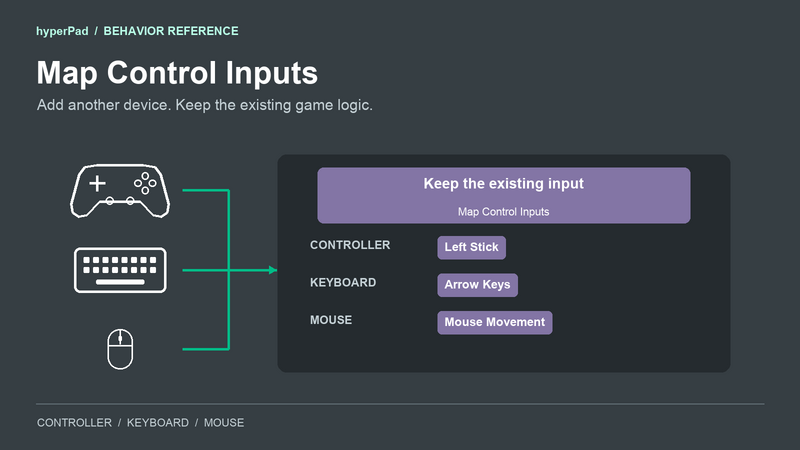
Description
Use Map Control Inputs to add controller, keyboard, or mouse support to an input you already use. Your character keeps the movement settings from Joystick Controlled. Your jump keeps the settings from Jump with Button. Your custom touch actions keep their existing behavior connections.
Each row connects an existing Input to a Mapped Control. You can select the input's Object or drag the Input output from a supported behavior. Add more rows when one action should work with several devices.
The original touch control continues to work.
Add a controller to an existing joystick
Start with a character that already uses Joystick Controlled. Keep Object A set to its joystick and Object B set to your character.
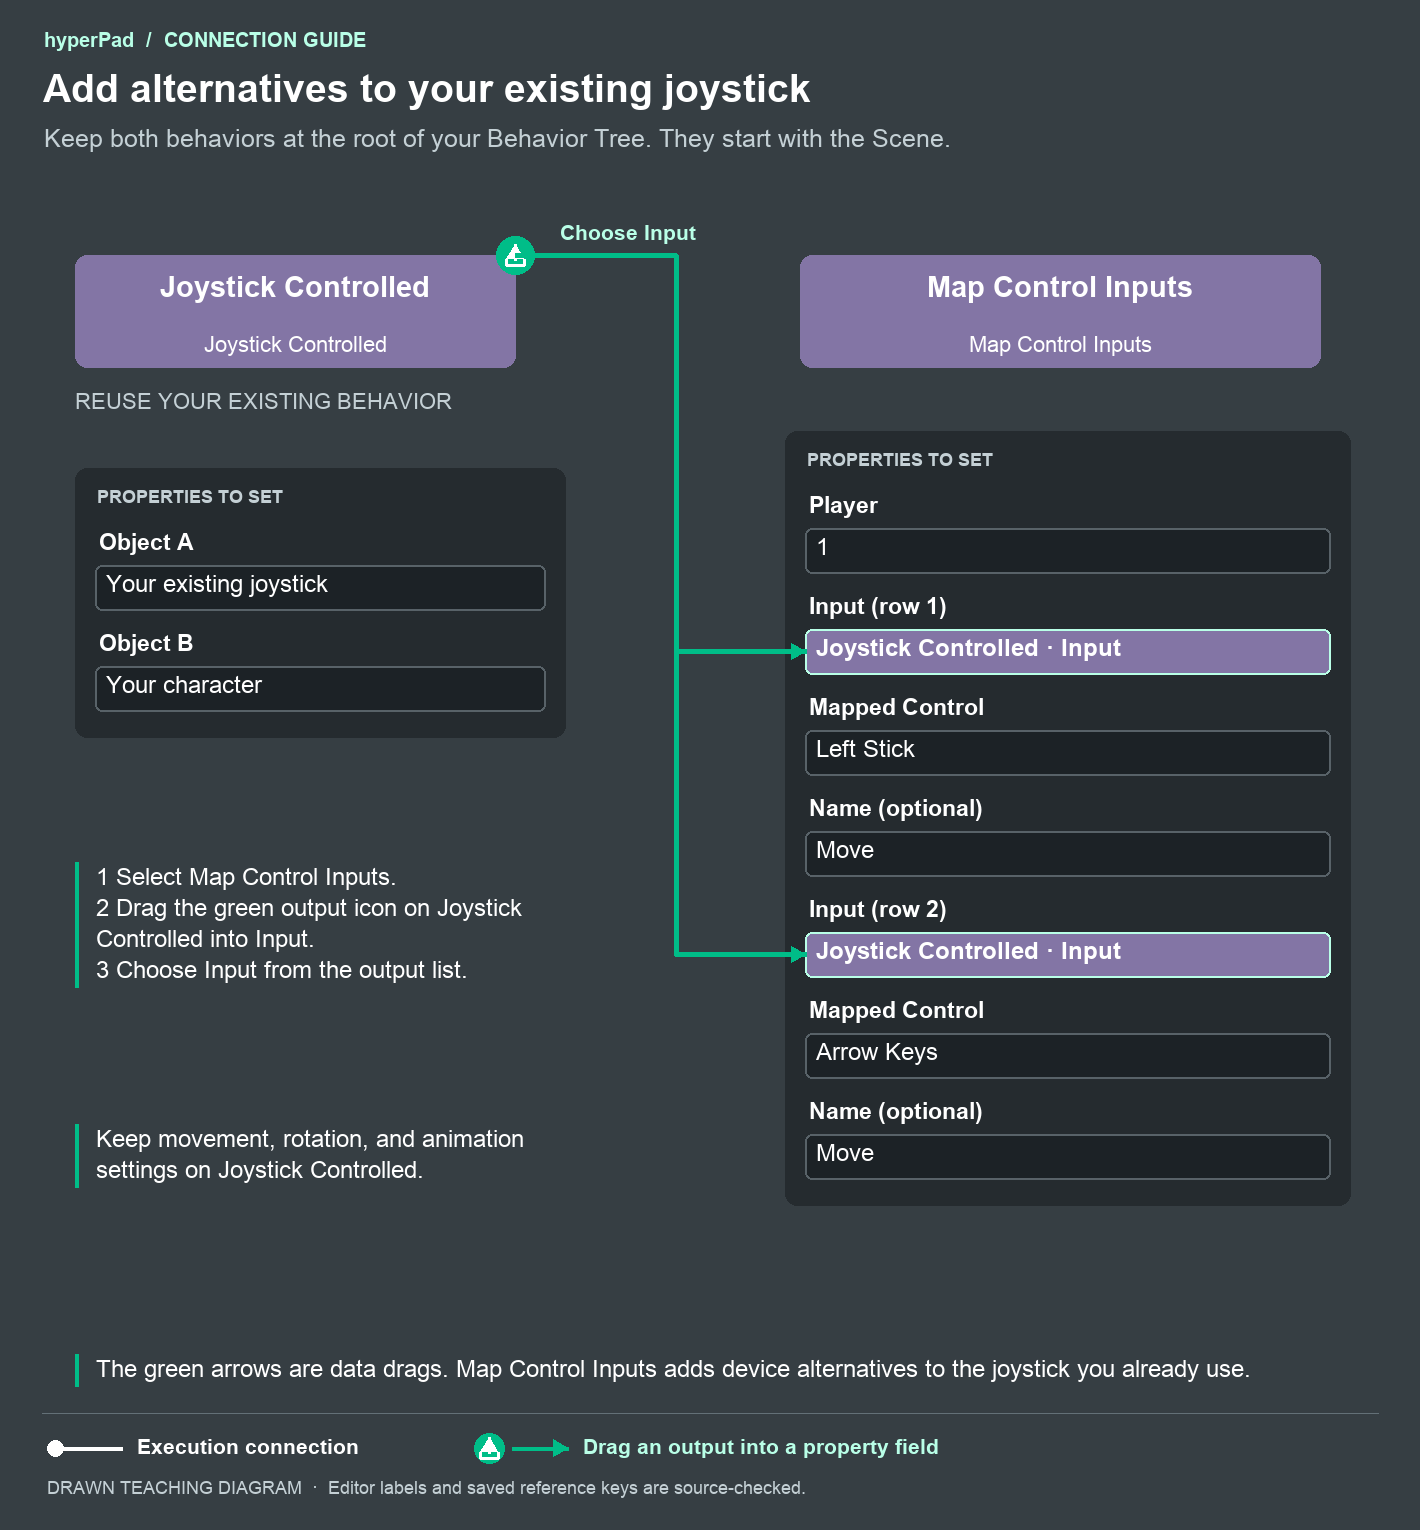
In this diagram, REUSE marks your existing behavior. Green arrows show data being dragged into a property. White connections run behaviors. These two behaviors start with the Scene, so this example needs no white connection between them.
- Add Map Control Inputs. Leave Player at 1 and let it start when the Scene starts.
- Select Map Control Inputs so its properties are open.
- Drag the green output icon on Joystick Controlled into the first row's Input. Choose Input from the output list.
- Set Mapped Control to Left Stick. Enter Move in Name (optional).
- Tap + Add Input. Drag the same Joystick Controlled · Input into this row.
- Set the second row's Mapped Control to Arrow Keys. Use Move as its name too.
Use the green icon on the source behavior for the drag. The green button inside a receiving input creates a Change Input Field behavior.
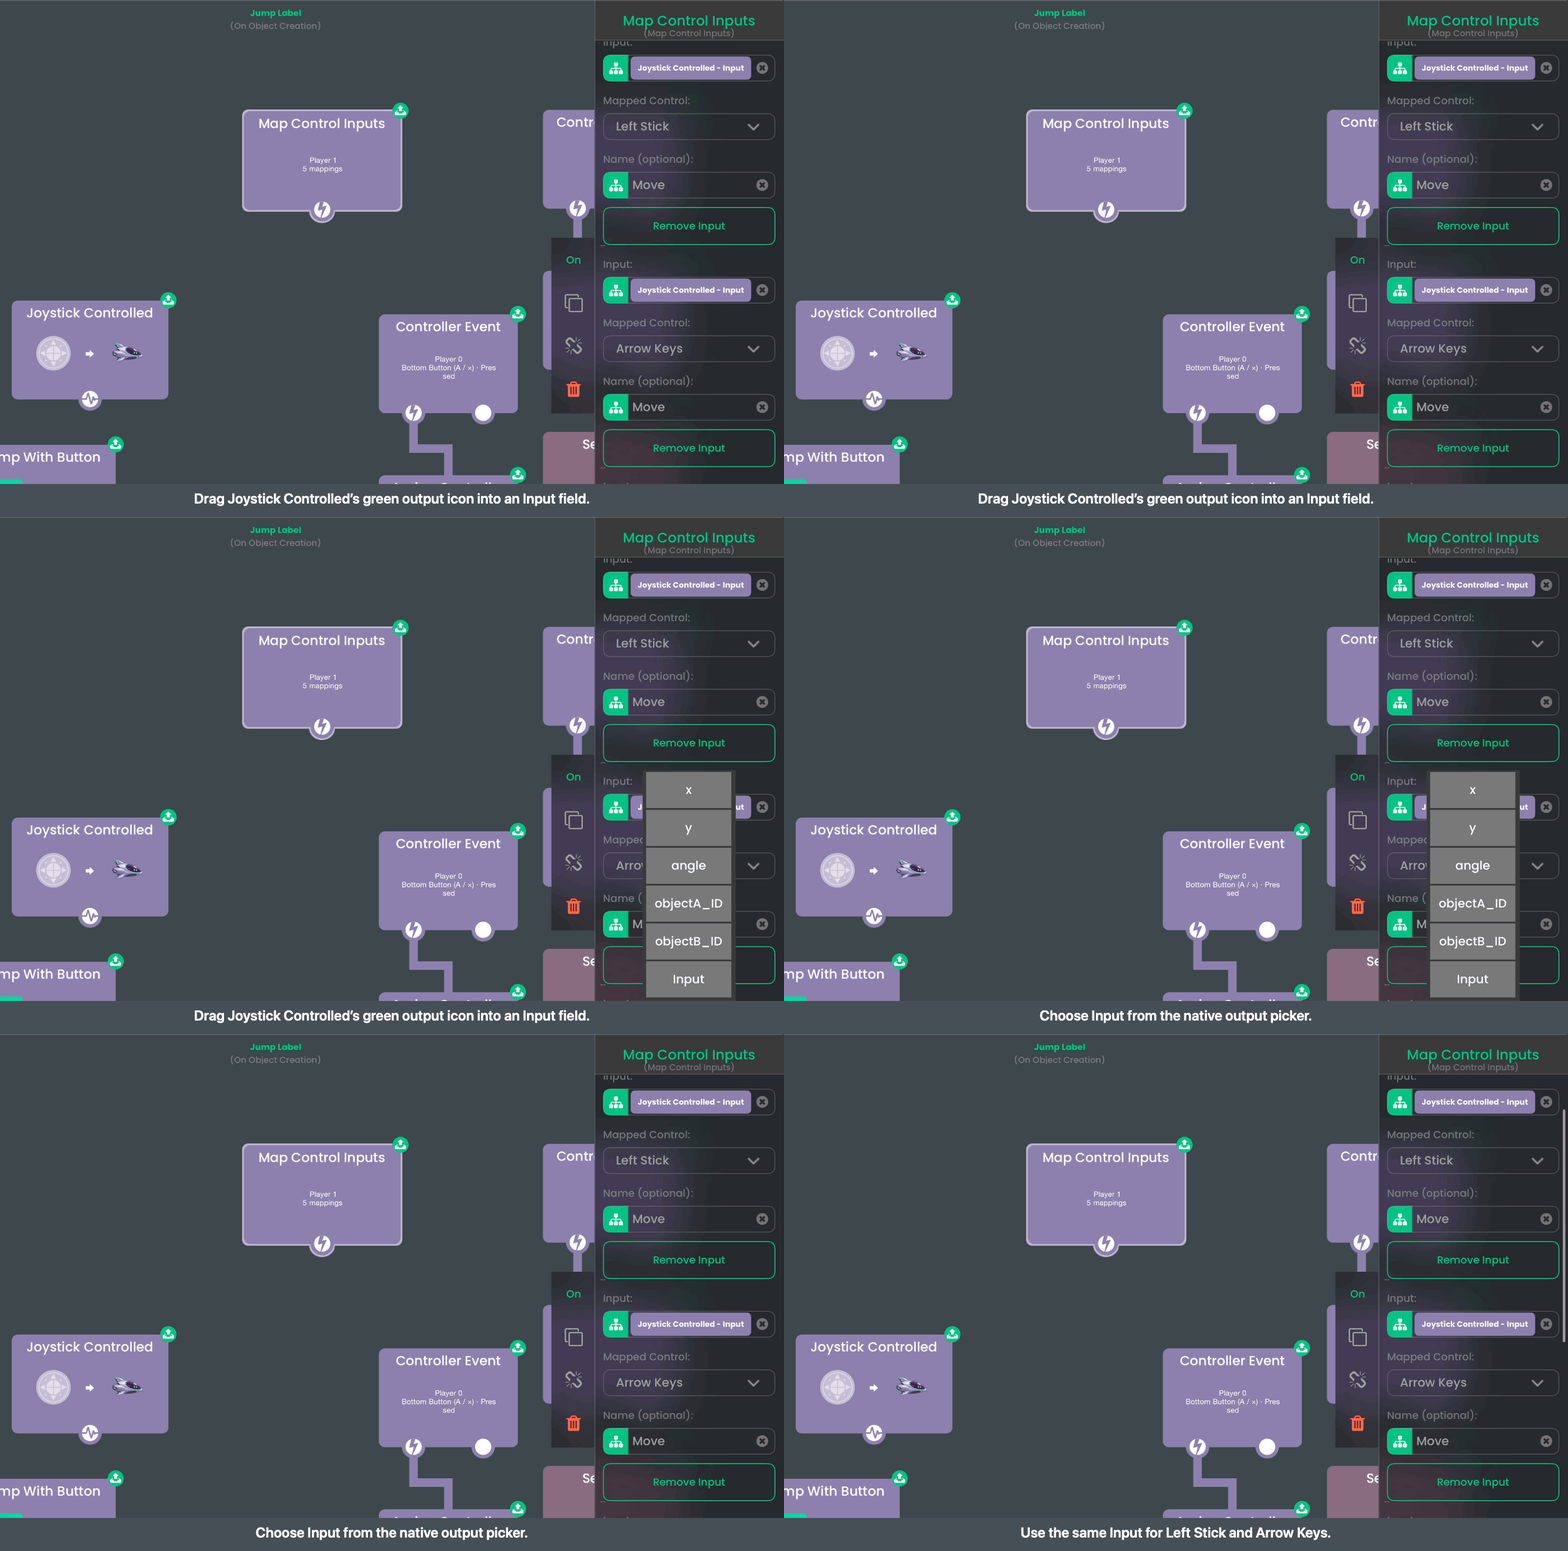
Drag the joystick’s output into the second Move row and select Input. This row uses Arrow Keys; the first row uses Left Stick.
Play your Project with a supported controller connected. Moving the left stick should move your character through the same Joystick Controlled settings. Try the arrow keys and the on-screen joystick as well. Walking speed, acceleration, enabled directions, rotation, and animations still come from Joystick Controlled.
Input identifies the control you are reusing. Here it identifies Object A, the joystick. It is available before you first move the joystick. The character's objectB_ID, the joystick's x and y, and the white event connection each serve a different purpose. Choose Input for this mapping.
Properties
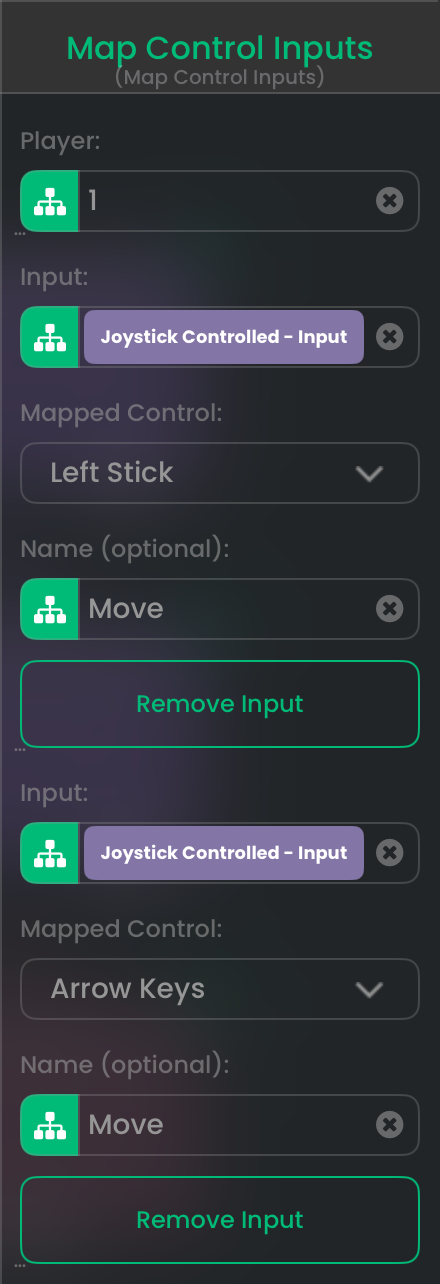
Both rows reuse the same joystick. One reads Left Stick; the other reads Arrow Keys.
| Property | What you set |
|---|---|
| Player | A positive player number. The default is 1. Controller rows read the controller assigned to this player. Use a separate Map Control Inputs behavior with Player 2 for another player's controls. |
| Input | Select a button or joystick Object, or drag Input from a supported behavior. A new row starts empty. For Jump with Button and Shoot with Button, Input identifies their button, not the character. |
| Mapped Control | The physical control that will supply input. The choices depend on the input type. A button row initially uses Bottom Button (A / ×). Selecting a joystick input offers directional controls and defaults to Left Stick when the old choice is incompatible. |
| Name (optional) | A label such as Move, Jump, or Shoot for the Controls overlay. The default is blank. The name does not change your gameplay. |
| + Add Input | Add another independent row. Use several rows with the same Input to give one action several alternatives. |
| Remove Input | Remove that row. Other rows continue to supply their alternatives. |
| Up Key, Right Key, Down Key, Left Key | Shown when Mapped Control is Custom Movement Keys. Choose one key for each direction. Their defaults are Up Arrow, Right Arrow, Down Arrow, and Left Arrow. |
Compatible inputs
| Input you reuse | Compatible Mapped Control choices |
|---|---|
| A joystick Object; Joystick Controlled; Joystick Input; the directional joystick behaviors | Left Stick, Right Stick, D-pad, WASD, Arrow Keys, Custom Movement Keys, Mouse Movement. |
| A button Object; Jump with Button; Shoot with Button; Started Touching, While Touching, or Stopped Touching on an Object | Controller face buttons, shoulders, triggers, stick clicks, Menu or Options; individual keyboard keys; mouse buttons; individual scroll directions. |
| Keyboard Event with one concrete key | The same button alternatives. Its existing press, held, or release event remains in use. |
| Mouse Event with On Left Click, On Right Click, or one specific On Scroll direction | The same button alternatives. A scroll direction supplies a short pulse. |
| Mouse Event with On Move | The directional alternatives listed for a joystick. |
Mouse button choices are Left Mouse Button, Right Mouse Button, Middle Mouse Button, Mouse Back Button, and Mouse Forward Button. Wheel choices are Scroll Up, Scroll Down, Scroll Left, and Scroll Right. A device must support the control you choose.
Mouse Movement supplies relative motion and returns to neutral when movement stops. Your existing joystick threshold still applies. Test small mouse movements when choosing that threshold.
Any key events and On Sequence do not provide one mappable key. Mouse connection events and On Scroll with Any do not provide one mappable mouse action. Choose a concrete supported input first.
A mapped button can drive an Object's existing press, held, and release behaviors. It uses the Object's center for touch coordinates. Swipes, finger paths, and drag distances need their own movement logic. For those cases, add Controller Event to your custom Behavior Tree and connect it to the actions that make sense for your game.
Add jump or a custom button action
For Jump with Button, add another row and drag its Input into the row. Choose Bottom Button (A / ×) and name it Jump. The original jump count, wall-jump setting, power, and animations still apply.
For a custom touch button, drag Input from Started Touching, While Touching, or Stopped Touching. These behaviors refer to the same selected Object's input. Mapping that Object lets your existing press, held, and release actions respond to the alternative button.
Several button sources can stay held at once. Releasing one source keeps the action held while another source is still held.
Execution and output
Map Control Inputs registers its rows when it starts. If you give it an incoming white execution connection, registration happens when that connection runs. Its bottom white event connection runs once after registration.
After that, the original input behaviors produce their usual events and values when you use the mapped controls. You do not need to run Map Control Inputs every frame. Disabling it removes its mappings. Paused gameplay and input captured for rebinding do not trigger the mapped gameplay actions.
| Output | Type | Meaning |
|---|---|---|
mappingCount | Number (integer) | Number of configured rows registered by this execution. This count does not confirm that a device is connected or that every row has a usable input. |
Players and the Controls overlay
Player numbers identify controller assignments. The first available controller is assigned to Player 1 automatically. You can use Assign Controller or the Controls overlay to choose which connected controller belongs to each player. Keyboard and mouse are shared physical devices, so choose their multiplayer roles in your Project.
The editor creates one editable Controls overlay for this setup. It contains device selection, player assignments, controller/keyboard/mouse binding cells, a controller diagram, and reset actions. Open it from your own menu with Load Overlay. If Controls is already used as a Scene name, the generated overlay receives a numbered name.
The overlay changes compatible controls within each row's device family. Rebind Input exposes the same operation for your own UI. Saved choices belong to the Project, player, and binding. A controller alternative and a keyboard alternative remain separate rows.
Connect or pair hardware through the platform's supported setup first. The overlay chooses among connected devices; it does not provide Bluetooth pairing.
Check your setup
- The character never moves: Check that Input refers to the joystick, the mapping has started, and the controller is assigned to the selected Player.
- The dropdown does not offer Left Stick: Choose a joystick or movement Input. Button inputs offer button controls.
- A custom swipe does not behave like touch: Build an explicit controller version of that action with Controller Event. Mapping a button supplies button states.
- A second player controls the first character: Check both the row's Input Object and its Player assignment.