Steal This Game Mechanic

Make Your Hits Feel Better
A projectile hits an enemy and takes away 20 health. Everything works. The collision fires, the damage is applied, and eventually the enemy dies.
But play it and the hit might barely register.
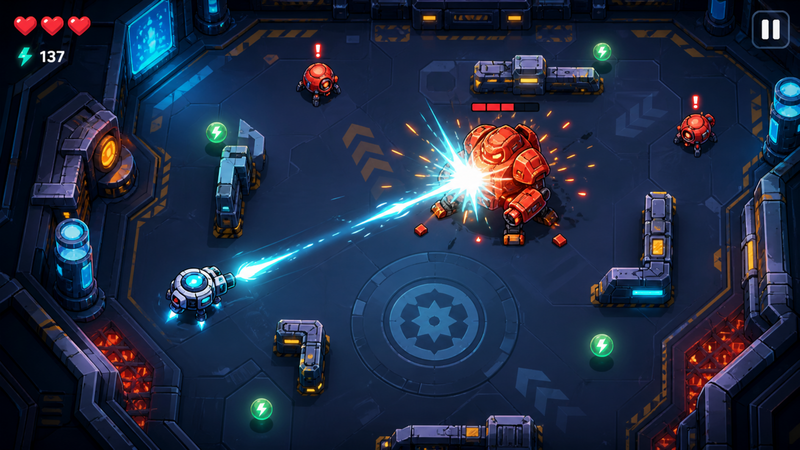
This is something action games spend a surprising amount of effort fixing. What happens to the enemy is only part of a hit. The player also needs to see, hear and feel that contact happened. A small sound, a burst of particles or a quick movement of the screen can change the impression of the exact same collision.
You can build a simple version of this in hyperPad with Behaviors you may already be using.
Build the boring version first
Start with two Objects that can collide. They could be a projectile and an enemy, a ball and a wall, or whatever makes sense for your game.
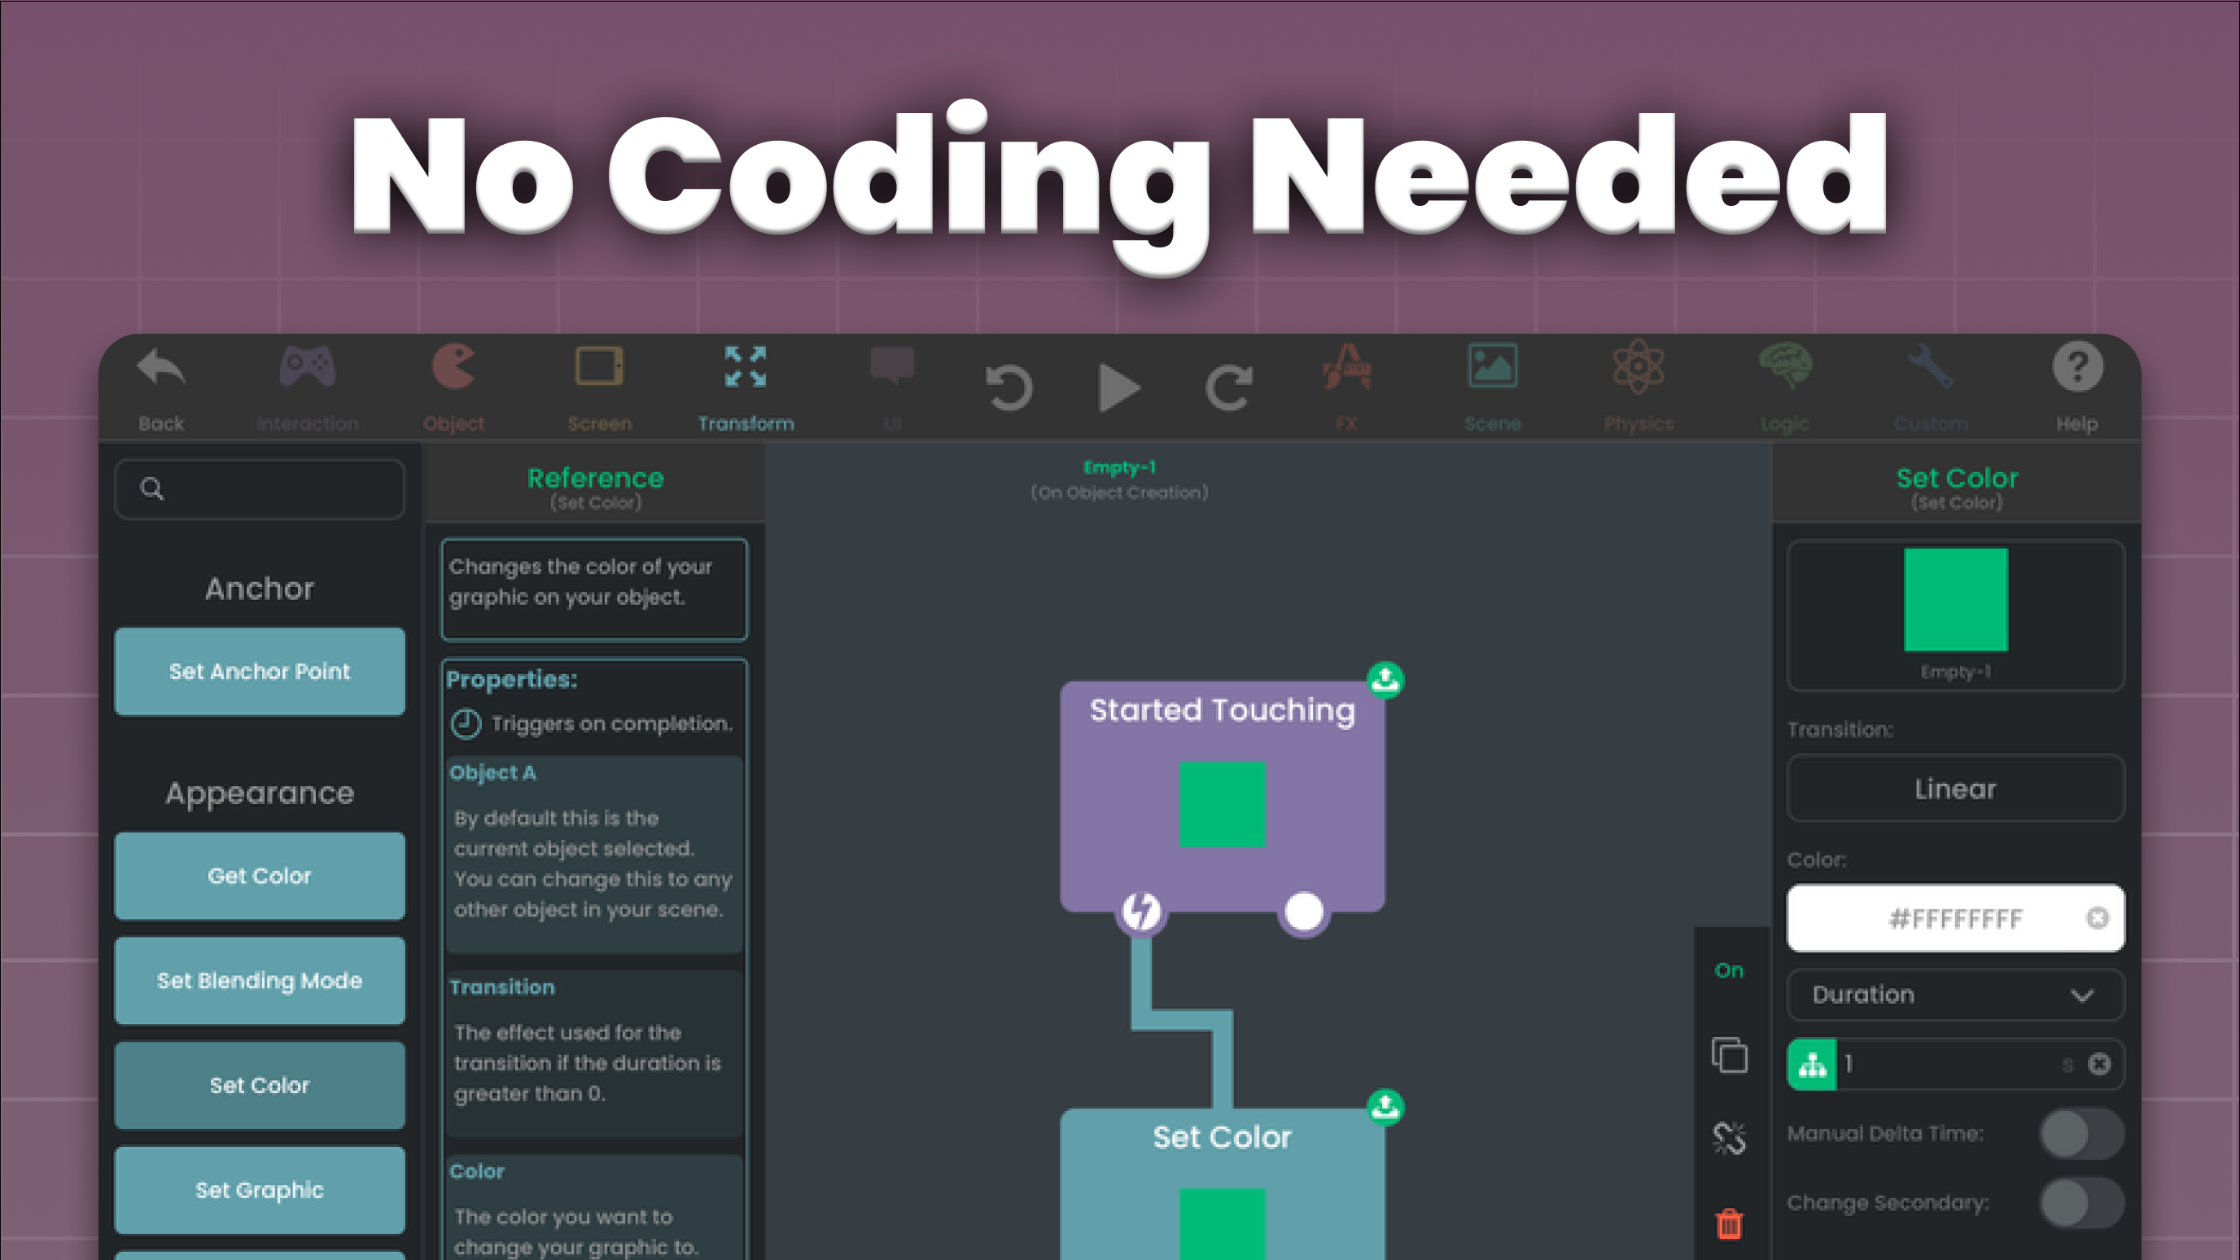
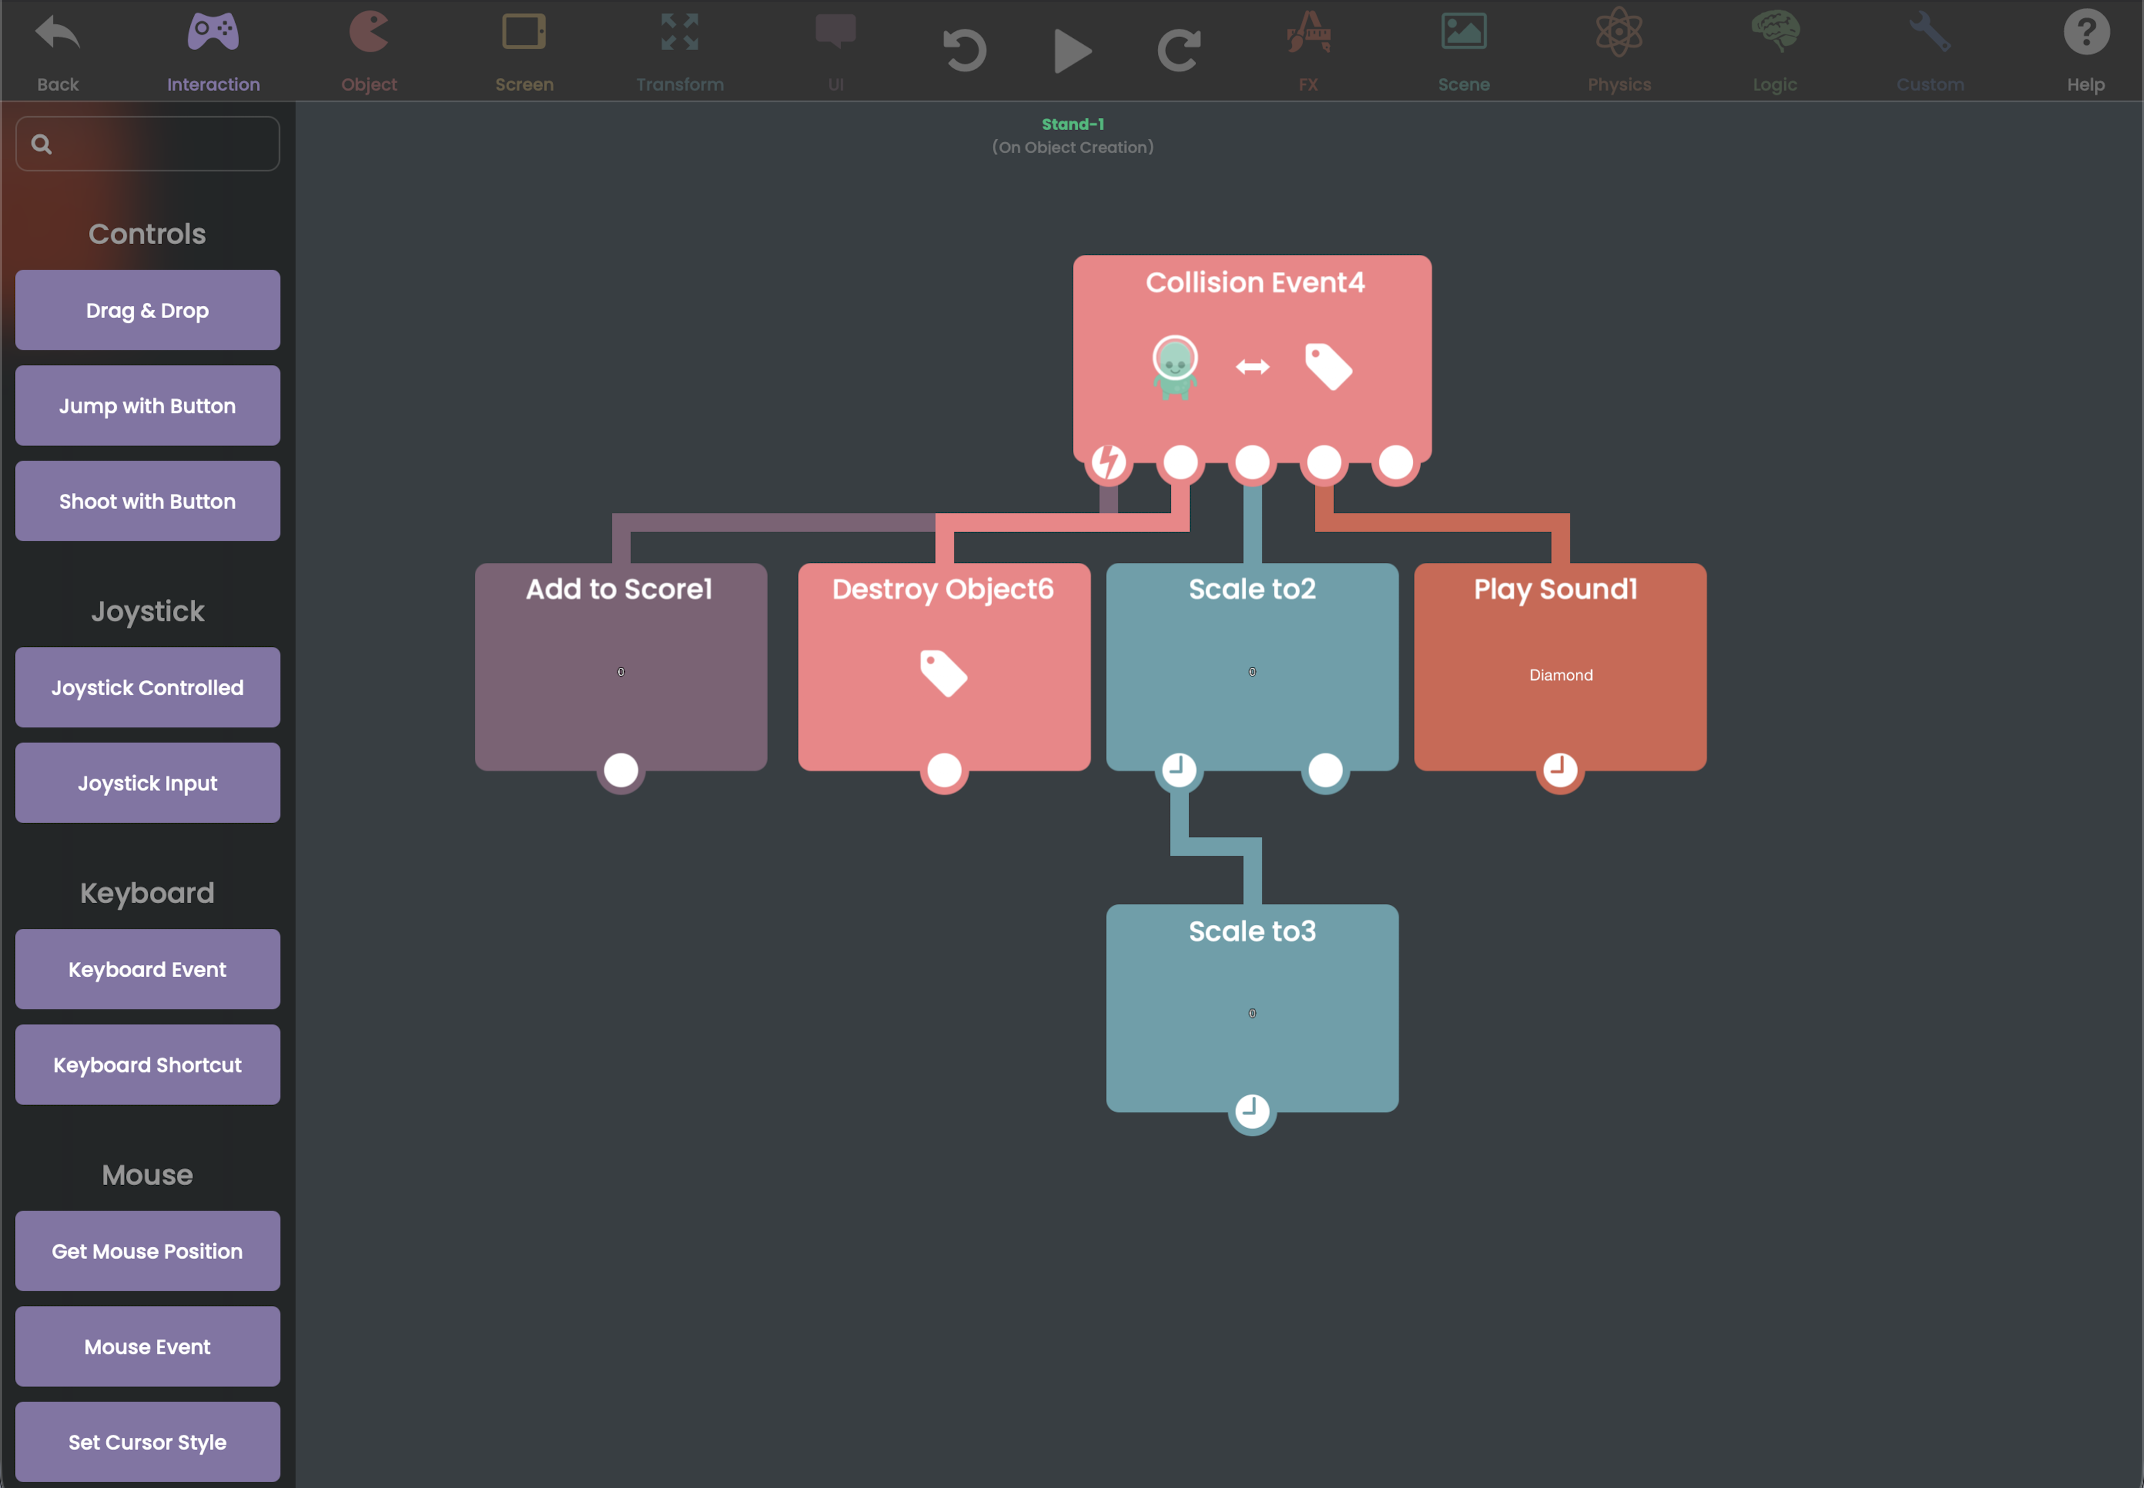
Open the Behaviors screen and add Collided. Choose the Object you want to detect the collision with.
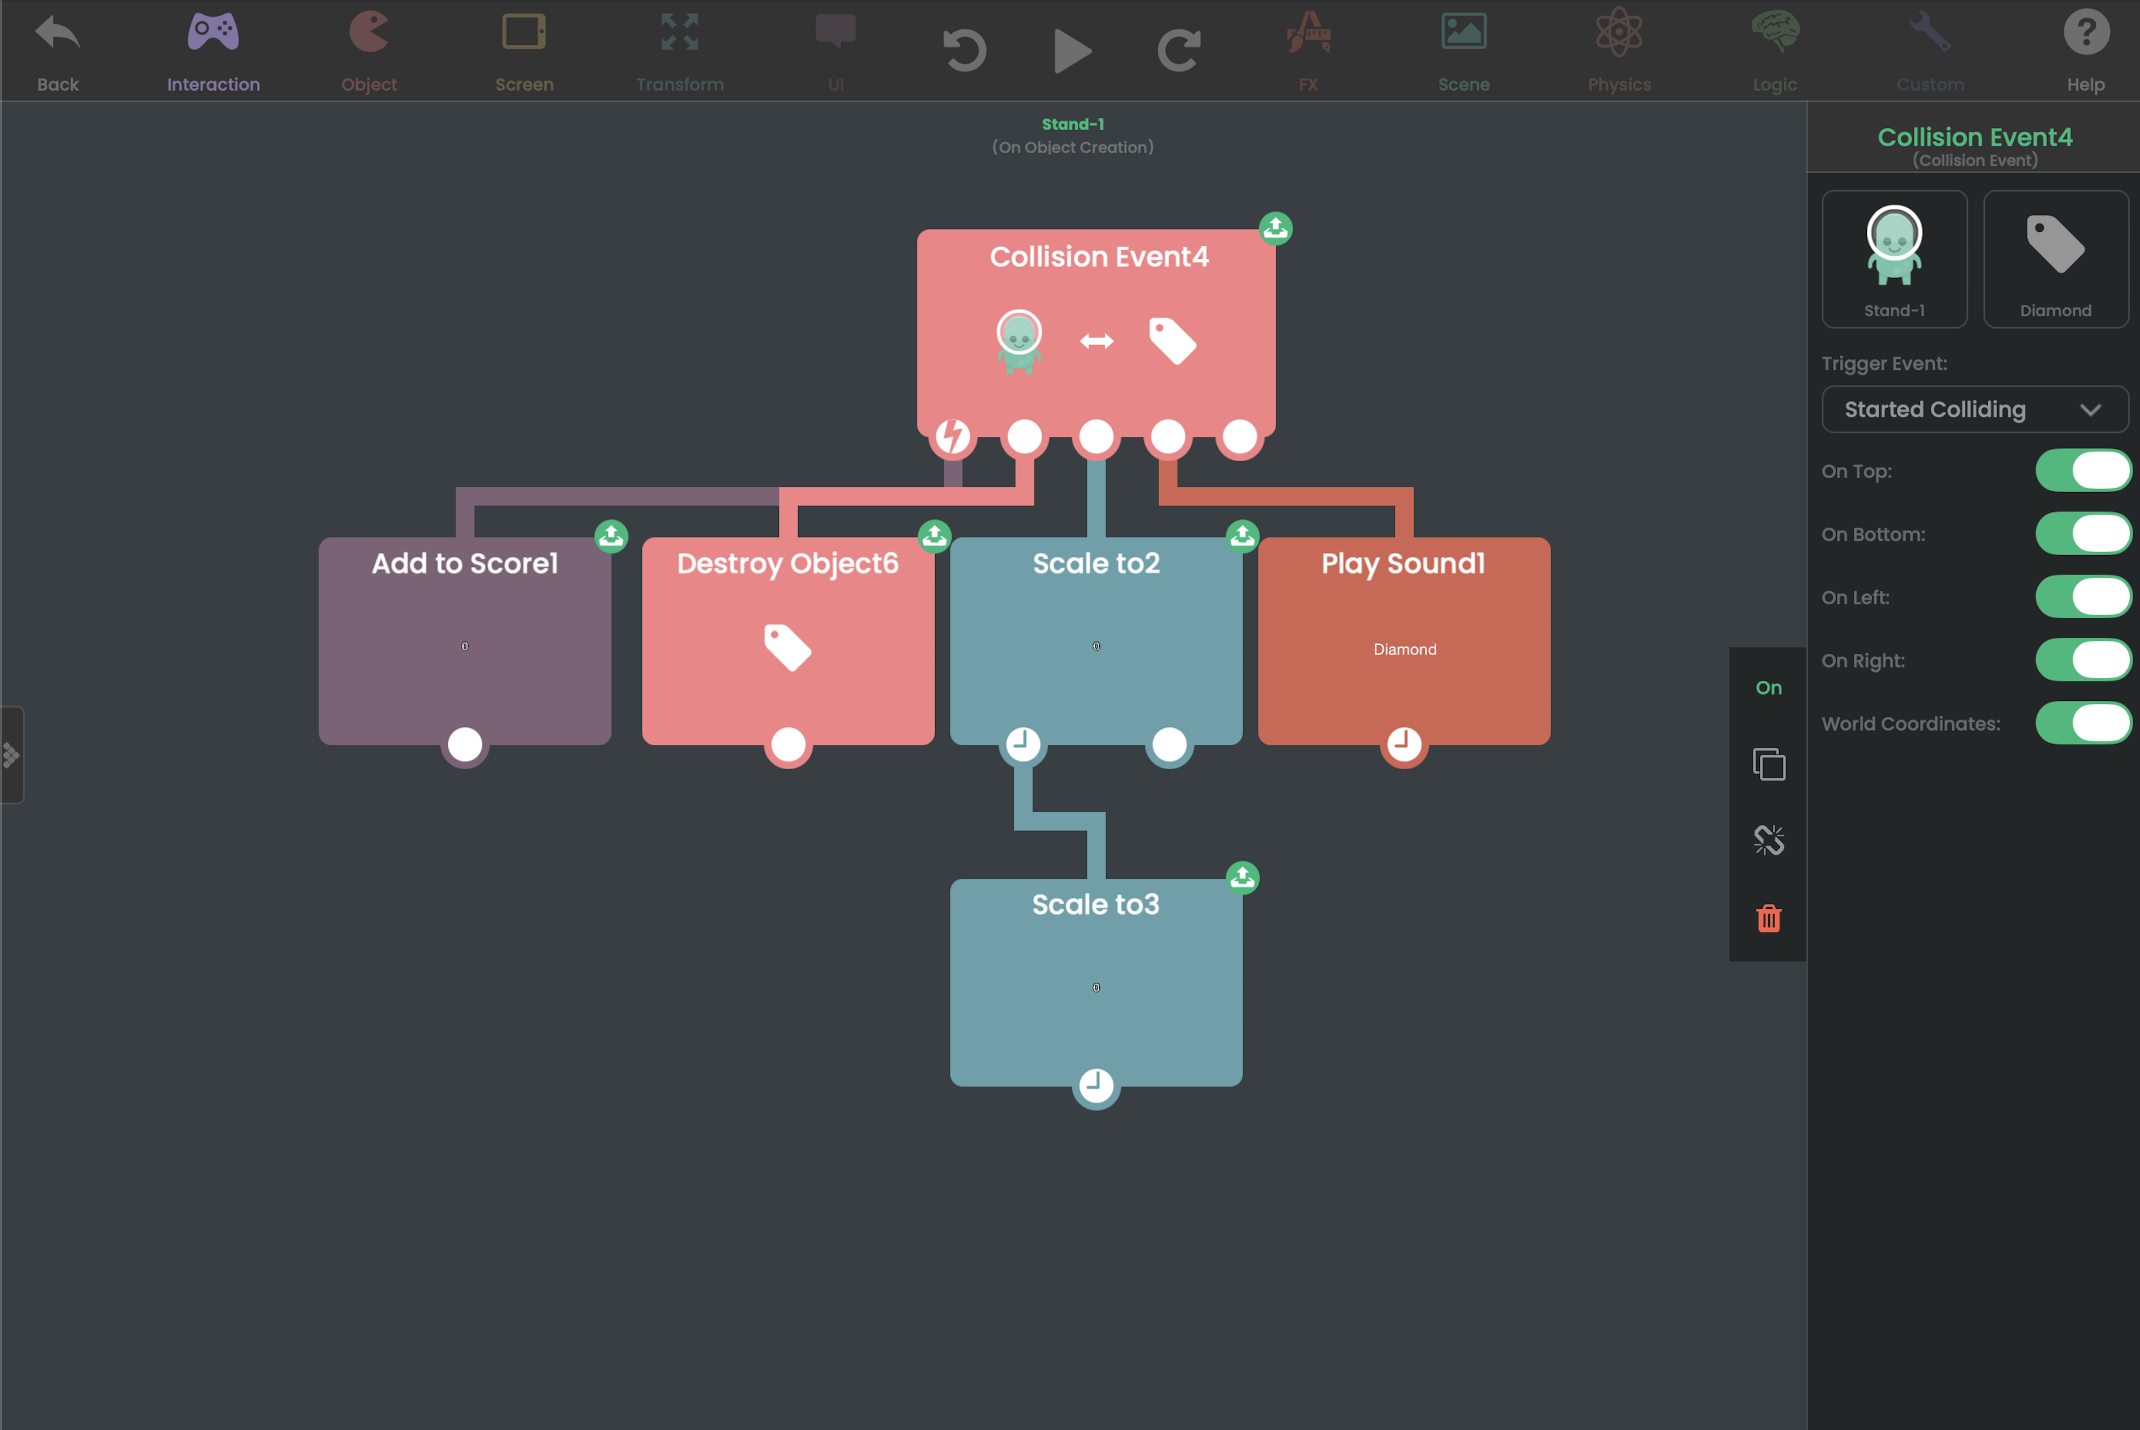
This follows the basic Event → Action structure used throughout hyperPad's Behavior system. The official Tappy Plane tutorial uses the same setup for its crash logic: the plane colliding with the ground is the event, and Behaviors connected to it determine what happens next.
Watch: Behavior Editor Rundown
New to hyperPad? Main Editor Rundown
For now, don't connect anything else.
Run the game and make the Objects collide a few times. This gives you a useful baseline. The collision works, but hyperPad isn't making any decisions about how important that collision should feel. That's your job.
Go back to the Behaviors and connect Play Sound to Collided. Pick a short sound that suits the contact you're making and try the game again. You can create or customize one using hyperPad's Sound Effects Editor.
The collision itself hasn't changed, but the player gets an immediate confirmation that something happened. hyperPad's Tappy Plane tutorial uses sound in the same way for scoring and suggests separate sounds for crashing and tapping the screen.
This is where you can start treating feedback as part of the mechanic instead of decoration added at the end.
Give the collision some weight
Next, add Shake Screen to Collided.
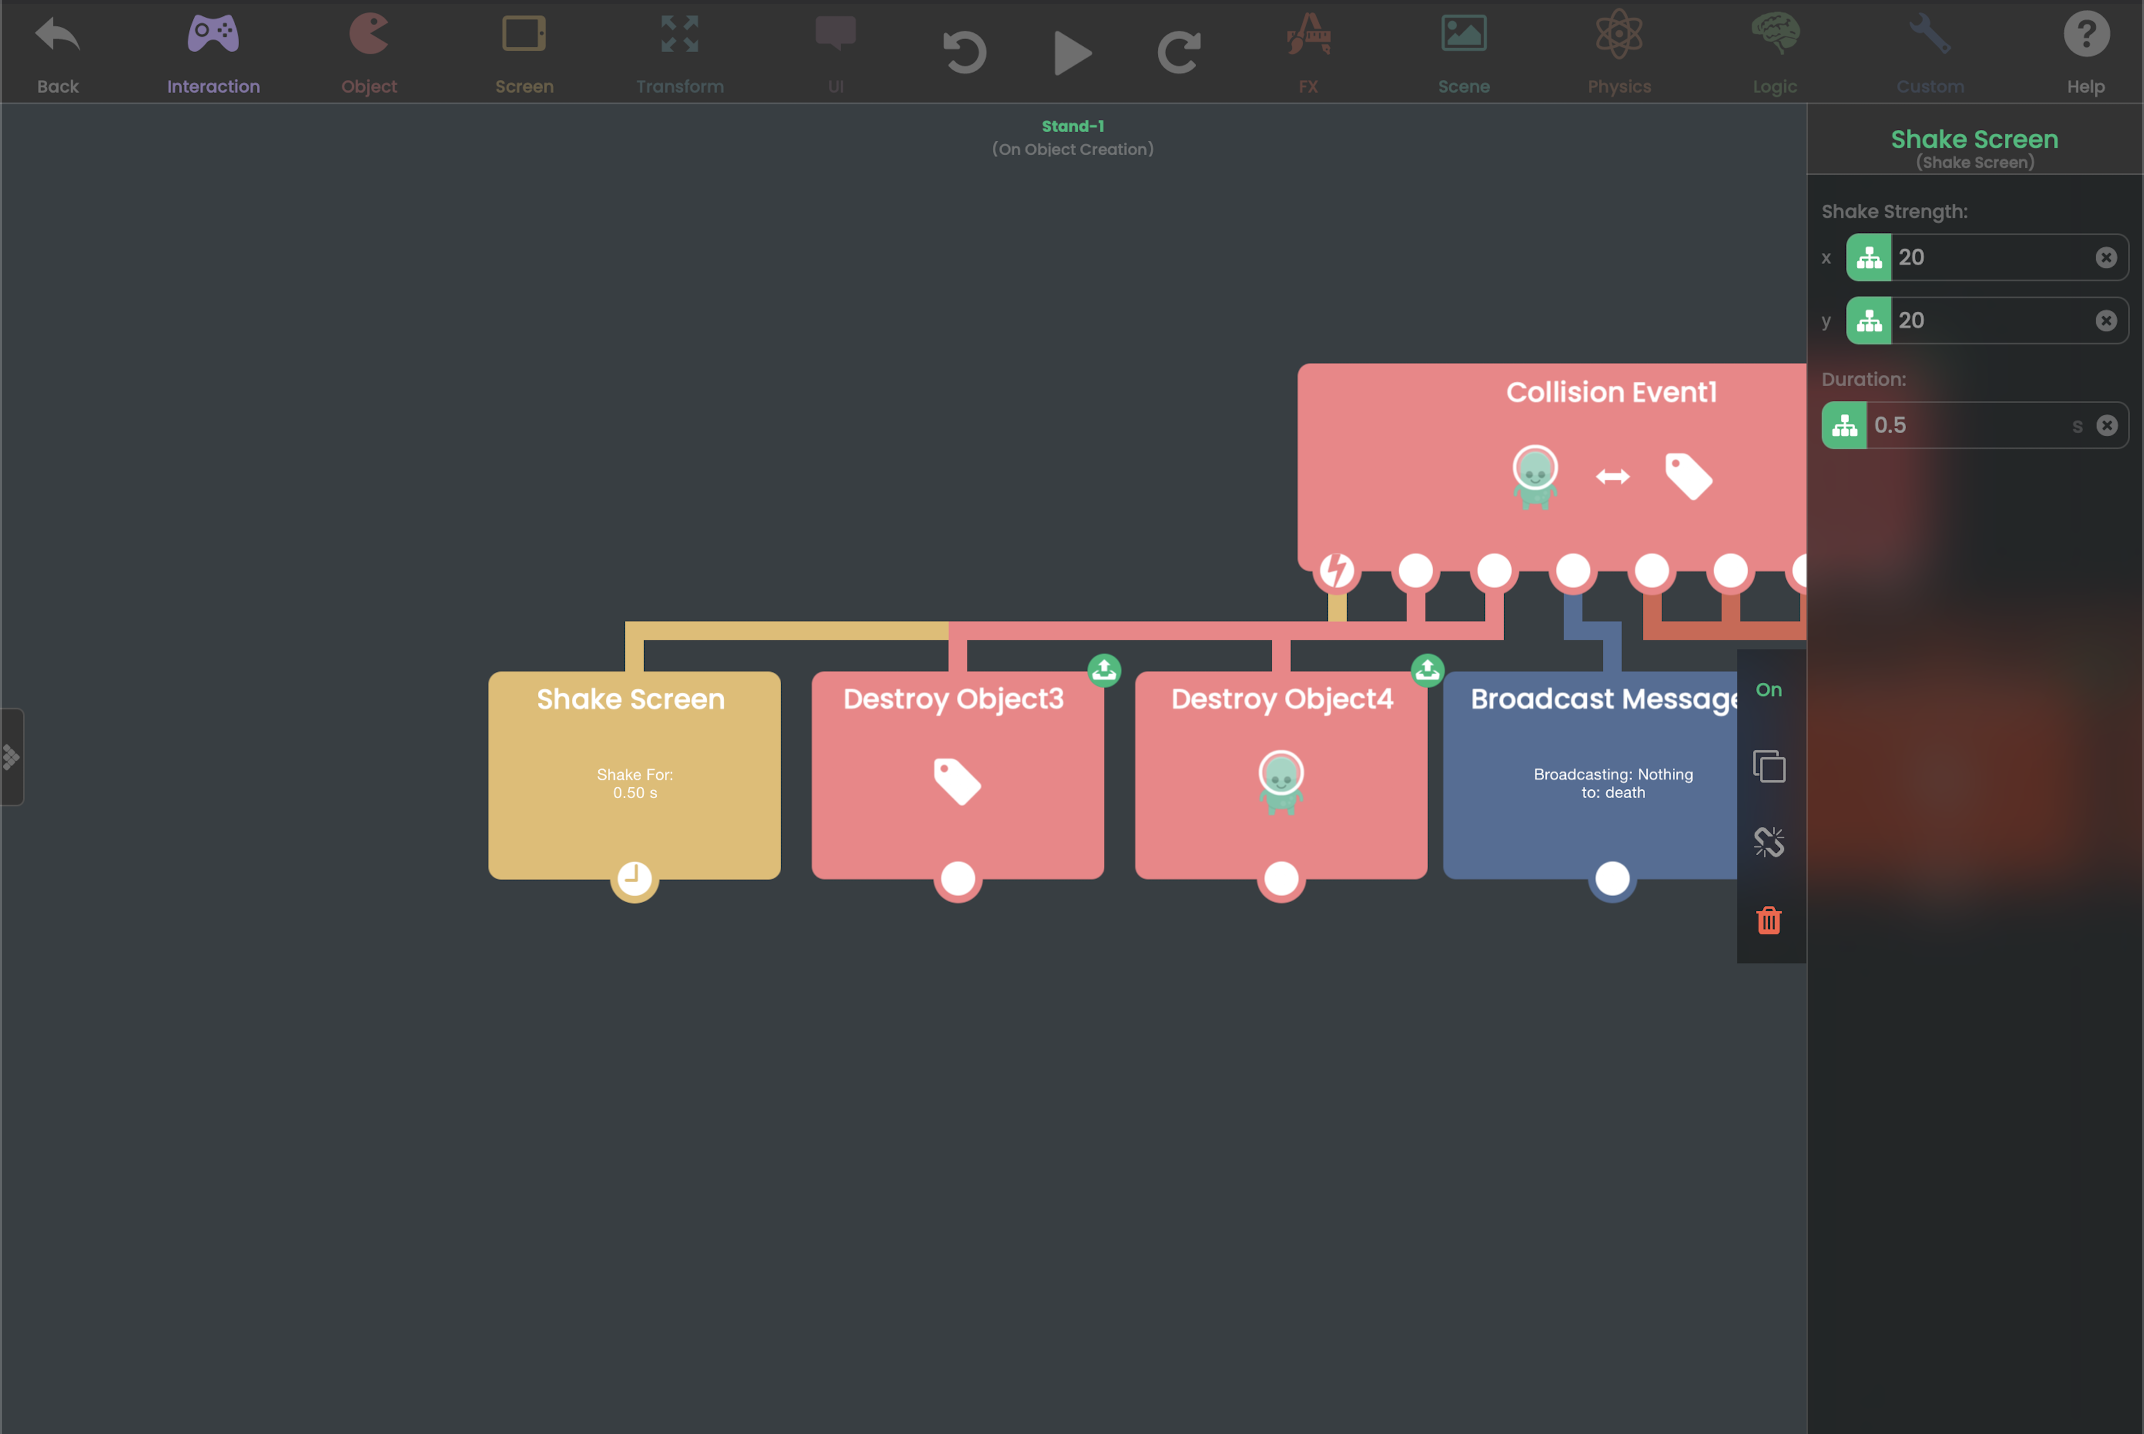
Shake Screen is a Screen Behavior built into hyperPad. In Tappy Plane, it's connected to the plane's collision Behaviors to give the crash more impact. The tutorial uses a duration of 0.1 seconds and then adjusts the shake strength by testing the game.
That's a reasonable place to start, but don't treat 0.1 seconds or any particular strength as the correct setting for your game.
Make the shake too strong on purpose and see what happens. A tiny projectile causing the whole screen to jump can feel ridiculous. Bring the strength down until the response fits the thing that caused it.
That difference matters. A cannon shell, a basketball hitting the rim and a character landing from a jump could all trigger Shake Screen, but using the same settings for all three would make little sense. The Behavior gives you the effect. Testing tells you how much of it your mechanic needs.
You can do the same with particles.
Add Start Particles to the collision and choose or create an effect that fits the contact. hyperPad's Tappy Plane tutorial does this for its crash effect, connecting Start Particles to Collided and anchoring the particles to the plane.
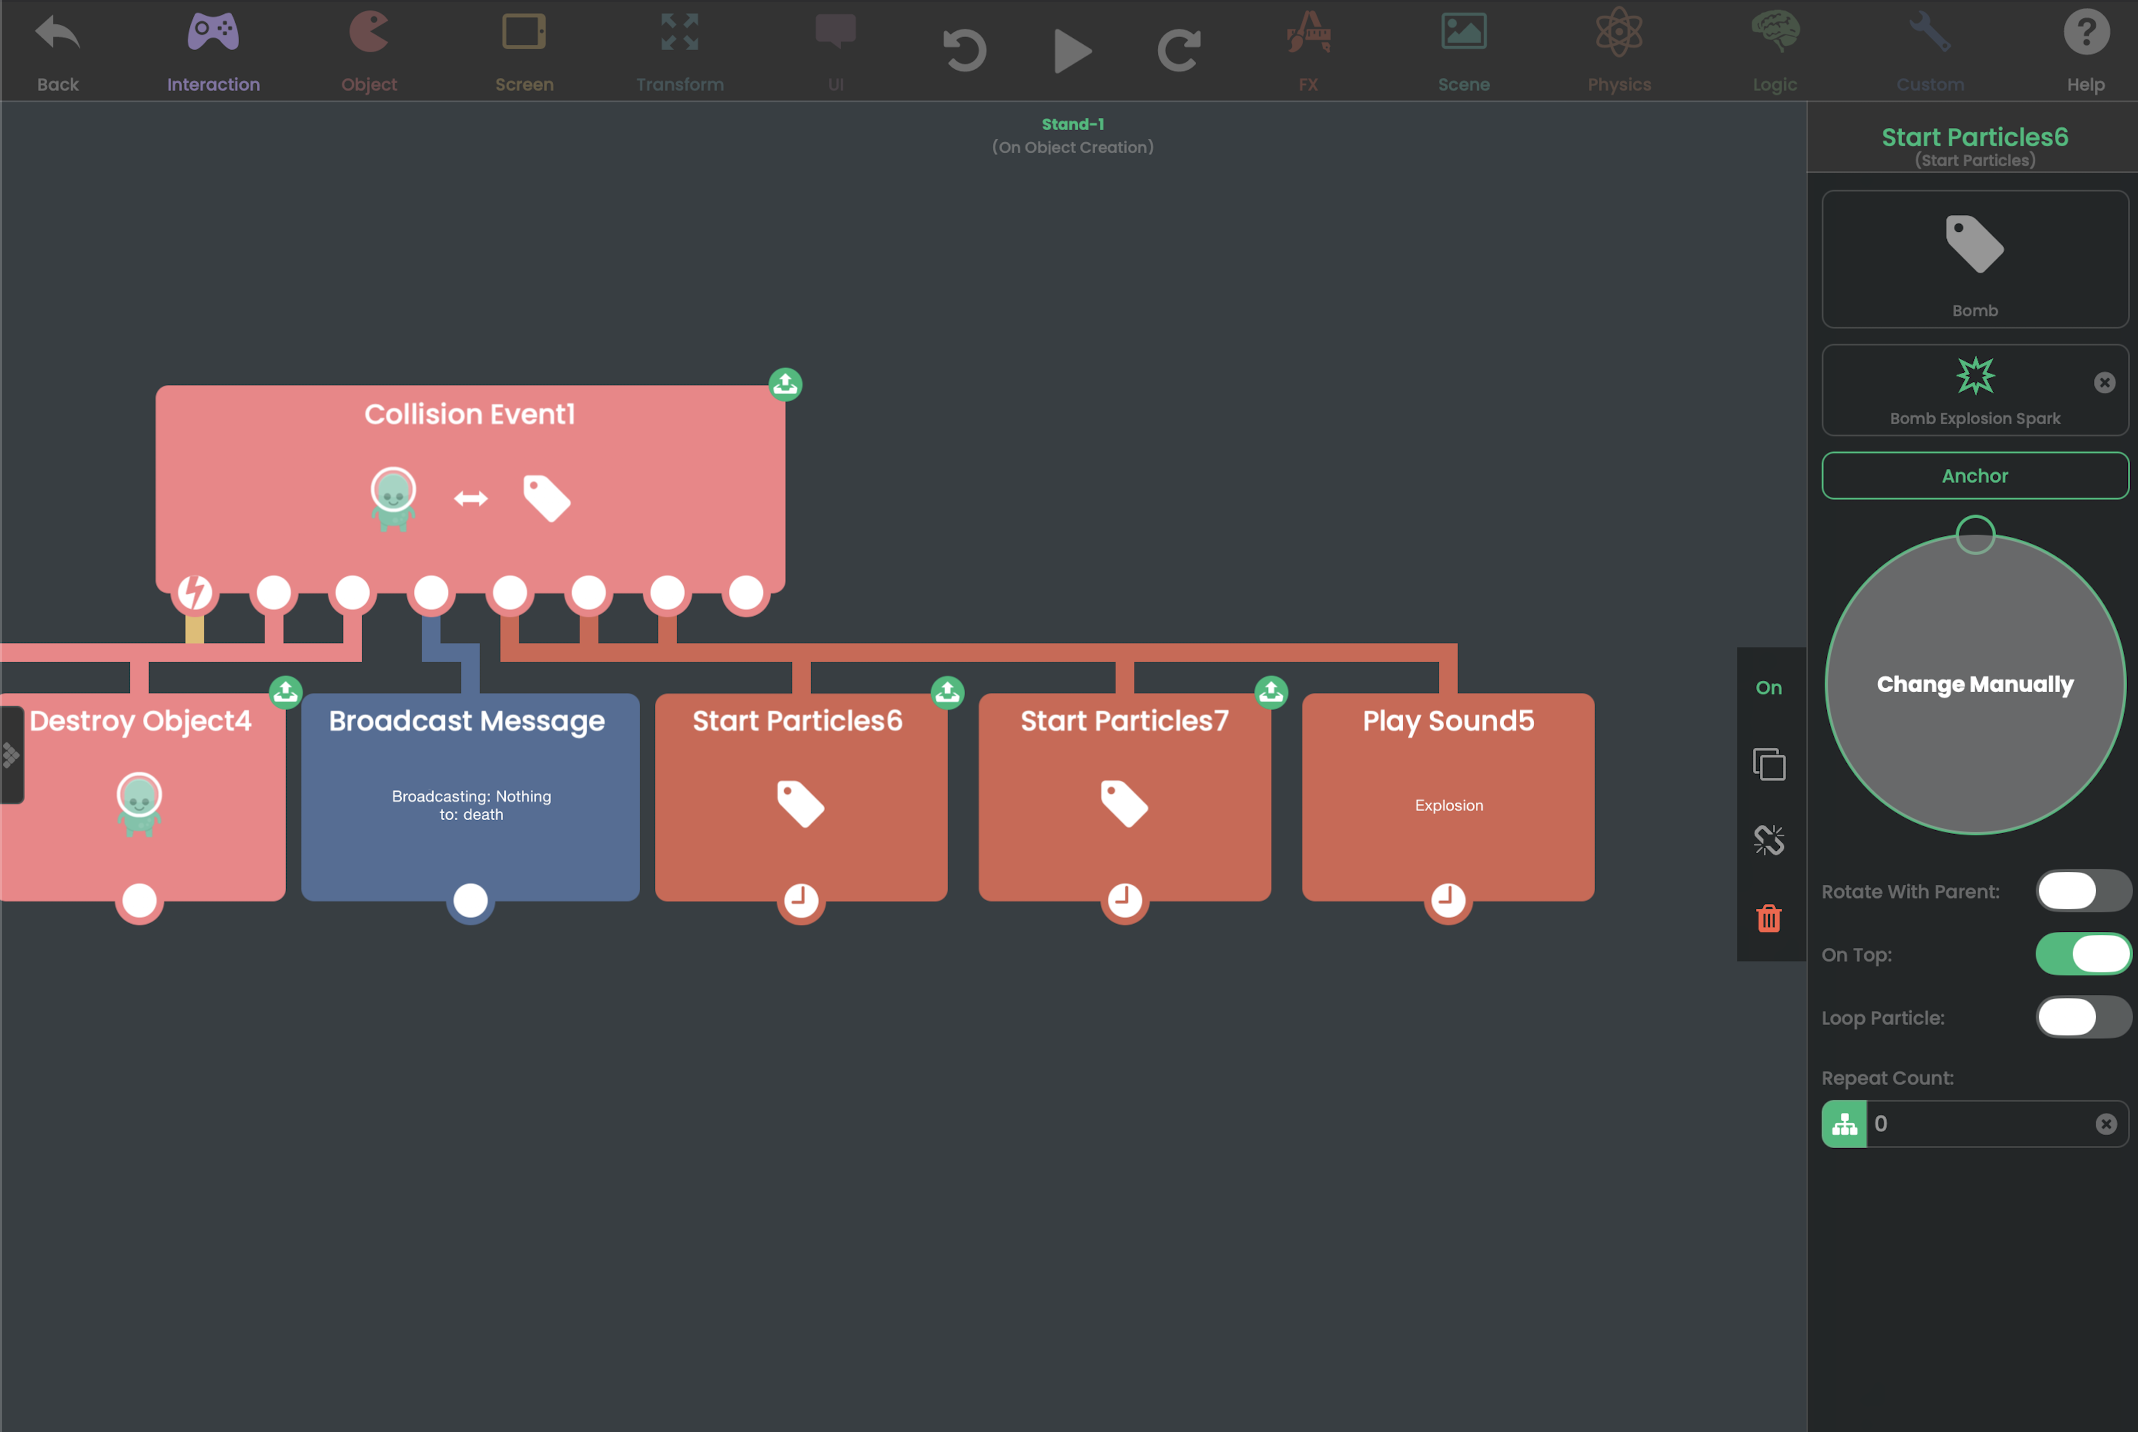
For a projectile, you might place the particles around the point of impact. Sparks could work for metal, dust for a hard landing, or something much less realistic if you're making an arcade game. The art isn't particularly important for this experiment. What matters is whether the effect makes the collision easier to read.
At this point your simple collision can trigger a sound, a small screen shake and a particle effect.
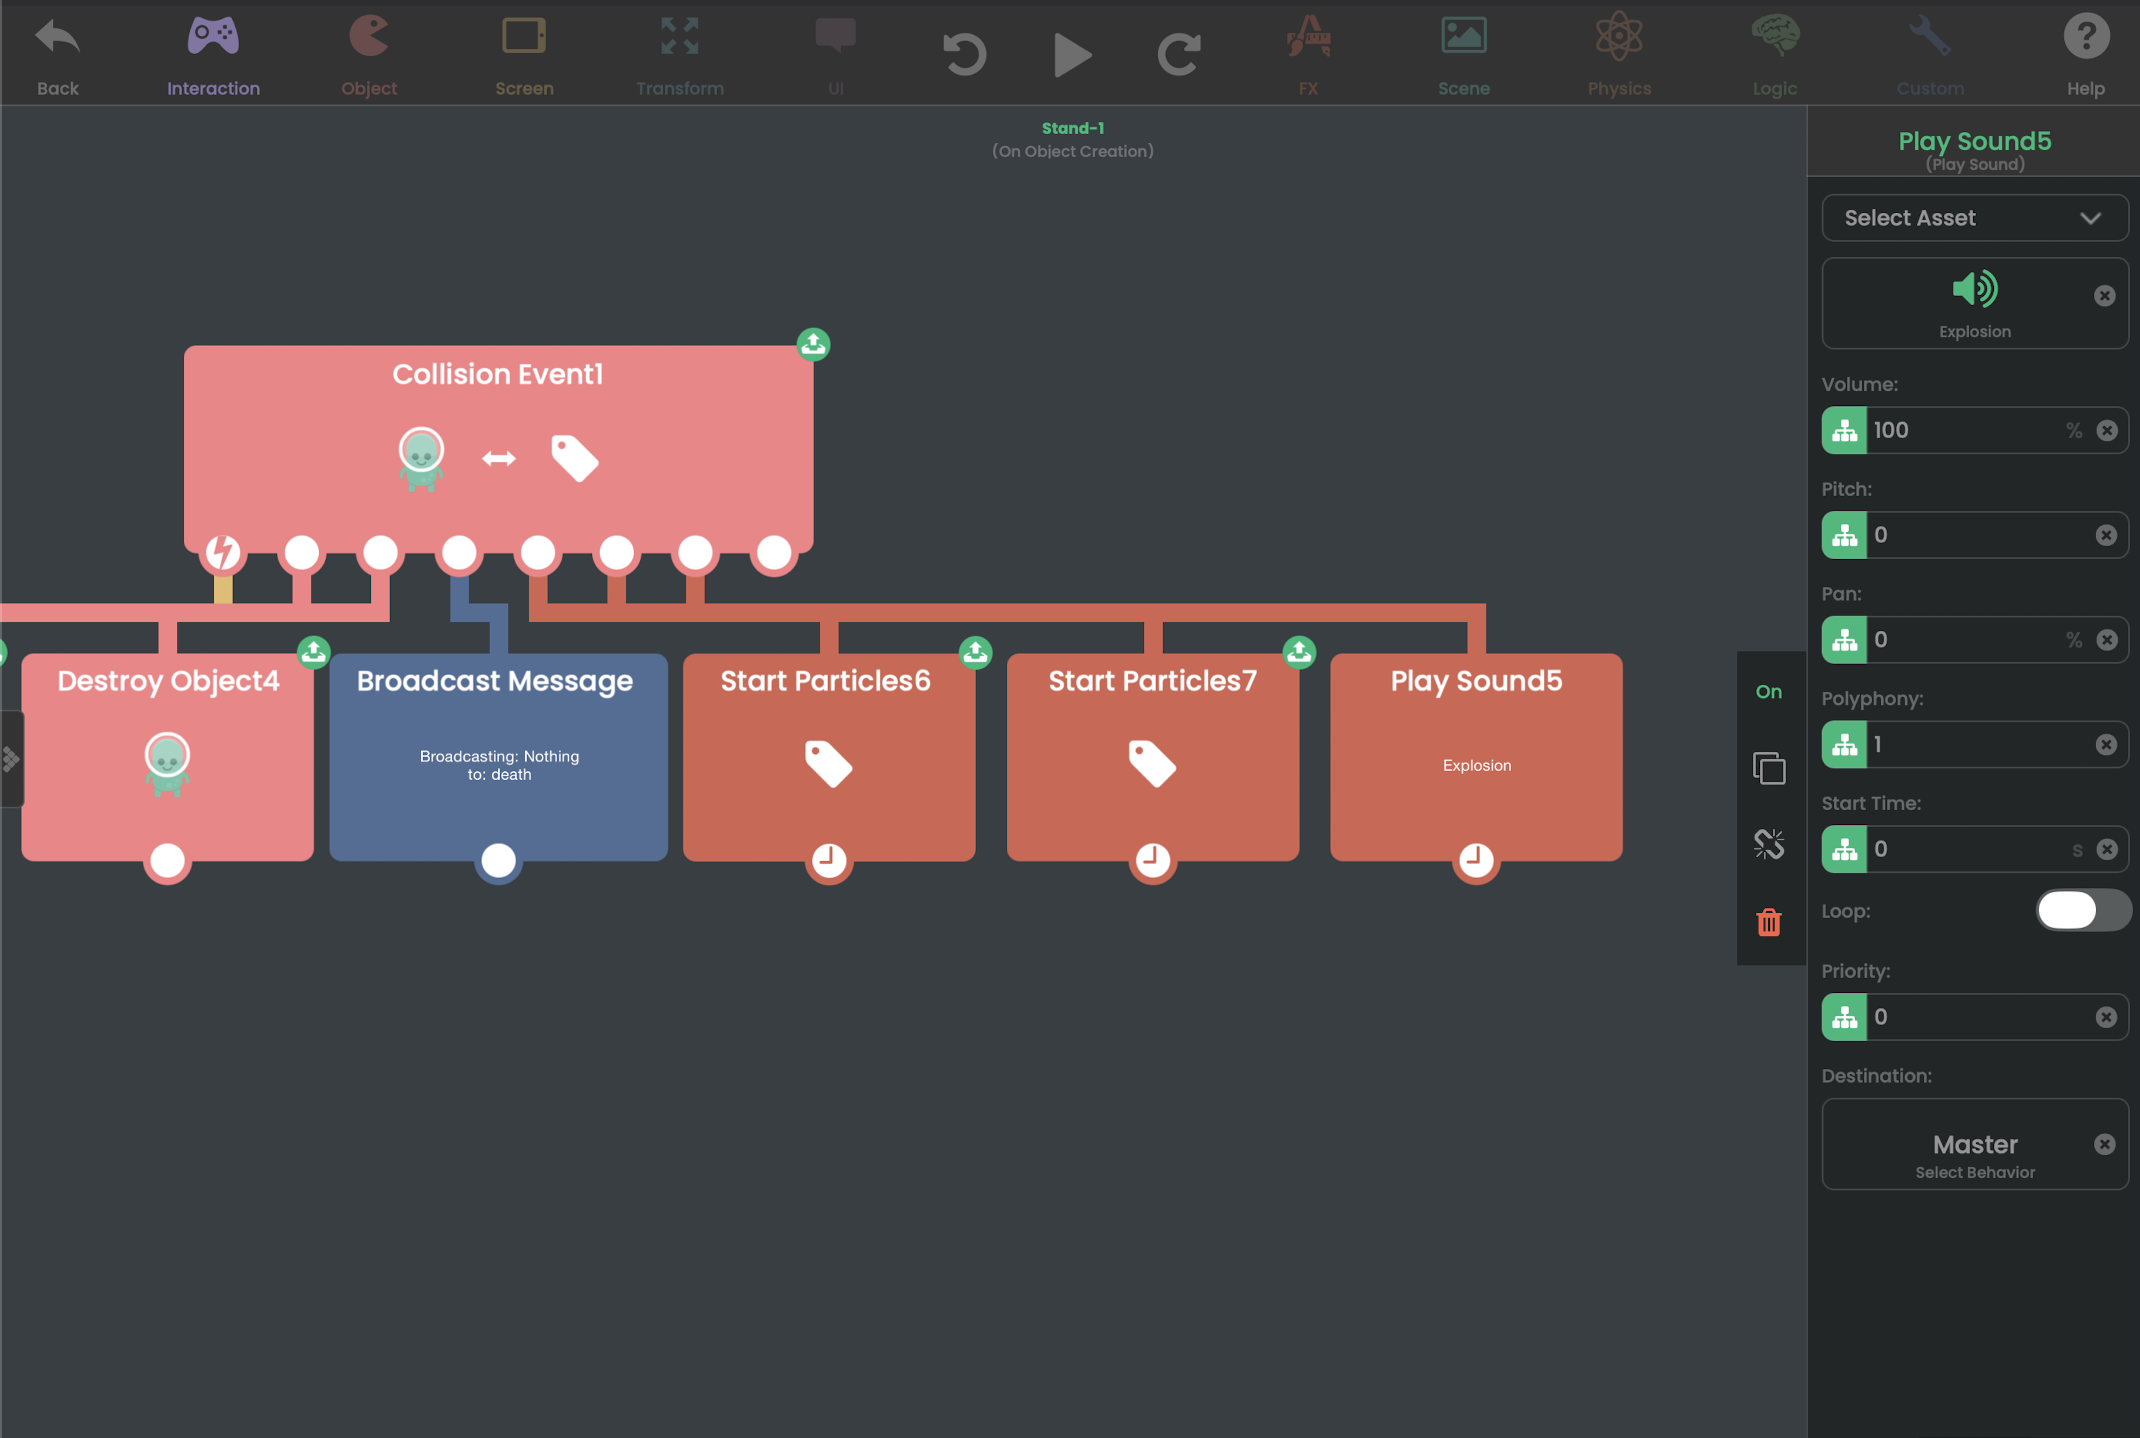
Play it for a while, then start taking things away. This kind of focused testing is part of prototyping and refining game feel.
Turn off the particles and play it again. Put them back, remove the sound, and see what changes. Lower the screen shake, then try the collision without it altogether. You'll get a much better sense of what each effect is actually contributing to the hit.
This is useful because the collision already works. Now you're deciding what it should communicate to the player.
A rapid-fire weapon, for example, could become exhausting if every bullet produces a strong screen shake. You might keep the sound and particles for normal hits, then reserve a stronger reaction for something important. A heavy attack could justify more movement. A critical hit could use a different effect. A basketball game might use almost no shake at all and rely on sound to make contact with the rim readable.
Stop adding effects once the collision reads clearly. You're looking for the response that fits the event.
Steal it for something that isn't combat
Once you understand what the effects are doing, the same idea becomes useful well beyond weapons and enemies.
Suppose you're making a platformer. Have the character land normally and play it a few times. Then experiment with a small dust particle when their feet touch the ground. Give a much harder landing a different sound or a slight screen shake.
Or use the idea for a breakable Object. The collision may already destroy the crate, but adding the right sound and particles can make the break much easier to read.
The same thinking works for scoring a basket, hitting a rhythm-game note, crashing a vehicle or collecting something rare. Start with the event that already exists in your game, then decide what feedback that event deserves.
hyperPad's own Tappy Plane project is a useful example because its crash isn't handled as a single visual change. The collision is used to trigger several responses, including screen shake and particles, while sound is suggested as another layer of feedback.
Go back to your original collision after you've experimented with these effects. Strip everything away and play the boring version once more.
You'll know which pieces you miss.
Ready to test the mechanic yourself? Try hyperPad Starter and build a playable version directly on iPad.
Related topics
- Behavior Interface Overview: Explains the Behavior Editor, Behavior categories, and the Event → Action relationship used in the article.
- Collision Event: Official reference for Collided/Collision Event, including Started Colliding, Object A/Object B, tags, collision position and impulse outputs.
- Play Sound: Official reference for playing short sound effects in response to gameplay events.
- Sound Effects Editor Overview: Explains how to create and customize sounds for hits, explosions, pickups and other events.
- Shake Screen: Official reference for adding screen movement to an impact or other important event.
- Start Particles: Official reference for triggering particle effects, choosing the particle asset, anchor position, rotation, layering and looping.
- Particle Editor Overview: Explains how custom particle effects are created and saved for use with Start Particles.
- How to Create a Player-attached Weapon: Shows how to create cannonballs that produce explosion particles upon collision.
- How to Make Tappy Plane: Demonstrates collision, screen shake, particles and sound as layers of crash feedback.
- hyperPad Documentation: Main official documentation index for the Behavior system and editor.