Particle Editor Overview
You can create custom particle effects to be used throughout your creation. You can then use the created particle with the Start Particles behavior. This article is an overview of the different features of the Particle Editor.

Template Bar
The top tool bar in the Particle Editor is the Template Bar. Each item in the bar is a single template. You can use these as a starting point for creating your own effects.
| Particle Preset | Preview | Description |
 |  | Particle effect that looks like fire. |
 |  | Particle effect that looks like a flaming comet. |
 |  | Particle effect that simulates water spouting from a fountain. |
 |  | An explosion particle effect. |
 |  | An effect that looks like a billowing smoke stack. |
 |  | Particle effect that can be used for falling snow. |
 |  | A shockwave effect. |
 |  | A cool spiraling portal particle effect. |
 |  | Particles that look like a forming galaxy. |
Emitter Settings
Tap the Settings tab to bring up Emitter Settings. Emitter Settings allow you to change some parameters for your entire effect. Simply adjust the sliders until you get the desired effect. Press and hold the slider nub for precise tuning.
Adjustable sliders to modify your entire emitter effect. Press and hold the slider nub for precision mode.
Mode Settings
The Mode tab let you change the physical properties for your particle effect. When in Gravity mode, control gravity and acceleration. When in Radial mode, you can change the speed and radius settings for your effect.

Gravity Mode

Graphic Settings
The Graphics tab lets you change the visual properties for your particle effect. You can change the graphic for each individual particle, the start color and the the end color. You can also change the effect from Normal, Additive, and Subtractive.

Creating Animated Particles
There are three animation modes. By default, all particles are in None animation mode. When in Once or Loop animation mode, tap on the particle icon to edit the frames of the animated particle - the icon will update in real-time to preview what the animation would look like.
⚠️ Warning: Note that the frames are not a copy of the original sprites and are only a reference. Deleting the original sprites in the asset library will remove them from the animated particles. Copying the animated particle to another project will not keep the frames, so you must import all the frames again.
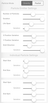
| Animation Mode | Description |
| None (default) | The default. The particles will not be animated and will use one single sprite. |
| Once | The particles will play an animation once through their entire lifetime. A shorter lifespan means the animation runs faster, and vice versa. |
| Loop | The particles will play an animation at a specified framerate which can be changed via a slider. The particles can play the animation multiple times in their entire lifetimes. |
Menu
The menu is where you can playback the effect, or export it.

| Action | Description |
| Play | The Play button starts the particle effect from the beginning. |
| Loop | Repeatedly plays the particle effect you are making. |
| Save | Saves your particle effect so you can use it in your creation with the Start Particles behavior. Once your effect is saved, you can also edit later, or use it in other creations you make. |
| Share | You can share the current particle effect. This will send a file that can be edited with hyperPad. |
My Particle Effects
Your saved particle effects show up under “ My Particle Effects ”. You can modify these at any time. Simply tap an effect from the list to load the effect.
