Part 5: Adding coins and points

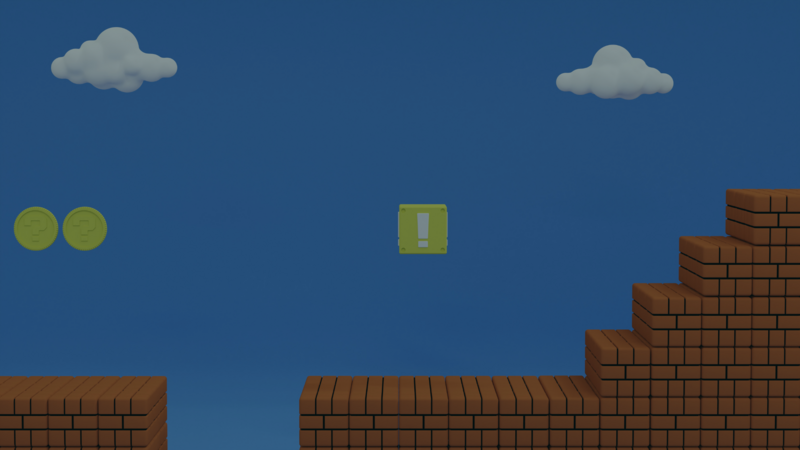
With Part 4 done, you should have a level and a playable character that can run and jump around.
Now your player needs a purpose. In this part of the tutorial, you'll add collectible coins and a score to keep track of them.
Coins hidden in blocks are one of Mario's best-known features. Let's start by building that.
Hiding Coins in Bricks
Hitting the Brick
You'll set up your first brick so you can quickly change how many coins it holds. Once the brick is done, you can duplicate it and place it anywhere you want.
This tutorial builds on Part 4 and assumes you've branched the Part 4 project from the Hub.
Start by selecting one of the bricks that will hold coins. In the Object properties, tap the "Behaviors" button to open the Behavior Editor.
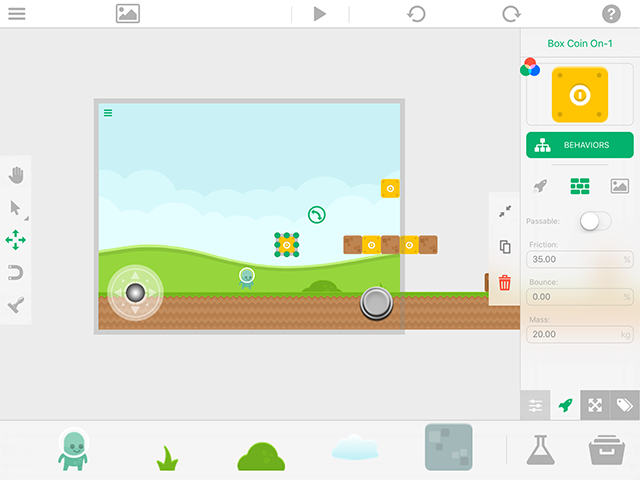
From the Object category, add the Collided Behavior. The Collided Behavior triggers an event every time 2 specified Objects touch each other.
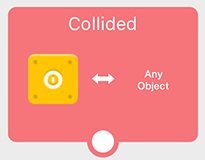
Tap the Collided Behavior you added to view its properties. It has 2 boxes for selectable Objects (called Object A and Object B). The first one (Object A) is selected for you, and it's the Object you're applying the Behaviors to. You can tap to change it, but leave it as is for now.
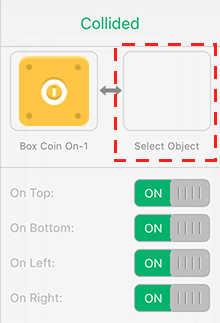
The empty box is for your second Object (Object B), which the Collided Behavior checks against. Tap the empty box and select the player character you added in Part 4 of the guide.
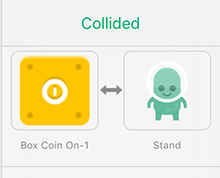
With your Objects selected, you can now choose which part of Object B triggers the Collided event. Turn off all the toggles except On Top. Now the Collided Behavior only fires when the top of the player character touches the brick.
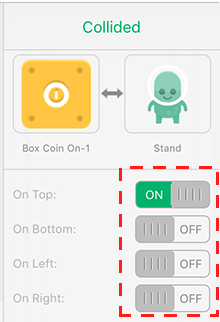
Now that the brick checks whether the player's head touches it, let's make it bounce up and down. You'll use Move By Behaviors to move it up, then back down.
From the Transform category, add the Move By Behavior and connect it to the Collided Behavior you added before.
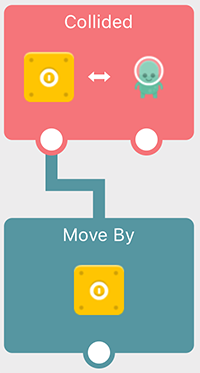
Tap the Move By Behavior to view its properties. You want the brick to move up when the player hits it, so change the Y Value. Set it to a small number for a small bounce. I used 0.20 meters.
You'll also need to change the Duration. The duration is how long the move takes to finish. It defaults to 1, which means the brick moves 0.2 meters over 1 second. That's far too slow here. Change the duration to 0.10 seconds.
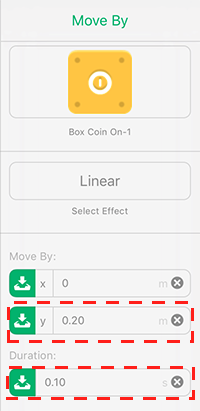
Note: A duration of zero makes your Object jump instantly to the new position with no smooth animation. Also notice the box with the text "Linear." That's the motion tween applied to your move. If your Behavior has a duration, the Object moves based on this effect.
To make the brick bounce back, add another Move By Behavior and connect it to the previous one.
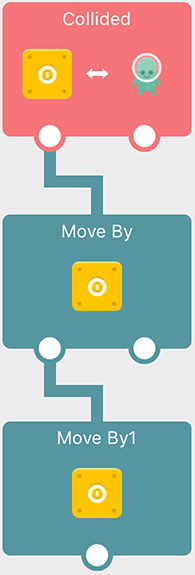
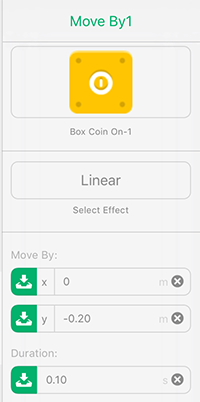
Change its properties again. This time the brick should move back down, so set the Y Value to a negative number. To return the brick to its original position, move it by -0.20 meters. Change the duration to 0.10 seconds as well.
If you press play now, your player can hit the brick from below and the brick bounces up and down. There are still a few issues to fix:
-
There's a small bug in the logic. If the player keeps jumping very fast without letting the brick return to its original position, it keeps moving up.
-
The brick bounces forever. What if you want it to hold only a few coins and stop when it's empty?
-
It doesn't give any coins yet.
Start with issue 1. It's a simple fix. Turn off the Collided Behavior as soon as the player hits the brick, then turn it back on when the brick is done moving.
To do this, switch to the Custom category, add Behavior Off, and connect it to the Collided Behavior.
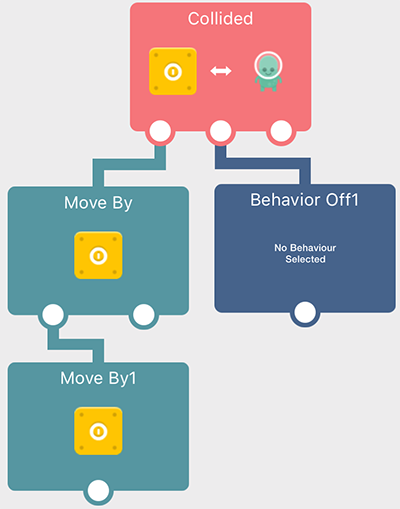
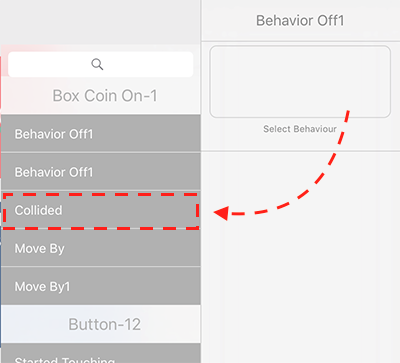
Next, in the Behavior Off properties, tap the empty box labeled Select Behavior. Find the correct Collided Behavior in the list. The list shows every Behavior from every Object, sorted by Object name.
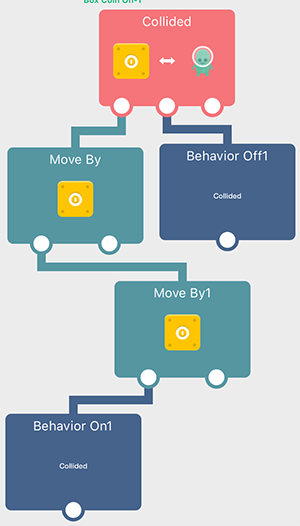
Now turn the Collided Behavior back on when the bounce is done. Add a Behavior On from the Custom category and connect it to the second Move By Behavior. In its properties, make sure you select the Collided Behavior to turn it back on.
For issue 2, you'll use a box container to set how many coins each brick holds. That way you can give specific bricks more or fewer coins.
First, add a box container from the Custom category. You can place it anywhere on the screen, since it doesn't connect to anything else. Rename it "Coins" so it's easier to find later (check Part 4 if you need a reminder on renaming Behaviors).
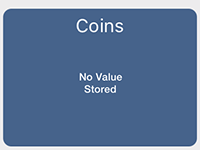
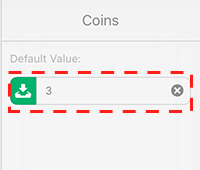
In the properties of the Coins box container, set Default Value to 3. That's how many coins the brick holds.
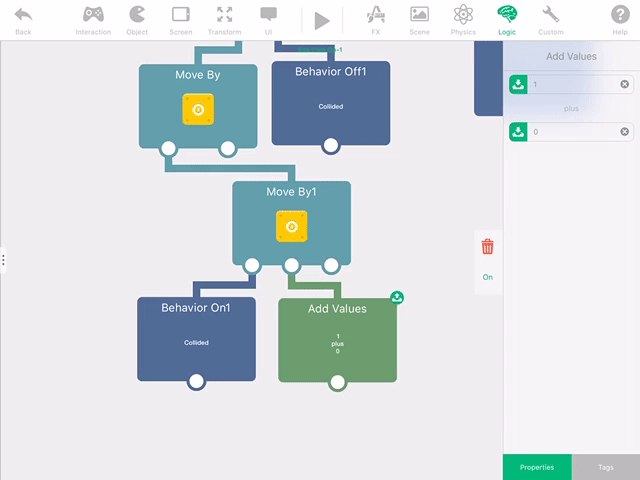
Now, from the Logic category, add an Add Values Behavior and connect it to the second Move By you added earlier. You'll use Add Values to count each time the player hits the brick.
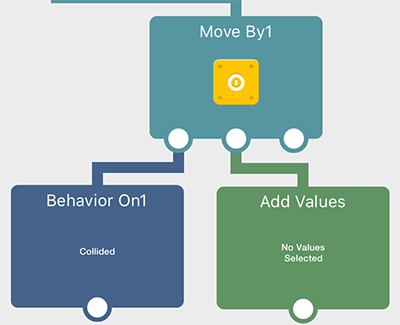
Once Add Values is connected, tap it to view its properties. It has 2 input fields and outputs the sum of the values you enter.
Since you're using it to count each hit, enter 1 in the top field. For the bottom field, output the sum of the Add Values Behavior back into the second input field.
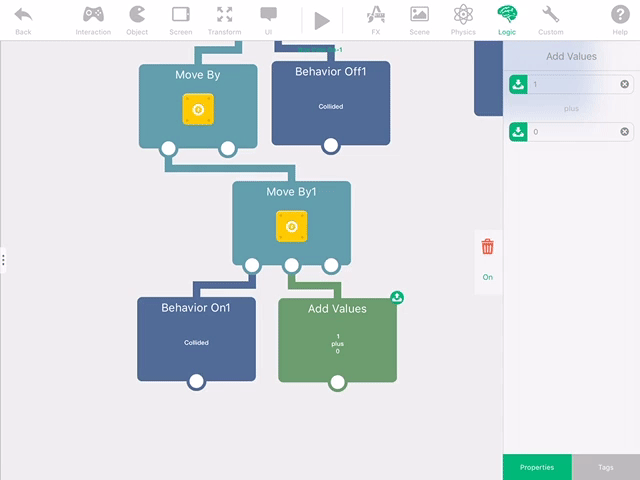
This increases the sum each time the Behavior runs. The first time, it's 1+0, since there's no sum yet. The second time, it's 1+1, because the sum from the previous run is stored.
Next, check whether the sum from Add Values matches the Coins box container you added.
To do this, add an IF Behavior from the Logic category and connect it to Add Values.
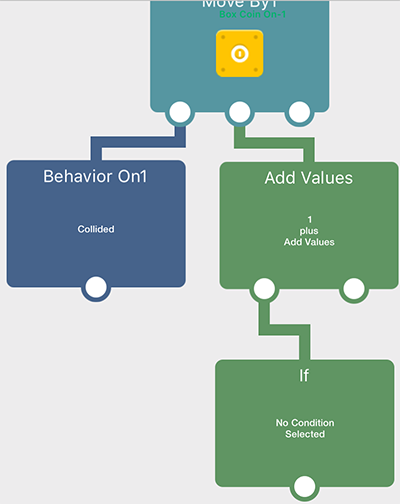
With the IF connected, tap it to view its properties. The IF Behavior checks whether a condition is met, based on its 2 input fields and the selected condition.
Output (share) the sum from the Add Values Behavior into the first field of the IF.
Then output the contents of the box container into the second field.
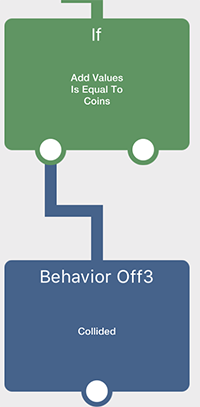
With these values entered, the next connected Behavior only runs IF the sum from Add Values equals the value stored in the Coins box container.
Now turn the Collided Behavior off and change the Graphic, so the player can't get any more coins. Add a new Behavior Off from the Custom category and connect it to the IF. As before, select the Collided Behavior as the one to turn off.
To show the player the brick is empty, add the Change Graphic Behavior from the Transform category and connect it to the IF.
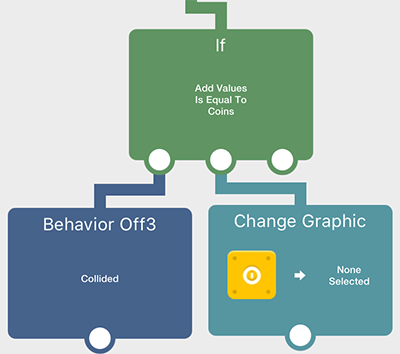
Once it's connected, pick a new Graphic in the Change Graphic properties. Tap the second box and select the new Graphic.
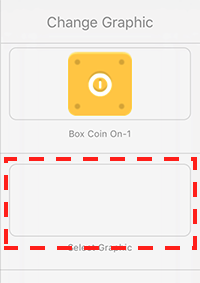
Now press play. You can jump up and hit the brick 3 times before it stops.
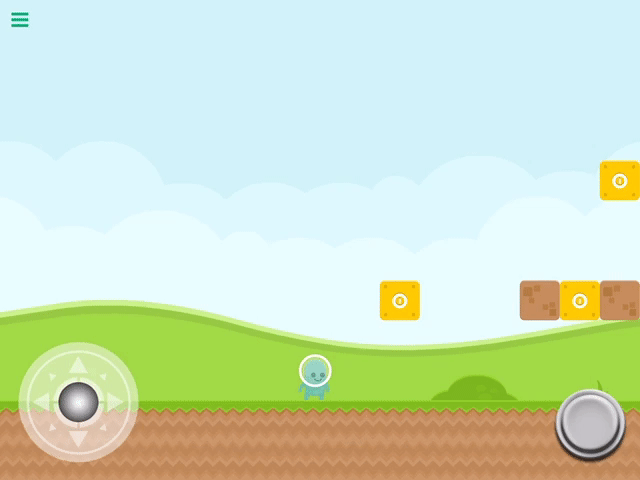
Getting Points
Setting up the UI
What's left is getting points and collecting coins when you hit the brick!
First, add a counter in the corner of the screen that tells the player how many points they have.
Go back to the main editor by pressing back in the Behavior Editor. Then open the Layers bar by tapping the 3 dots on the right side of the screen (you can also swipe in from the edge of the screen).
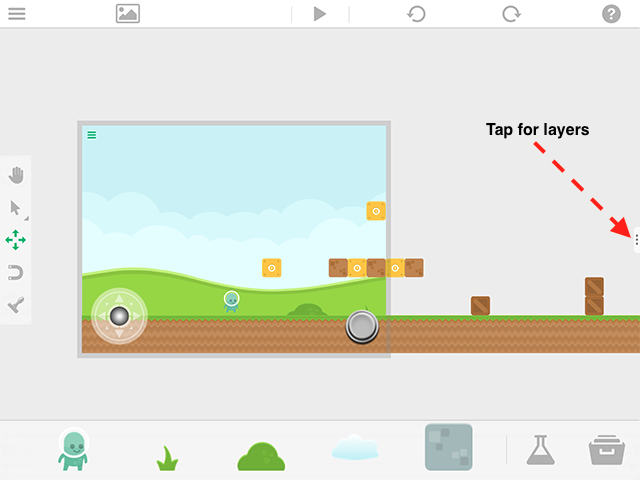
Select the Global UI layer. UI layers sit on top of the other layers in the Scene and usually hold buttons, joysticks and labels. They stay fixed in the same spot on the screen while the rest of your Scene moves around them.
Note: Objects on the Global UI layer exist in every Scene in your project. If you want something in only one Scene, use the Scene UI layer.
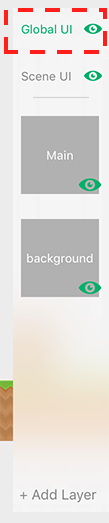
With the Global UI layer selected, tap the Special Objects beaker icon on the dock, or drag it into the Scene.

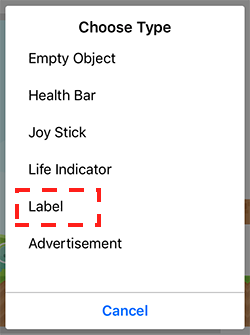
In the popup, select Label, and a label appears in your Scene.
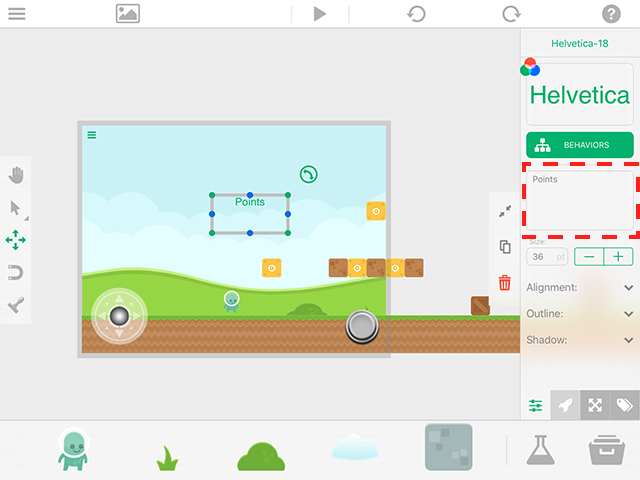
Tap the new label to open its Object properties. Here you can change the text color, font, the text itself and more.
Tap the large text box and change the text to "Points:".
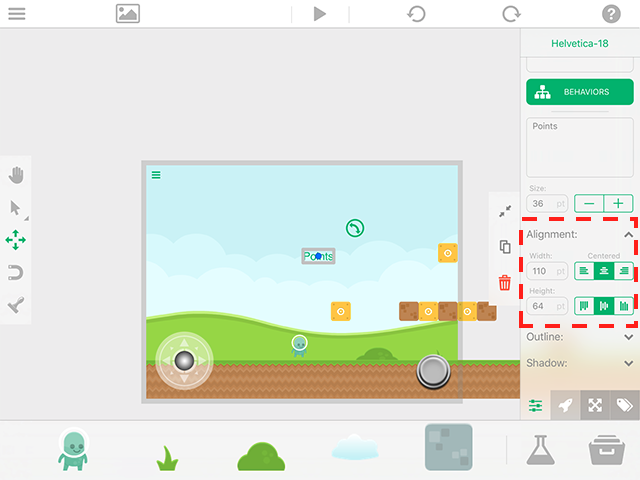
Next, tap "Alignment" to expand the alignment properties. Set Width to 110 and Height to 64.
Note: Setting these to 0 removes the text area, so your text can grow horizontally without limit.
With the label set up, use the Move/Transform tool to move it to a corner of the screen where it won't block the player's view.
Once your label is in place, add another label to the Scene. This one displays your points. Set its text to 0, since your player starts with zero points. This time, give it a specific width and height: set Width to 500pt and Height to 64pt. That defines the area where the text can appear. Text that doesn't fit in this area gets cut off.
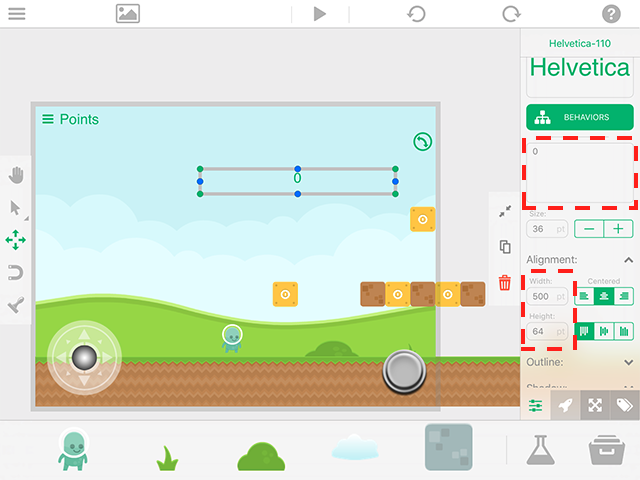
Also set the horizontal alignment to left aligned (Flush Left).
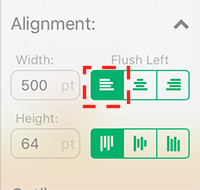
When you're done with the label properties, position it next to the "Points" title.
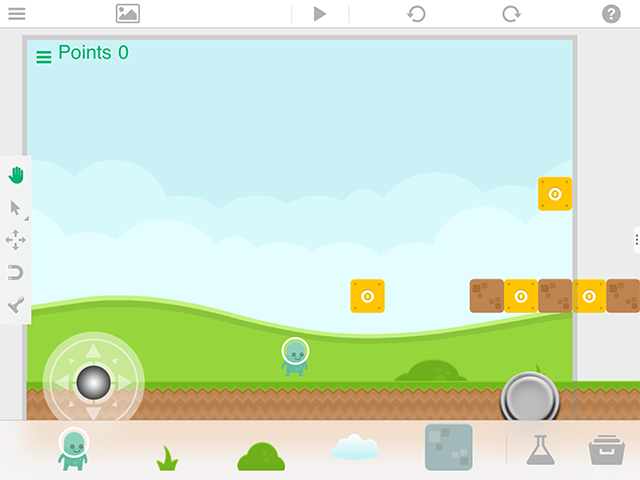
Getting Points
Now make your points go up each time you get a coin. Switch back to your main layer and open the Behaviors for the brick with the coins.
From the UI category, drag in the Add To Score Behavior and connect it to the second Move By Behavior you added earlier in this guide.
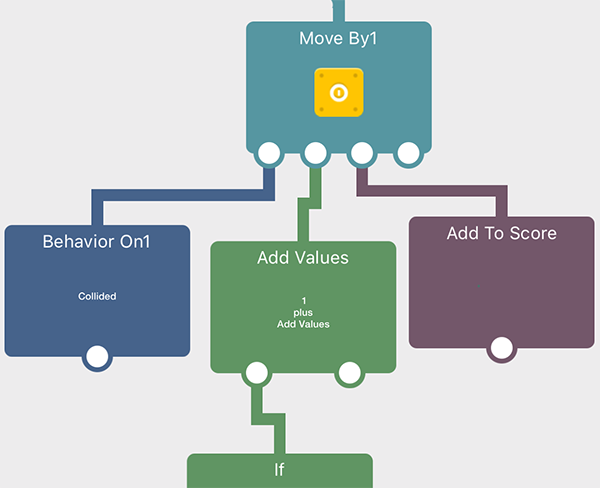
Next, tap the Add To Score Behavior and turn on the Infinite Score toggle. With this toggle off, the next Behavior would trigger when the specified score is reached. Also make sure the "0" label is selected as the Object, because Add To Score automatically picks a random label in your Scene.
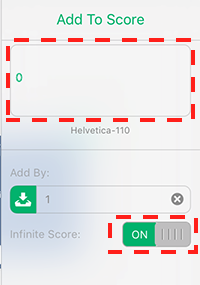
Press play now, and you earn 1 point each time the player hits the brick.
Now you can duplicate this brick (as you learned in Part 3) and place copies throughout your level.
Individual Coins
Your first coin
Sometimes you'll want coins scattered through your level without hiding them in bricks. That's simple to set up, and here's how.
Start by adding your coin Graphic to your Scene, then tap it to view its Object properties.
At the bottom of the Object properties, make sure the physics tab is selected.
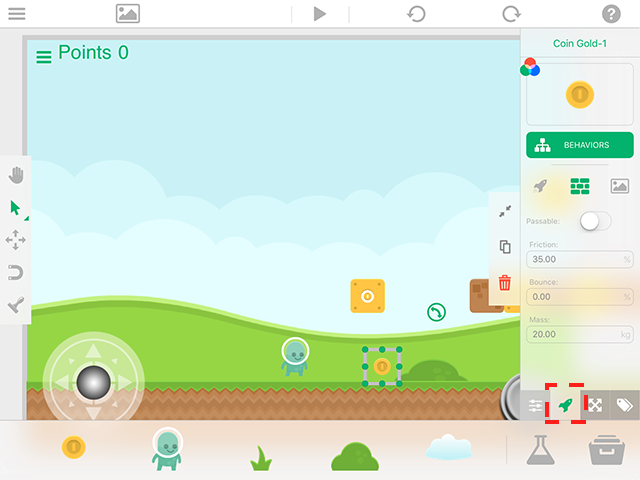
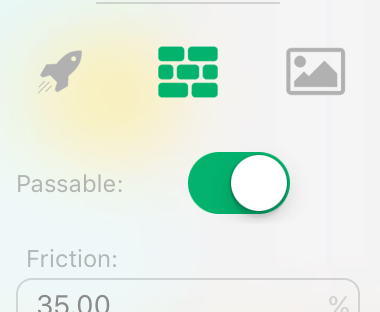
In the physics tab, make the coin passable. That way your player runs through it without being stopped or slowed down.
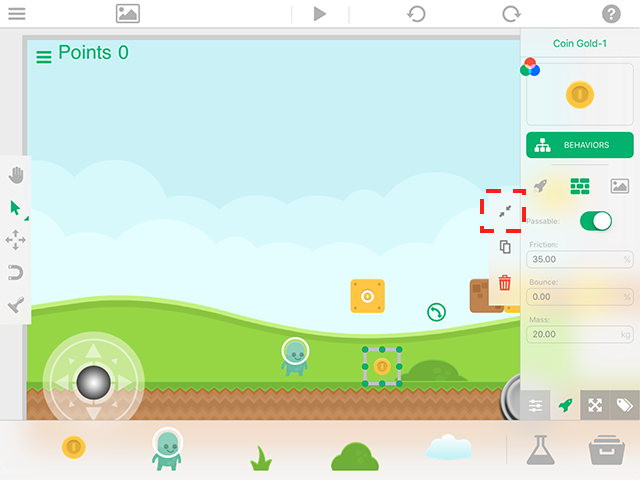
Next, adjust the coin's collision boundaries. Collision boundaries define the physical shape of an Object, and they can differ in size or shape from how the Object looks. To adjust them, tap the Collisions icon.
In the Collision Editor, use the tool palette on the left to edit and create custom collision shapes.
For this guide, select Circle to create a circular collision boundary.
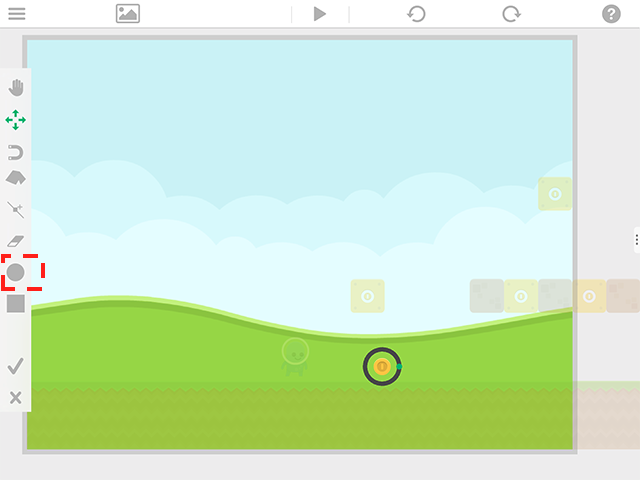
Next, drag the green dot on the circle to resize the collision boundary. Make it the same size as the coin. If the collision boundary is larger than your Object, your player can touch it before reaching the coin Graphic in the middle.

When you're done with the collision boundary, tap the check mark icon in the tool palette to accept and save the new shape.
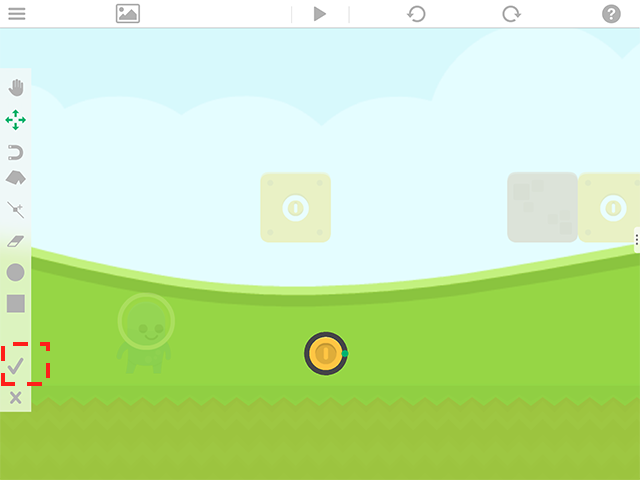
Tap the coin again to view its Object properties. This time, open the Behavior Editor for the coin.
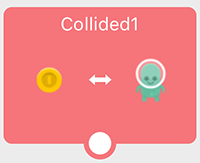
From the Object category, add the Collided Behavior. Just like before, open its properties and select the Green Spaceman player for Object B.
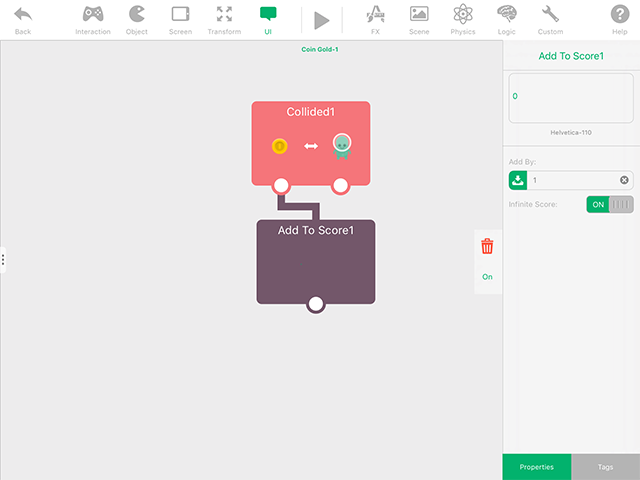
Next, from the UI category, drag in the Add To Score Behavior and connect it to Collided. Again, turn on Infinite Score in its properties and make sure the correct score label is selected.
Finally, from the Object category, add the Destroy Object Behavior and connect it to Collided. It removes the coin as soon as the player runs into it.
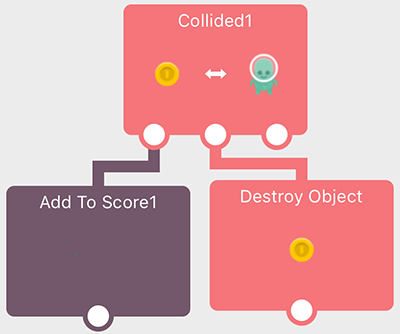
Press play, run into the coin, and it disappears.
That's it! Your platform game has collectible coins. Now duplicate your coins and place them throughout your level. Get creative with where you put them.

You can branch the finished version of Part 5 from the Hub and see it all in action.

In Part 6, you'll add some challenge to the game with enemies.
Saving, Loading, and High Scores
Often you'll want your game to remember details from the last time it was played.
What you save depends on the game or app you're making. Whether it's a score, a position or overall progress, plan what you want to save and how.
In this tutorial, you'll save a player's score and build a simple high score (or "Best Previous" score) system.
This tutorial assumes you've made a simple game where the player picks up coins (Part 5 of Creating a Platform Game), and a label on the screen shows the number of coins.
Saving
When it comes to saving, ask yourself two questions. What do you want to save, and when should you save it? In hyperPad, the Save Behavior can only save one value at a time, so think carefully about what you're saving.
In this tutorial, you'll save the score (the number of coins collected) shown in a label on the screen.
Now that you know you're saving the score from the label, figure out when to save.
There are many options, and they depend on your gameplay and design. You could save every time the player picks up a coin, when the player loses, when the player beats the level, when the player presses a button, or whenever else makes sense for your game.
In this tutorial, you'll set up a button that saves the score when the player presses it. You can use the same Behavior logic to save when the player loses or finishes the level. Just trigger these Behaviors on the win or lose event instead.
Select your Save Button Object and open its Behaviors.
From the Interaction category of the Behavior Editor, add a "Stopped Touching" Behavior.
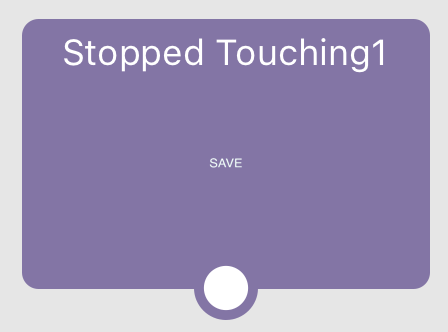
Now, from the UI category, add a "Get Label" Behavior and connect it to "Stopped Touching."
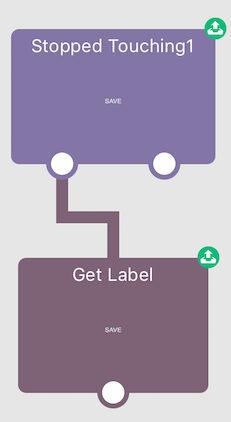
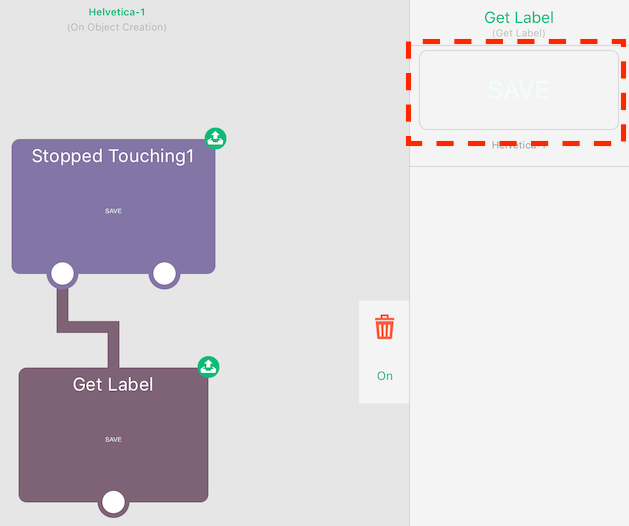
Tap "Get Label" to view its properties. Tap the area that shows the current Object, then select the label in your Scene that shows your score.
Next, from the Custom category, add a "Save to File" Behavior and connect it to "Stopped Touching."
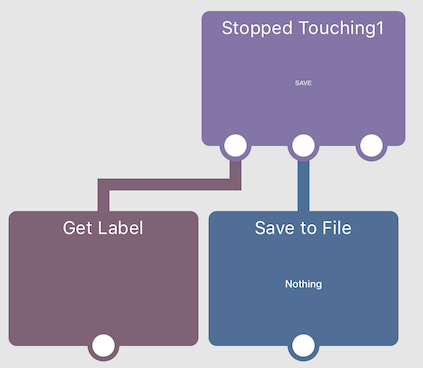
Select the "Save to File" Behavior you just added to view its properties. Notice that "Key Type" is set to Existing. Existing keys are predefined things you want to save.
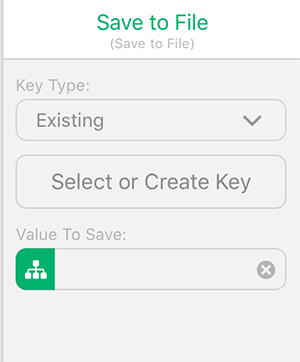
First, add a title or description for what you want to save. This is called a "Key." Tap the "Select or Create Key" button to open the list of keys.
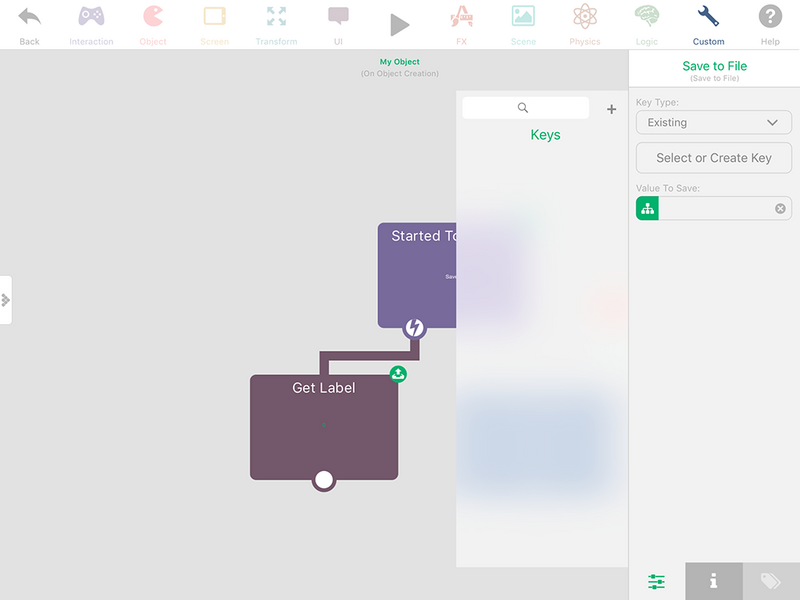
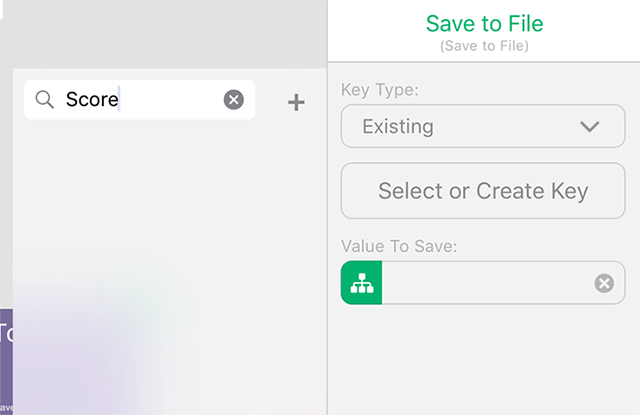
Enter a descriptive title at the top, then press the + button to add your first key. Since you're saving the score, enter "Score" as the key.
Now save the score from the label. Drag the output value from the corner of "Get Label" into the input field of the "Save to File" properties.
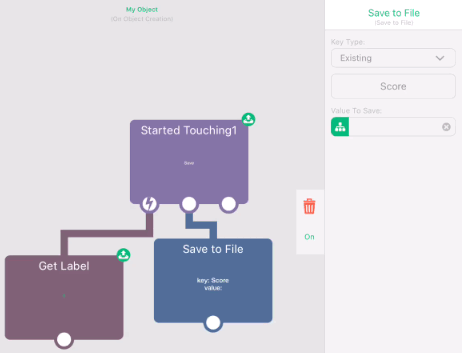
That's it! Your game now saves your score when you press the save button. You aren't doing anything with the saved value yet, though. Next, load the score and use it in your Scene.
Loading
With your score saved, you need to load it and use it in your Scene. For loading, there's one important question. When do you want to load?
As with saving, the answer depends on your project. You can load as soon as your Scene starts, when the player presses a button, or whenever some other event triggers. It depends on what you're trying to do.
In this tutorial, you'll load when the Scene starts and show the previously saved score.
To start, add a label to your Scene. This label shows your saved score.
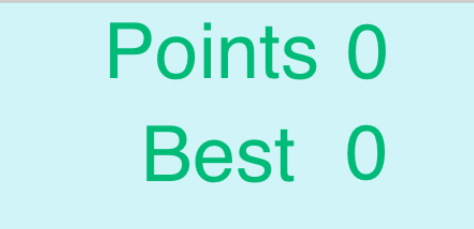
Next, add the load logic. Here, you'll add it to the Save Button from the previous steps, though your game might need it somewhere else. Select the save button and open the Behavior Editor from its Object properties.
From the Custom category, add the "Load from File" Behavior and don't connect it to anything. Because it isn't connected to another Behavior, it runs as soon as the Scene starts (when the button exists in the Scene). To load on a certain event or other trigger, you'd connect it to other Behaviors.
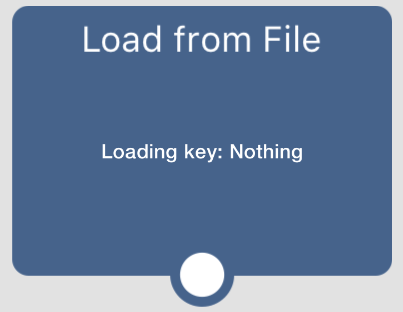
Now select "Load from File" to view its properties. Again, make sure "Existing" is selected for the key type.
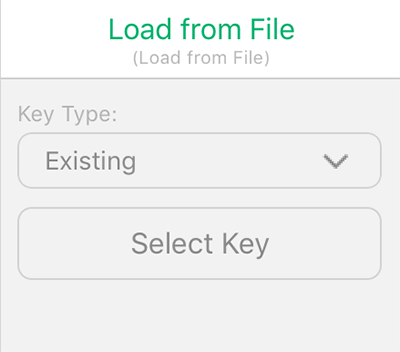
Next, tap the "Select Key" button to open the list of saved keys, and choose the "Score" key you added earlier.
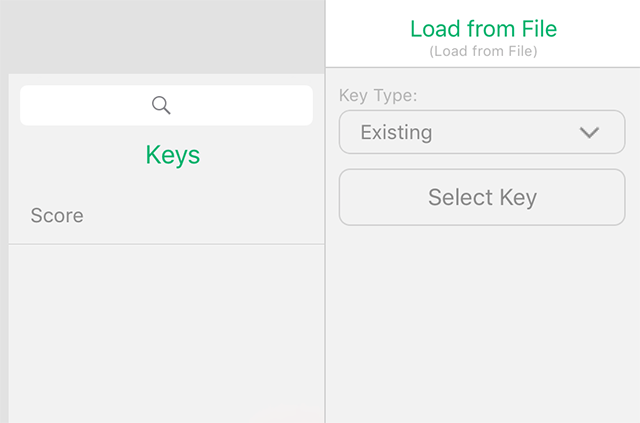
At this point, you've technically loaded the score, but you're not using it yet. Let's put the loaded value to work.
From the UI category, add a "Set Label" Behavior and connect it to the Load Behavior you added.
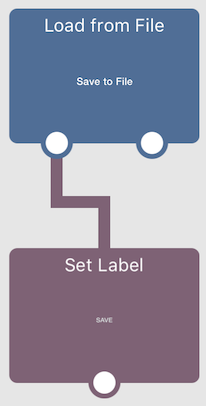
Select "Set Label" to view its properties, and choose the new label you added for the loaded score. Then drag the output value from the corner of "Load from File" into the input field of Set Label.
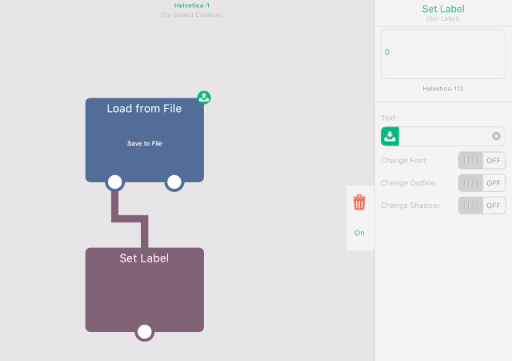
That's all you have to do! Your progress saves, and it loads into a label the next time you play.
High Score
You may have noticed that your score saves every time you press the button, overwriting your previous score. Sometimes that's fine. Usually, though, you only want to save when the player beats their previous score.
To build this "High Score" system, you only need to change the saving logic slightly.
Go back to where the saving Behaviors are (the save button).
First, disconnect the "Save to File" Behavior from Stopped Touching. Tap the line connecting the two Behaviors to disconnect them.
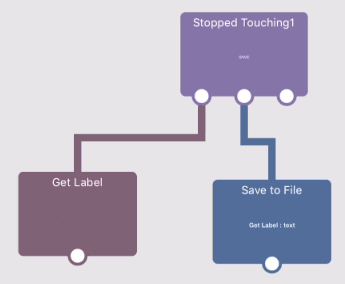
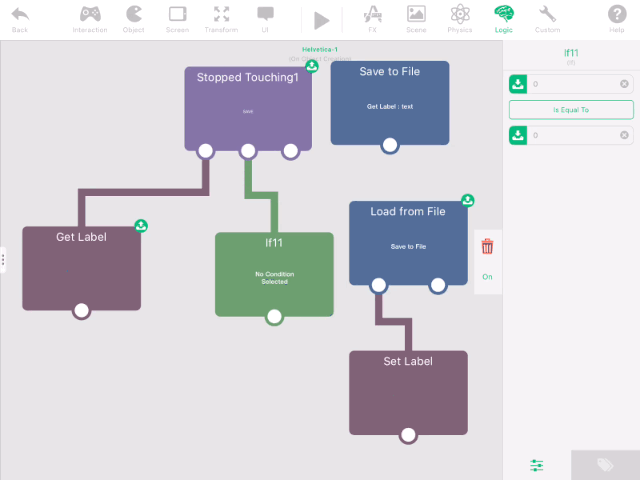
Next, from the Logic category, add an IF Behavior. IF checks that a condition is met before continuing. Here, you only want to save IF the score is greater than the previous (loaded) score.
Connect the IF Behavior to "Stopped Touching."
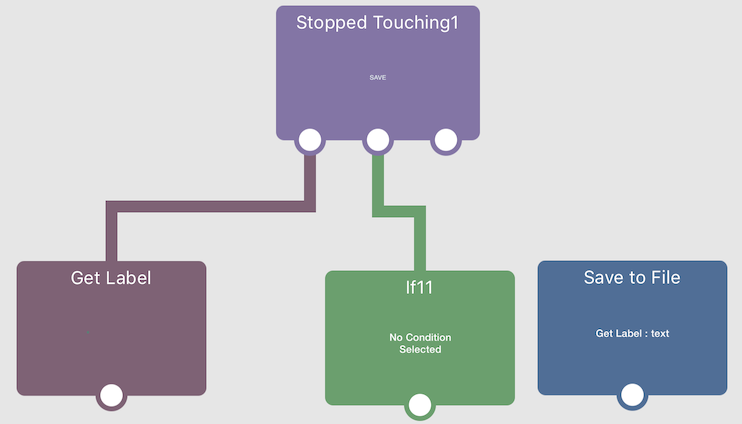
Tap the IF Behavior to open its properties and set up the condition.
Drag the output value from "Get Label" into the first input field of the IF Behavior.
Then drag the output value from "Load from File" into the second input field.
Now change the condition. Tap the "Is Equal To" button and select the Greater Than or Equal To (≥) option.
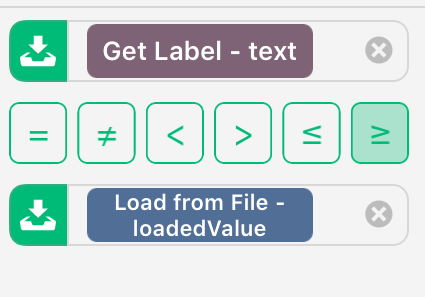
Finally, connect your old save Behavior to the IF. Now the IF only runs the connected save IF the value from the label is greater than (or equal to) the loaded value.
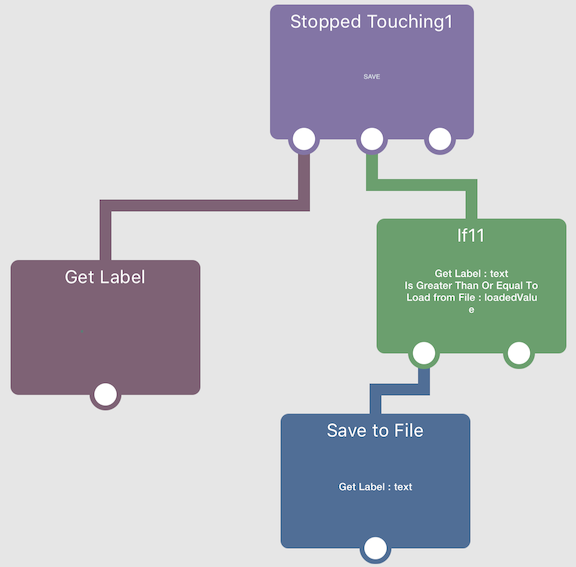
That's all you need to do. You now have a working save and load system that saves the player's score only when they beat their previous attempt.
Other Saving
This tutorial covered saving a score. Sometimes you'll want to save other things, like a player's position or the current level.
The same ideas apply. You just change when you save and what you save.
Take saving a player's position. An Object's position is 2 numbers: X and Y. So you'd use 2 save Behaviors, one for the X position and one for the Y position. To load, you'd use 2 load Behaviors. Then, instead of setting a label, you'd move the player Object to the loaded X and Y positions.
Plan what you're saving and when you need to save it, and you can build a system that works for almost any situation.
Continue with an in-game asset test
Use the free 2D game assets guide to compare sources and licences. Then follow Importing Assets and test the file inside a running Scene. Keep each asset’s license with your Project notes, then use the hyperPad Asset Library to organize imported Graphics, animations, audio, and fonts.
Test each asset inside the running Scene, not only on its own. Keep it when it makes the action clearer, strengthens feedback, or supports the atmosphere.